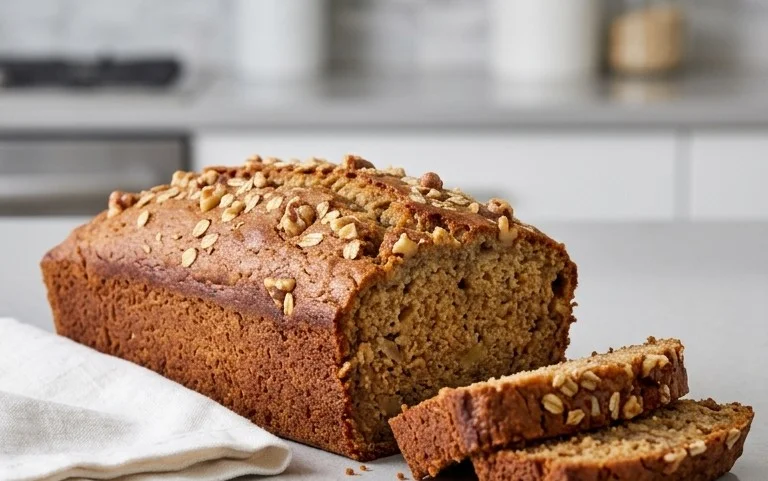
Spicy Beef Jalapeno Pinwheels-Flavorful Appetizer
Jalapeño Pinwheels are more than just a snack; they’re a vibrant burst of flavor and a guaranteed crowd-pleaser. If you’ve ever found yourself reaching for that irresistible spicy-savory combination, you’re in good company. These delightful spirals capture the essence of simple comfort with an exciting kick, making them a go-to for parties, game nights, or simply when you crave something truly satisfying. What is it about these delicious rolls that makes them so universally loved? It’s the perfect marriage of creamy, tangy fillings enveloped in flaky, golden pastry, all punctuated by the signature warmth of jalapeños. They offer a delightful texture contrast – the crisp exterior giving way to a soft, flavorful interior – and that satisfying hint of heat that wakes up your taste buds without overwhelming them.
Why You’ll Adore This Recipe:
This recipe for Jalapeño Pinwheels is designed to be incredibly approachable, even for begin extractner bakers. We’ll guide you through creating a lusciously creamy cheese filling, expertly blending it with finely chopped jalapeños and a touch of seasoning. The magic truly happens when that seasoned dough is rolled, sliced, and baked to perfection, creating those iconic pinwheel shapes that are as beautiful to look at as they are to eat. Each bite is a testament to how simple ingredients can transform into something extraordinary.

Ingredients:
- 8 oz Cream Cheese (softened)
- 1/3 cup Sour Cream
- 1 1/2 cups Sharp Cheddar Cheese (shredded)
- 6 slices Beef Beef Bacon (cooked crispy and crum extractbled)
- 1/4 cup Jalapeño (finely chopped, seeds removed)
- 2 Scallions (green part only, thinly sliced)
- 5 Burrito-Sized Flour Tortillas (8-inch)
- Ranch Dressing (optional, for dipping)
Preparing the Filling
The heart of these delicious Jalapeño Pinwheels lies in its flavorful and creamy filling. To begin extract, ensure your cream cheese has come to room temperature. This is crucial for achieving a smooth and lump-free mixture. In a medium mixing bowl, combine the softened cream cheese with the sour cream. Using a spatula or a wooden spoon, vigorously mix them together until they are completely incorporated and form a smooth, cohesive base. Don’t rush this step; a well-combined cream cheese and sour cream mixture will make all the difference in the final texture of your pinwheels.
Next, it’s time to add the star players to this creamy ensemble. Gradually incorporate the shredded sharp cheddar cheese into the cream cheese and sour cream mixture. Stir until everything is well distributed. Now, let’s bring in that irresistible smoky flavor and delightful crunch. Arum extractthe crumbled crispy beef baconbacon to the bowl. If you haven’t already, take a moment to appreciate the aroma; it’s truly mouthwatering.
For that signature kick and vibrant color, gently fold in the finely chopped jalapeño. Remember, we’ve removed the seeds to control the heat, but you can adjust this based on your spice preference. If you like it spicier, feel free to leave some of the seeds in, or even add a touch more jalapeño. Finally, sprinkle in the thinly sliced green parts of the scallions. These will add a fresh, oniony bite and a beautiful visual appeal to the filling. Give everything one last thorough stir, ensuring all the ingredients are evenly distributed throughout the creamy mixture. Taste a small spoonful of the filling at this point. This is your opportunity to adjust seasoning if needed. Perhaps a pinch of salt or a grind of black pepper, tbeef bacon the bacon and cheddar usually provide ample savory notes.
Assembling the Jalapeño Pinwheels
With your flavorful filling ready, it’s time to move on to assembling the pinwheels. Lay one of the burrito-sized flour tortillas flat on a clean, dry surface. It’s important to use a surface that won’t stick. You don’t need to grease the surface; the filling is moist enough to adhere well to the tortilla. Now, take a generous amount of the cream cheese mixture – about a quarter of it – and spread it evenly across the surface of the tortilla, leaving a small border around the edges. This border will help prevent the filling from oozing out too much when you roll it up. Aim for an even layer so that each bite of your pinwheel has a good balance of tortilla and filling.
Once the first tortilla is coated, take another tortilla and lay it directly on top of the filling. Gently press down to help the tortillas adhere to each other and to the filling. You want to create a layered effect. Repeat this process: spread another quarter of the filling over the second tortilla, then place a third tortilla on top. Continue this layering until you have used all five tortillas and distributed the filling evenly among them. The goal is to have a stack of tortillas with filling spread between each layer. This creates a substantial, multi-layered structure that will yield many delicious pinwheels. Ensure the filling is spread as close to the edges as possible without overflowing, to maximize the flavor in every slice.
Rolling and Chilling
Now comes the fun part where we transform this flat stack into perfect pinwheels. Starting from one edge, carefully and tightly roll up the entire stack of tortillas and fillgin extract. Imagine you are rolling a jelly roll or a Swiss roll. The tighter you roll, the neater and more compact your pinwheels will be. As you roll, gently press to maintain an even consistency and to prevent any air pockets from forming. If any filling does manage to escape along the edges, you can carefully tuck it back in as you roll.
Once you have a tightly rolled log, wrap it tightly in plastic wrap. This is a crucial step for several reasons. The plastic wrap will help the log maintain its shape, making it much easier to slice. It also helps to keep the pinwheels from drying out and ensures that the layers meld together beautifully. Place the wrapped log in the refrigerator for at least 2 hours, or preferably for 3-4 hours. This chilling period is essential. It allows the cream cheese filling to firm up considerably, making it firm enough to slice cleanly without the filling smearing or the tortilla tearing. A well-chilled log is the secret to perfectly formed pinwheels.
Slicing and Serving
After the chilling period, your log should be firm and ready for slicing. Unwrap the tortilla log from the plastic wrap. Place it on a cutting board. Using a sharp knife, carefully slice the log into 1/2-inch to 3/4-inch thick pinwheels. For the cleanest cuts, try to saw gently rather than pressing straight down, which can sometimes crush the layers. If your knife starts to stick, wipe it clean with a damp cloth. You should aim for consistently sized pinwheels so that everyone gets an equal amount of deliciousness. If the ends of the log are a bit messier, you can trim them off and enjoy them as a cook’s treat!
Arrange the Jalapeño Pinwheels on a serving platter. They look incredibly appealing when fanned out, showcasing the beautiful spiral pattern of the filling and tortilla layers. You can serve them immediately as they are, or if you’re looking for an extra touch of indulgence and a delightful dipping option, offer some ranch dressing on the side. The cool, creamy ranch dressing provides a perfect counterpoint to the savory, slightly spicy flavors of the pinwheels. These Jalapeño Pinwheels are perfect for parties, potlucks, game days, or just as a delicious snack any time you crave something a little special. Enjoy the delightful crunch, creamy texture, and zesty flavor!

Conclusion:
And there you have it – your guide to creating delicious Jalapeño Pinwheels! We’ve walked through each step, from preparing the creamy filling to achieving that perfect golden bake. These delightful pinwheels are incredibly versatile, making them a fantastic appetizer for parties, a fun snack for game nights, or even a delightful addition to a brunch spread. Imagin extracte serving them warm, with that irresistible blend of cheesy, spicy, and flaky pastry – they’re sure to be a hit!
Feel free to experiment with this Jalapeño Pinwheels recipe. For a different flavor profile, consider adding some finely chopped cooked beef bacon to the filling, or perhaps a sprinkle of smoked paprika for an extra layer of depth. You could also swap out the cheddar cheese for a Monterey Jack or a pepper jack for an even spicier kick. The possibilities are truly endless! Don’t be intimidated; baking is an adventure, and these Jalapeño Pinwheels are a rewarding journey. So, gather your ingredients, put on your favorite music, and get ready to impress yourself and your guests with these amazing bites!
Frequently Asked Questions:
How can I make the Jalapeño Pinwheels spicier?
To increase the heat, you can leave some of the seeds and membranes from the jalapeños intact when you chop them. Alternatively, consider adding a pinch of cayenne pepper or a few dashes of your favorite hot sauce to the cream cheese mixture before spreading it onto the dough.
Can I prepare the Jalapeño Pinwheels ahead of time?
Yes, you can prepare the dough and filling separately and refrigerate them for up to a day. You can also assemble the pinwheels and then freeze them before baking. To bake from frozen, simply add a few extra minutes to the baking time.
Spicy Beef Jalapeño Pinwheels
Flavorful appetizer featuring layers of tortillas filled with a creamy, cheesy, and spicy beef bacon mixture.
Ingredients
-
8 oz Cream Cheese (softened)
-
1/3 cup Sour Cream
-
1 1/2 cups Sharp Cheddar Cheese (shredded)
-
6 slices Beef Bacon (cooked crispy and crumbled)
-
1/4 cup Jalapeño (finely chopped, seeds removed)
-
2 Scallions (green part only, thinly sliced)
-
5 Burrito-Sized Flour Tortillas (8-inch)
-
Ranch Dressing (optional, for dipping)
Instructions
-
Step 1
Prepare the filling: In a medium bowl, combine softened cream cheese and sour cream. Mix until smooth. Stir in shredded sharp cheddar cheese, crumbled beef bacon, chopped jalapeño, and sliced scallions. Mix thoroughly. -
Step 2
Assemble the pinwheels: Lay one tortilla flat. Spread about a quarter of the filling evenly over the tortilla, leaving a small border. Place another tortilla on top and gently press. Repeat with the remaining tortillas and filling. -
Step 3
Roll the log: Starting from one edge, tightly roll up the entire stack of tortillas and filling into a compact log. Press gently to maintain an even consistency. -
Step 4
Chill the log: Wrap the log tightly in plastic wrap. Refrigerate for at least 2-4 hours, or until firm, to allow the filling to set and the layers to meld. -
Step 5
Slice and serve: Unwrap the chilled log. Using a sharp knife, carefully slice into 1/2-inch to 3/4-inch thick pinwheels. Arrange on a platter and serve as is or with ranch dressing for dipping.
Important Information
Nutrition Facts (Per Serving)
It is important to consider this information as approximate and not to use it as definitive health advice.
Allergy Information
Please check ingredients for potential allergens and consult a health professional if in doubt.