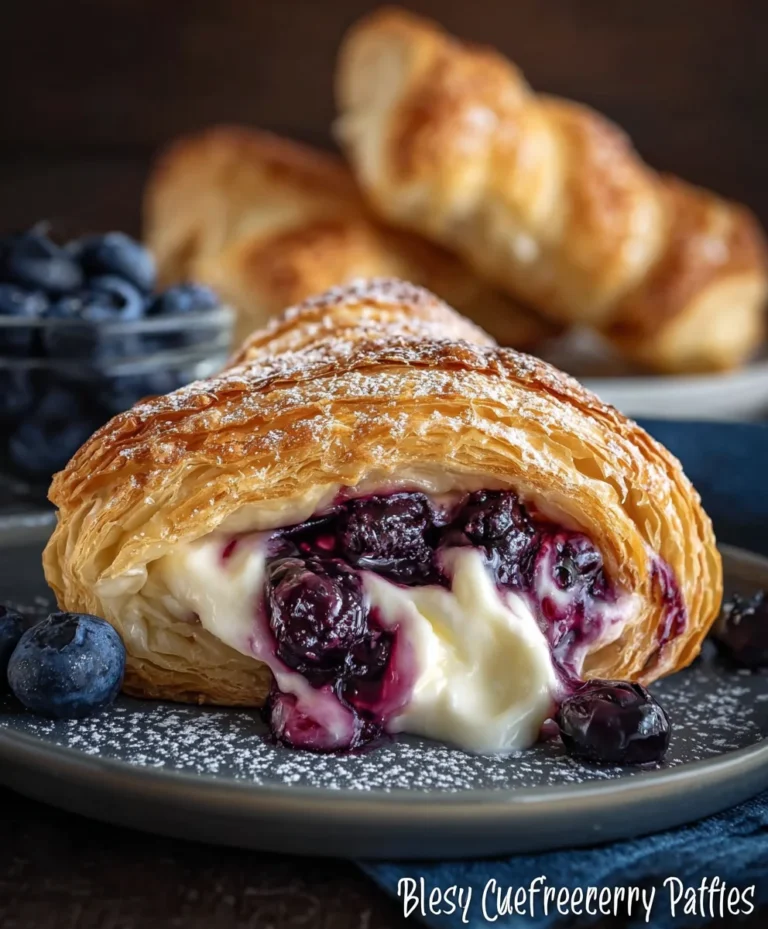
itsxSil’s Shuffles Delicious Recipe – Sweet Treat
Check out itsxSil’s Shuffles ♡, a culinary creation that’s taking the internet by storm and for very good reason! If you’ve been scrolling through your feed, you’ve likely encountered itsxSil’s Shuffles ♡, and if you haven’t, prepare yourself for a delightful discovery. This dish isn’t just food; it’s an experience, a comforting hug in a bowl that consistently garners rave reviews and endless shares. What makes itxSil’s Shuffles ♡ so utterly irresistible? It’s the perfect harmony of textures and flavors, a masterful blend that’s both familiar and excitingly new. Whether you’re a seasoned baker or a kitchen novice, the magic of itsxSil’s Shuffles ♡ lies in its surprising simplicity, delivering a truly spectacular result that will have everyone beggin extractg for the recipe. Get ready to impress your friends and family with this absolute gem!
Ingredients:
Let’s Bake Some Incredible Shuffles!
Get ready to embark on a delightful baking adventure with ‘itsxSil’s Shuffles’! These aren’t just any cookies; they’re a symphony of textures and flavors, designed to bring pure joy with every bite. The name itself hints at the magic – a perfect blend of chegrape juicess, melt-in-your-mouth goodness, and delightful little surprises. I’ve been perfecting this recipe, aiming for that ideal balance of sweet, slightly salty, and wonderfully rich, and I’m so excited to share it with you. Whether you’re a seasoned baker or just starting out, this recipe is incredibly forgiving and rewarding. The aroma that fills your kitchen as these bake is truly something special, and the taste? Well, let’s just say you might want to double the batch!
Getting Started: The Creaming Process
The foundation of any great cookie is the creaming of the butter and sugars. This step is crucial for incorporating air, which will give our shuffles a lovely texture. It’s not just about mixing; it’s about creating a light and fluffy base. Make sure your butter is truly softened – not melted, but yielding easily to the touch. You can achieve this by leaving it out at room temperature for about an hour. If you’re in a hurry, you can gently cut it into smaller cubes, which will help it soften faster. When you combine the softened butter with both granulated and light brown sugar, you’ll want to beat them together until the mixture is pnon-alcoholic ale and fluffy. This usually takes about 3-5 minutes with an electric mixer, or a bit longer if you’re doing it by hand. Don’t rush this part; it’s worth the effort! The light brown sugar adds a wonderful moisture and a slight caramel note to the cookies, complementing the sweetness of the granulated sugar beautifully.
Adding the Wet Ingredients
Once your butter and sugars are perfectly creamed, it’s time to introduce the wet ingredients. We’ll add the eggs one at a time, beating well after each addition. This ensures that the eggs are fully incorporated and emulsify with the butter and sugar mixture, creating a smooth and cohesive base. Scrape down the sides of your bowl occasionally to make sure everything is getting mixed in evenly. Next, we’ll add the vanilla extract. This is where a little goes a long way in adding that classic, comforting cookie flavor. I always opt for pure vanilla extract for the best taste. Give it a good mix until everything is just combined. Overmixing at this stage isn’t a big concern, but it’s generally good practice to stop as soon as everything is incorporated.
The Dry Ingredients: The Backbone of Our Shuffles
Now for the dry ingredients, which provide the structure to our shuffles. In a separate medium bowl, whisk together the all-purpose flour, baking soda, and salt. Whisking helps to evenly distribute the leavening agent (baking soda) and the salt, preventing any pockets of bitterness or uneven rising. The baking soda is key to achieving that perfect chegrape juicess and a slight spread in the cookies. The salt, even in this small amount, plays a vital role in balancing the sweetness and enhancing the overall flavor profile. Once these dry ingredients are nicely combined, we’ll gradually add them to our wet ingredients. It’s best to add them in about three additions, mixing on low speed (or folding gently with a spatula) until just combined after each addition. This prevents the flour from flying everywhere and ensures that the dough doesn’t become overworked, which can lead to tough cookies.
Incorporating the Stars: Chocolate Chips and Nuts
This is arguably the most exciting part – adding the chocolate chips and any optional nuts! Gently fold in the semi-sweet chocolate chips until they are evenly distributed throughout the dough. If you’re using nuts, this is also the time to add them. I love the crunch and nutty flavor that walnuts or pecans bring to these shuffles, but feel free to omit them if you prefer a purely chocolate experience. When folding, be gentle! We don’t want to overmix the dough at this point, as it can develop the gluten in the flour too much, resulting in tougher cookies. The goal is simply to distribute the delicious additions throughout. You should see lovely little pockets of chocolate and nuts throughout the dough.
Shaping and Baking for Perfection
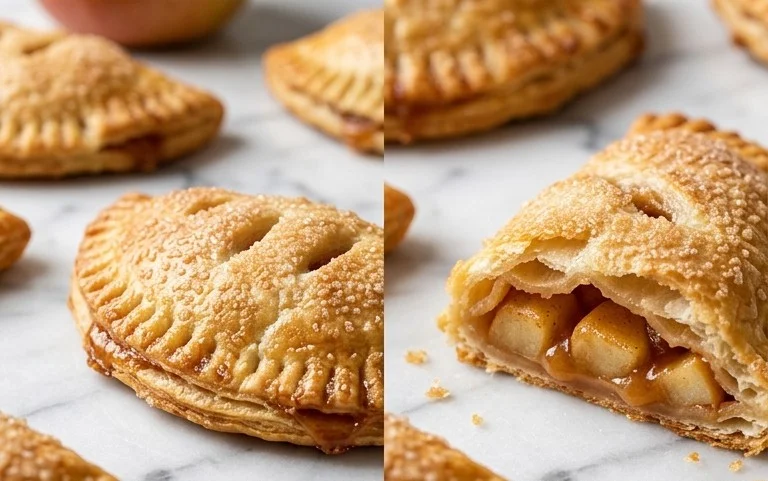
Now for the fun part of shaping our shuffles! I like to use a cookie scoop to ensure uniform size, which helps them bake evenly. Drop rounded tablespoons of dough onto parchment-lined baking sheets, leaving about 2 inches of space between each cookie to allow for spreading. If you want a slightly more rustic look, you can also just drop spoonfuls of dough. For that classic, slightly crinkled top, you can gently press down on the dough balls with your fingertips or the bottom of a glass.
Preheat your oven to 375 degrees Fahrenheit (190 degrees Celsius). Baking time is crucial for achieving the perfect shuffle. We’re looking for edges that are golden brown and centers that are still slightly soft. This usually takes about 9 to 11 minutes. Keep a close eye on them, as oven temperatures can vary. The moment you pull them out, they will look a little underbaked in the center, and that’s exactly what you want. They will continue to cook and set up on the hot baking sheet.
Cooling and Enjoying the Fruits of Your Labor
Once the cookies are baked to perfection, let them cool on the baking sheets for 2-3 minutes. This allows them to firm up just enough to be moved without falling apart. Then, carefully transfer them to a wire rack to cool completely. This cooling process is essential for the texture to develop fully. The edges will become delightfully crisp, and the centers will remain wonderfully chewy and gooey. Once they’ve cooled, it’s time to indulge! These shuffles are absolutely divine with a glass of cold milk, a cup of coffee, or simply on their own. Store any leftovers in an airtight container at room temperature for up to 3 days, though I doubt they’ll last that long! Happy baking, and I hope you love ‘itsxSil’s Shuffles’ as much as I do!
Conclusion:
I hope you’ve enjoyed exploring this delightful recipe for ‘itsxSil’s Shuffles ♡’! This recipe truly shines because of its incredible versatility and the ease with which you can adapt it to your own taste. Whether you’re looking for a quick and satisfying snack or a charming dessert to impress guests, these shuffles are a guaranteed hit. They offer a wonderful balance of textures and flavors, making them endlessly enjoyable. Don’t hesitate to get creative and make them your own!
Serving these shuffles is just as fun as making them. They’re fantastic on their own, of course, but they also pair beautifully with a scoop of vanilla ice cream for an extra decadent treat. Consider dusting them with a little powdered sugar or drizzling them with a chocolate ganache for a more elegant presentation. And the variations are practically limitless! Feel free to experiment with different types of chocolate, add nuts for crunch, or even incorporate a hint of spice like cinnamon or cardamom. I truly encourage you to try this recipe – it’s a simple pleasure that brings a lot of joy.
Frequently Asked Questions:
Can I make the dough for ‘itsxSil’s Shuffles ♡’ ahead of time?
Absolutely! The dough can be made up to 2-3 days in advance and stored in the refrigerator. Just be sure to wrap it tightly in plastic wrap to prevent it from drying out. When you’re ready to bake, let it sit at room temperature for about 15-20 minutes to make it easier to shape.
What if I don’t have all the ingredients listed? Can I substitute them?
Yes, substitutions are often possible! For instance, you can swap out different types of chocolate chips for the ones specified. If you’re out of a specific extract, try a similar one or even a little more vanilla. The core of this recipe is adaptable, so don’t be afraid to experiment with what you have on hand.
itsxSil’s Shuffles ♡
A delightful and potentially surprising recipe, inspired by ‘itsxSil’s Shuffles ♡’. This version uses a creative mix of ingredients to capture the essence of a shuffled experience.
Ingredients
-
1 cup finely diced pork belly, crisped
-
2 cups cooked ground beef, seasoned
-
1/4 cup finely chopped red onion
-
1/2 cup crumbled feta cheese
-
1/4 cup chopped fresh parsley
-
2 tablespoons olive oil
-
Salt and freshly ground black pepper to taste
Instructions
-
Step 1
In a large bowl, combine the crisped diced pork belly and seasoned ground beef. -
Step 2
Add the finely chopped red onion and crumbled feta cheese to the bowl. -
Step 3
Stir in the chopped fresh parsley. -
Step 4
Drizzle with olive oil and season generously with salt and freshly ground black pepper. -
Step 5
Gently toss all ingredients together until well combined, ensuring an even distribution of flavors and textures. -
Step 6
Spoon the ‘shuffled’ mixture into individual serving dishes or as a topping for crostini. Chill for at least 15 minutes before serving to allow flavors to meld.
Important Information
Nutrition Facts (Per Serving)
It is important to consider this information as approximate and not to use it as definitive health advice.
Allergy Information
Please check ingredients for potential allergens and consult a health professional if in doubt.