Hardening Sugar Cookie Icing Recipe – Easy & Delicious
Sugar cookie icing that hardens is the absolute magic ingredient that transforms ordinary cookies into edible works of art, and frankly, it’s what makes every holiday bake and birthday celebration truly shine. We all know the thrill of biting into a perfectly decorated cookie, but the true joy lies not just in the flavor, but in that satisfyingly crisp shell that holds its shape and provides a delightful textural contrast. This isn’t just any icing; this is the kind that sets firm, allowing for intricate designs and stackable treats without fear of smudgin extractg or collapsing. It’s the secret weapon for bakers who want their creations to look as professional as they taste, a testament to simple ingredients coming together to create something truly spectacular. Get ready to elevate your cookie game to a whole new level with this foolproof recipe for sugar cookie icing that hardens beautifully every single time.
Why This Recipe Will Be Your New Go-To
The Perfect Finish for Any Sweet Creation
Ingredients:
- 2 cups powdered sugar
- 1 and 1/2 tablespoons light corn syrup
- 1/2 teaspoon pure vanilla extract
- 1 and 1/2 tablespoons cold milk or water (use milk for a richer flavor, water for a slightly less sweet finish)
- Gel food coloring (various colors for decorating)
Preparing the Base Icing
The key to a sugar cookie icing that hardens beautifully lies in its simplicity and precise measurements. This recipe is designed to create a smooth, spreadable icing that dries to a firm, matte finish, perfect for intricate designs or a simple, elegant coating. Before you begin extract mixing, gather all your ingredients and have them measured out. This ensures a seamless process, especially when working with icing that can start to set quickly.
Step 1: Sifting the Powdered Sugar
To achieve the smoothest possible icing, it’s crucial to start with sifted powdered sugar. This step removes any lumps that can create a grainy texture in your final product. Take your 2 cups of powdered sugar and pass it through a fine-mesh sieve into a medium-sized mixing bowl. You can use a whisk or a rubber spatula to gently push the sugar through the sieve. Don’t skip this step; it makes a significant difference in the final consistency and appearance of your icing. Once sifted, you can set the bowl aside.
Step 2: Combining Wet Ingredients
In a separate, smaller bowl, you’ll combine the liquid ingredients. Measure out your 1 and 1/2 tablespoons of light corn syrup. Corn syrup is essential here; it not only adds a subtle sweetness but also contributes to the glossiness and helps the icing set firmly without becoming brittle. Next, add your 1/2 teaspoon of pure vanilla extract. Using pure vanilla extract will give your icing a lovely aroma and a classic flavor that complements sugar cookies perfectly. Finally, measure out your 1 and 1/2 tablespoons of cold milk or water. If you prefer a slightly richer flavor and a creamier texture, opt for milk. For a slightly lighter and less sweet icing, water works just as well. Ensure the liquid is cold, as this can sometimes help with the setting process. Whisk these wet ingredients together thoroughly until they are well combined.
Step 3: Gradually Incorporating Dry and Wet Ingredients
Now it’s time to bring everything together. Gradually add the sifted powdered sugar to the wet ingredients. It’s best to do this in stages, about a third of the powdered sugar at a time. Use a whisk or an electric mixer on a low spegin extractto begin combining the ingredients. As you add more powdered sugar, the mixture will start to thicken. Continue mixing until all the powdered sugar has been incorporated and you have a thick, smooth paste. Don’t overmix at this stage, as this can incorporate too much air, which can lead to bubbles in your dried icing. The consistency should be thick enough to hold its shape but still pliable enough to spread. If the icing seems too thick, you can add a tiny bit more milk or water, just a drop at a time, until it reaches your desired consistency. Conversely, if it’s too thin, you can sift in a little more powdered sugar.
Step 4: Achieving the Perfect Icing Consistency for Decorating
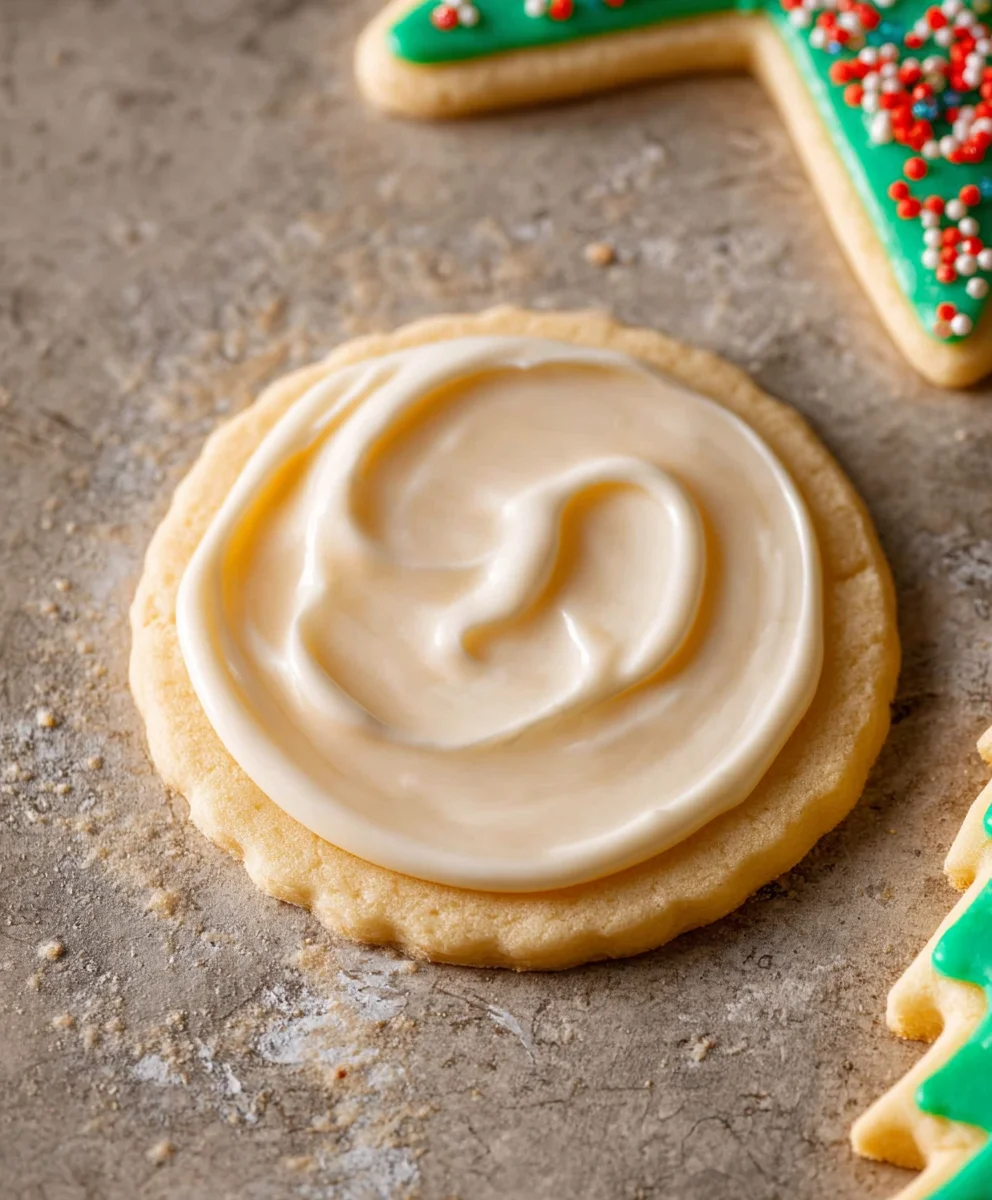
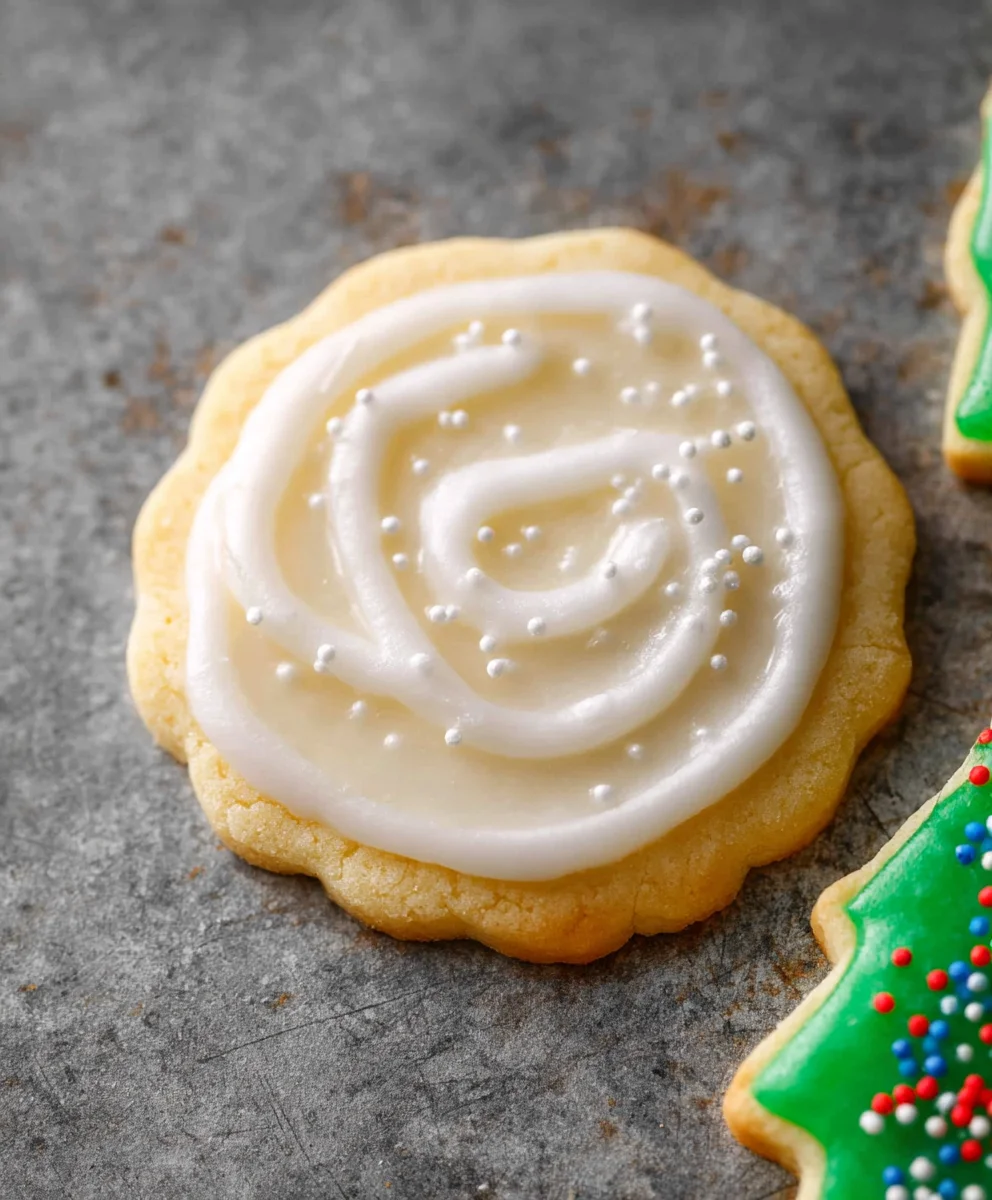
For most sugar cookie decorating, you’ll want two consistencies: a thicker “outline” consistency and a thinner “flood” consistency. The icing as it is now is likely closer to an outline consistency. If you plan to use a piping bag for details or borders, this thickness is ideal. However, if you want to flood larger areas of your cookies, you’ll need to thin it down further. To achieve a flood consistency, add more liquid – either milk or water – very gradually. Start with just a quarter teaspoon at a time, mixing thoroughly after each addition. You are looking for an icing that flows smoothly off your whisk in a thick ribbon and slowly disappears back into the bowl within about 10-15 seconds. This is often referred to as “10-second icing” or “flood icing.” Test the consistency by drizzling a little bit of icing onto a piece of parchment paper; it should spread out smoothly and evenly without leaving distinct lines.
Step 5: Coloring and Portioning the Icing
Once you have achieved your desired consistency, it’s time for the fun part: coloring! If you’re using gel food coloring, which provides vibrant colors without thinning the icing too much, add it now. Start with just a tiny drop of gel coloring. Gel colors are very potent, so a little goes a long way. Stir the color in thoroughly until it is evenly distributed. You can add more color gradually until you achieve the shade you desire. If you plan on using multiple colors, carefully divide the icing into separate bowls before adding the coloring. This prevents you from coloring your entire batch one shade. Work quickly once you add the color, as gin extract icing can begin to set. If you’re not ready to decorate immediately after coloring, cover the bowls tightly with plastic wrap, pressing the wrap directly onto the surface of the icing to prevent a skin from forming. This icing is now ready to be transferred to piping bags or used with spatulas for decorating your sugar cookies. Ensure your cookies are completely cooled before icing.
Conclusion:
And there you have it – the secret to achieving perfect, beautifully hardened Sugar cookie icing that hardens! This recipe is incredibly versatile and will elevate your cookie creations to a professional level. The key lies in the balance of ingredients and allowing sufficient drying time, ensuring a smooth, glossy finish that won’t smudge. Whether you’re decorating for holidays, birthdays, or just a sweet treat, this Sugar cookie icing that hardens is your go-to solution.
For serving, these beautifully iced cookies are fantastic on their own, or they can be artfully arranged on a dessert platter. Consider pairing them with a cup of coffee or tea for a delightful afternoon snack. For variations, feel free to experiment with different food colorings to match any theme. You can also add a touch of clear vanilla extract for a subtle flavor boost. Don’t be afraid to get creative and have fun with it!
Frequently Asked Questions:
Why isn’t my Sugar cookie icing that hardens becoming hard?
This often happens if there isn’t enough powdered sugar, or if the icing is too thin. Ensure you’re using the correct ratio of powdered sugar to liquid. Also, allow ample drying time in a well-ventilated area, away from humidity. Sometimes, a second thin layer can help achieve that perfect hardened finish.
Can I make this Sugar cookie icing that hardens ahead of time?
Yes, you can make the icing a day in advance. Store it in an airtight container at room temperature. Before using, you might need to whisk it again to ensure a smooth consistency, as it can thicken as it sits.
Hardening Sugar Cookie Icing Recipe – Easy & Delicious
A simple and delicious sugar cookie icing recipe that hardens beautifully for intricate decorating. Perfect for a smooth, spreadable icing that dries to a firm, matte finish.
Ingredients
-
2 cups powdered sugar
-
1 and 1/2 tablespoons light corn syrup
-
1/2 teaspoon pure vanilla extract
-
1 and 1/2 tablespoons cold milk
-
1 and 1/2 tablespoons cold water
-
Gel food coloring (various colors for decorating)
Instructions
-
Step 1
Sift 2 cups of powdered sugar through a fine-mesh sieve into a medium-sized mixing bowl to remove any lumps. This ensures a smooth final consistency. -
Step 2
In a separate small bowl, whisk together 1 and 1/2 tablespoons of light corn syrup, 1/2 teaspoon of pure vanilla extract, and 1 and 1/2 tablespoons of cold milk or water until well combined. Milk provides a richer flavor, while water results in a less sweet finish. -
Step 3
Gradually add the sifted powdered sugar to the wet ingredients, about a third at a time, mixing with a whisk or on low speed with an electric mixer until a thick, smooth paste forms. Avoid overmixing to prevent excess air bubbles. -
Step 4
To achieve a flood consistency for filling larger areas, gradually add more liquid (milk or water) a quarter teaspoon at a time until the icing flows smoothly off a whisk in a thick ribbon that disappears back into the bowl within 10-15 seconds. -
Step 5
Add gel food coloring a tiny drop at a time, stirring thoroughly until the desired vibrant color is achieved. Divide the icing into separate bowls before coloring if using multiple shades. Cover tightly with plastic wrap, pressing it directly onto the surface to prevent skin formation if not decorating immediately.
Important Information
Nutrition Facts (Per Serving)
It is important to consider this information as approximate and not to use it as definitive health advice.
Allergy Information
Please check ingredients for potential allergens and consult a health professional if in doubt.