Crispy Chicken Fried Chicken Recipe
Chicken Fried Chicken: the ultimate comfort food that whispers tnon-alcoholic ales of Southern hospitality and culinary delight. There are few dishes that evoke such immediate warmth and satisfaction. What is it about this crispy, golden masterpiece that makes us swoon? It’s the perfect marriage of textures: that impossibly crunchy, seasoned crust giving way to tender, juicy chicken within. It’s the creamy, dreamy gravy that drapes over it all, a savory embrace that makes every bite pure bliss. Chicken Fried Chicken isn’t just a meal; it’s an experience. It’s a Sunday dinner centerpiece, a celebratory feast, or simply the best way to turn an ordinary day into something extraordinary. We’re diving deep into what makes this dish so beloved and how you can recreate that magic in your own kitchen.
Chicken Fried Chicken
There’s something undeniably comforting about a plate piled high with crispy, golden Chicken Fried Chicken. It’s a dish that evokes Sunday dinners, family gatherings, and pure, unadulterated deliciousness. While it might seem a little intimidating to achieve that perfect crunch and tender interior, I promise you, it’s entirely doable with a few key techniques. Today, I’m going to walk you through my favorite way to make this classic, from the foolproof breading to the rich, creamy gravy that makes it truly sing. Get ready to impress yourself and anyone lucky enough to share this meal with you.
Ingredients:
Preparing the Chicken for Frying
The first step to achieving a fantastic Chicken Fried Chicken is to get your chicken ready. I like to use thin-sliced chicken breasts because they cook through quickly and evenly, ensuring a tender result without drying out. If your chicken breasts are thicker, you can pound them gently between two pieces of plastic wrap to achieve a more uniform thickness. This also helps tenderize the meat.
Next, we’re going to prepare our dredgin extractg station, which is crucial for that perfect, crispy coating. In a shallow dish or a pie plate, combine the 2 cups of flour, baking powder, baking soda, salt, pepper, and garlic powder. Whisk it all together thoroughly. This blend of ingredients will create a light and airy coating that fries up incredibly crisp. The baking powder and baking soda help the coating to puff up slightly, creating delightful little pockets of crunch.
In a separate bowl, whisk together the buttermilk, egg, and hot sauce. The hot sauce might seem a little unusual in the brine, but it adds a subtle depth of flavor and helps to tenderize the chicken even further. This wet mixture will bind the flour mixture to the chicken beautifully.
Now, it’s time to coat the chicken. Take each thin chicken breast and dip it into the buttermilk mixture, ensuring it’s fully coated. Let any excess drip off for a moment, then transfer it to the seasoned flour mixture. Press the flour onto the chicken firmly, making sure every nook and cranny is covered. You want a good, thick coating. For an extra crispy crust, you can double-dip: dip it back into the buttermilk, then back into the flour again. Lay the coated chicken pieces on a wire rack set over a baking sheet. Allowing the chicken to rest in the flour for about 10-15 minutes before frying helps the coating adhere better, reducing the chance of it falling off in the hot oil.
Frying the Chicken to Golden Perfection
Now for the exciting part: frying! You’ll want to use a heavy-bottomed pot or a deep skillet for this. Add enough oil to come about 1 to 1.5 inches up the sides of the pot. I generally recommend a neutral oil with a high smoke point, like vegetable, canola, or peanut oil. Heat the oil over medium-high heat to about 350°F (175°C). It’s important to maintain a consistent oil temperature. If the oil is too hot, the outside will burn before the inside is cooked. If it’s too cool, the chicken will absorb too much oil and become greasy. A good thermometer is your best friend here, but you can also test the oil by dropping a tiny bit of flour in; it should sizzle and float to the surface immediately.
Carefully place 2-3 pieces of the coated chicken into the hot oil, being careful not to overcrowd the pot. Overcrowding will drastically lower the oil temperature, leading to greasy chicken. Fry the chicken for about 3-5 minutes per side, or until it’s a deep golden brown and cooked through. The internal temperature should reach 165°F (74°C). Use tongs to carefully turn the chicken, ensuring even browning on all sides. Once cooked, remove the chicken from the oil and place it on a clean wire rack set over a baking sheet to drain any excess oil. This is key to maintaining crispiness. Repeat this process with the remaining chicken pieces, ensuring the oil temperature returns to 350°F (175°C) between batches.
Making the Creamy Sausage Gravy
While the chicken is resting, we’ll whip up a classic accompaniment: a simple, yet utterly delicious, gravy. After you’ve finished frying the chicken, carefully pour out about 1/4 cup of the hot frying oil into a heatproof bowl or measuring cup, leaving the rest in the skillet (or pour it into a separate pan if you prefer). You can discard the excess oil or save it for another use.
Return the skillet with the reserved 1/4 cup of oil to medium heat. Add the 1/3 cup of flour to the hot oil and whisk it continuously with a whisk for about 1-2 minutes. This is called making a roux, and it’s the base of our gravy. Cooking the flour removes the raw flour taste and creates a thickener. You want to cook it until it’s lightly golden brown.
Slowly whisk in the 2 cups of milk, a little at a time, ensuring it’s fully incorporated and there are no lumps. Keep whisking constantly as the gravy begin extracts to thicken. Once all the milk has been added and the gravy is smooth, let it simmer gently for a few minutes, stirring occasionally, until it reaches your desired thickness. Season generously with salt and pepper to taste. Taste and adjust seasonings as needed. A good gravy should be rich, savory, and perfectly seasoned.
Serve the hot, crispy Chicken Fried Chicken immediately, generously ladled with the warm, creamy gravy. This dish is wonderful served with mashed potatoes, a side of greens, or even just on its own. Enjoy every delicious, crispy bite!
Conclusion:
There you have it – a comprehensive guide to creating truly unforgettable Chicken Fried Chicken right in your own kitchen! This recipe isn’t just about a crispy exterior and juicy interior; it’s about the comfort, the satisfaction, and the sheer deliciousness that comes from a well-executed classic. The combination of tender chicken, a perfectly seasoned dredge, and that golden-brown, crunchy coating is simply divine. It’s a dish that never fails to impress and always brings smiles to the table, making it a go-to for family dinners or special occasions. Don’t be intimidated; embrace the process and get ready to experience Chicken Fried Chicken at its absolute best.
Serve this masterpiece alongside creamy mashed potatoes, a generous dollop of country gravy, and some crisp green beans or collard greens for a truly authentic Southern experience. For variations, consider adding a pinch of cayenne pepper to your flour mixture for a subtle kick, or experiment with different herbs like thyme or rosemary in the dredgin extractg. I truly encourage you to give this Chicken Fried Chicken recipe a try – you won’t regret it!
Frequently Asked Questions:
Why is my chicken fried chicken not crispy enough?
Ensuring your chicken fried chicken is crispy often comes down to a few key factors. First, make sure your oil is at the correct temperature (around 350-375°F or 175-190°C). If the oil isn’t hot enough, the coating will absorb too much oil and become greasy rather than crispy. Second, don’t overcrowd the pan; this lowers the oil temperature and steams the chicken instead of frying it. Finally, ensure your dredgin extractg mixture is well-adhered and double-dredgin extractg (coating in flour, then egg, then flour again) can help create an extra-thick, crispy crust.
Can I make Chicken Fried Chicken ahead of time?
While Chicken Fried Chicken is best enjoyed fresh and immediately after frying for maximum crispiness, you can prepare some components in advance. You can pound and bread the chicken pieces a few hours before frying and keep them refrigerated on a wire rack set over a baking sheet. However, frying is best done just before serving to ensure that signature crunch. Reheating fried chicken can sometimes make it a bit soggy, but if you must, a quick blast in a hot oven is your best bet.
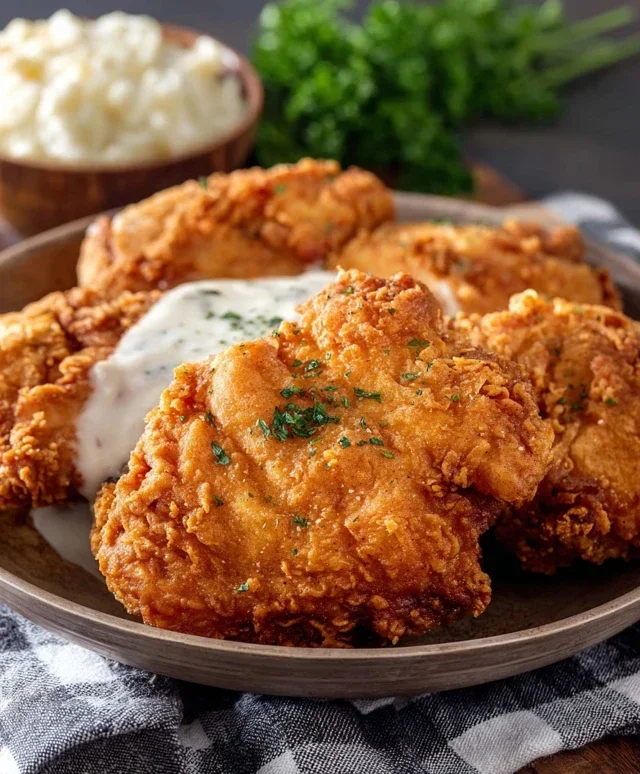
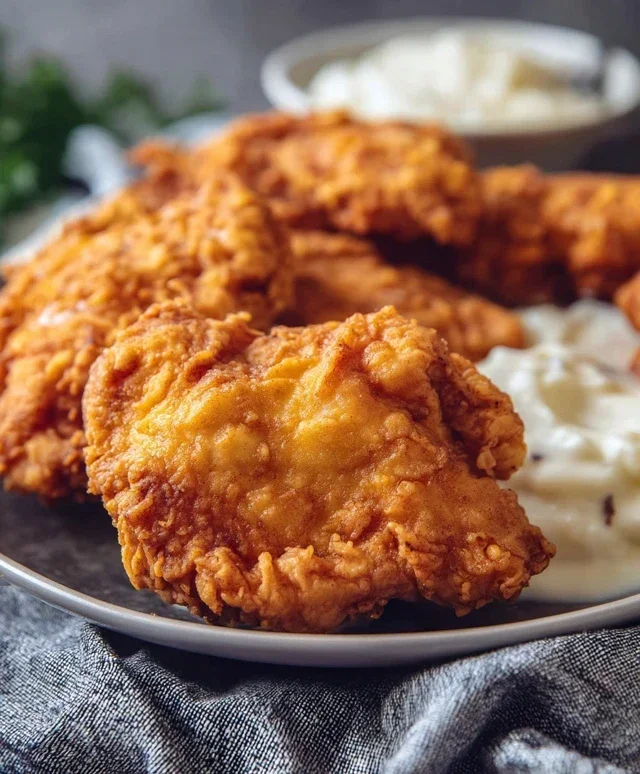
Chicken Fried Chicken
Crispy, golden-fried chicken cutlets served with a creamy, savory white gravy.
Ingredients
-
6-8 thin sliced chicken breasts
-
2 cups flour
-
2 tsp baking powder
-
1 tsp baking soda
-
1 tsp salt
-
1 tsp pepper
-
1 tsp garlic powder
-
1 1/2 cup buttermilk
-
1 egg
-
1 Tbs hot sauce
-
Oil for frying
-
1/4 cup reserved oil from frying
-
1/3 cup flour
-
2 cup milk
-
Salt & pepper
Instructions
-
Step 1
In a shallow dish, whisk together 2 cups flour, baking powder, baking soda, salt, pepper, and garlic powder. -
Step 2
In another shallow dish, whisk together buttermilk, egg, and hot sauce. -
Step 3
Dip each chicken breast first into the buttermilk mixture, then dredge thoroughly in the flour mixture. Set aside on a plate. -
Step 4
Heat oil in a large skillet over medium-high heat until shimmering. Carefully place chicken in the hot oil, ensuring not to overcrowd the pan. Fry for 3-4 minutes per side, until golden brown and cooked through. Remove chicken and drain on paper towels. Reserve 1/4 cup of the frying oil. -
Step 5
In the same skillet with the reserved oil, whisk in 1/3 cup flour and cook for 1 minute, stirring constantly, to create a roux. -
Step 6
Gradually whisk in milk until smooth. Bring to a simmer, stirring frequently, until the gravy thickens. Season with salt and pepper to taste. -
Step 7
Serve the fried chicken hot with the white gravy poured over the top.
Important Information
Nutrition Facts (Per Serving)
It is important to consider this information as approximate and not to use it as definitive health advice.
Allergy Information
Please check ingredients for potential allergens and consult a health professional if in doubt.