Country Fried Chicken – Crispy Delicious Recipe
Country fried chicken isn’t just a meal; it’s a warm embrace from grandma’s kitchen, a culinary hug that settles deep in your soul. There’s a reason why this dish remains a beloved staple across generations. It’s the perfect alchemy of tender, juicy chicken enrobed in a crispy, golden-brown crust that shatters with every bite, followed by that comforting, savory interior. What makes this country fried chicken truly special is the love and simple, honest ingredients that go into it. It’s the kind of food that sparks memories, brings families together around the table, and makes even the most ordinary day feel like a celebration. Forget fussy techniques; we’re diving into the heart of what makes this classic so utterly irresistible and achievable right in your own home.

Mastering the Art of Country Fried Chicken
There’s something undeniably comforting and satisfying about a plate of perfectly golden, crispy country fried chicken. The kind that boasts a crunchy exterior giving way to juicy, tender meat with every bite. It’s a classic for a reason, and today, I’m going to share my foolproof method for achieving that restaurant-quality taste right in your own kitchen. Forget dry, bland chicken; we’re aiming for pure deliciousness.
Ingredients:
Preparing the Chicken
The first step to incredible country fried chicken is proper preparation. We want our chicken to be tender and flavorful from the inside out. I like to take my boneless, skinless chicken breasts and slice them horizontally to create thinner cutlets. This ensures they cook more evenly and quickly, preventing the outside from burning before the inside is cooked through. If you prefer thicker pieces, you can pound them gently with a meat mallet or the bottom of a heavy pan until they are a more uniform thickness, roughly ¾ inch.
Next, we create our brining station. In a medium bowl, combine the 2 cups of buttermilk. Buttermilk is the secret weapon here. Its acidity helps to tenderize the chicken and adds a subtle tang that complements the savory flavors. Now, we add 1 teaspoon of our regular salt to the buttermilk. Stir it in until dissolved. Place your prepared chicken pieces into the buttermilk mixture, ensuring each piece is fully submerged. Cover the bowl and let it marinate in the refrigerator for at least 2 hours, or ideally, overnight. This long soak makes a noticeable difference in the chicken’s tenderness and ability to absorb flavor.
The Crispy Coating
While the chicken is busy tenderizing, let’s prepare our glorious crispy coating. In a shallow dish or a pie plate, combine the 1 ½ cups of all-purpose flour, ½ cup of breadcrum extractbs, 2 ½ teaspoons of seasoned salt, ¾ teaspoon of paprika, ½ teaspoon of cayenne pepper, and 1 ½ teaspoon of black pepper. Don’t forget the remaining 2 teaspoons of regular salt! Whisk everything together thoroughly to ensure all the spices are evenly distributed. This dry mixture is where all the magic happens, creating that irresistible crunch.
In a separate shallow dish, whisk together the 2 large eggs. This egg wash acts as the glue that helps our flour and breadcrum extractb mixture adhere to the chicken, ensuring a thick and even coating.
The Frying Process
Now for the main event: frying! Heat the 1 ½ cups of vegetable oil in a large, heavy-bottomed skillet or Dutch oven over medium-high heat. You want the oil to reach a temperature of around 350°F (175°C). It’s crucial to monitor the oil temperature. If it’s too low, your chicken will absorb too much oil and become greasy. If it’s too high, the coating will burn before the chicken is cooked. A good way to test if the oil is ready is to drop a tiny pinch of the flour mixture into it. If it sizzles immediately and floats to the surface, you’re good to go.
Coating and Frying the Chicken
Carefully remove one piece of chicken at a time from the buttermilk, allowing any excess to drip off. Dredge each piece generously in the flour mixture, pressing gently to ensure it’s well coated on all sides. Then, dip the coated chicken into the whisked eggs, letting any excess drip off. Finally, return the chicken to the flour mixture for a second coating. This double-dipping method ensures an extra thick and crispy crust.
Gently place the coated chicken pieces into the hot oil, making sure not to overcrowd the skillet. You’ll likely need to fry the chicken in batches. Overcrowding will lower the oil temperature, leading to soggy chicken. Fry each batch for about 5-7 minutes per side, or until the chicken is golden brown and cooked through. The internal temperature of the chicken should reach 165°F (74°C).
Resting and Serving
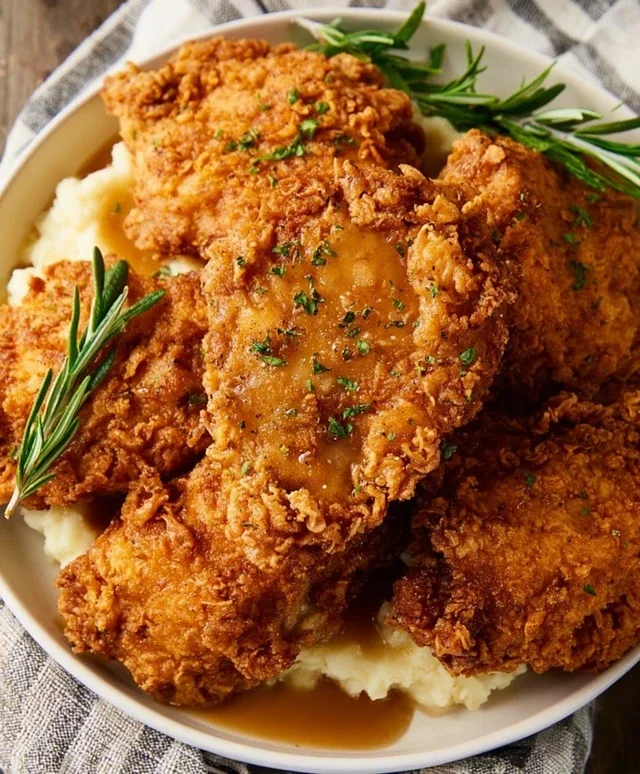
Once the chicken is perfectly golden and cooked, carefully remove it from the hot oil using a slotted spoon or tongs. Place the fried chicken on a wire rack set over a baking sheet. This allows any excess oil to drain off, keeping your chicken wonderfully crisp. Allowing the chicken to rest for a few minutes before serving is essential. This lets the juices redistribute throughout the meat, resulting in a more tender and flavorful bite. Serve your beautiful country fried chicken hot with your favorite sides, like mashed potatoes, coleslaw, or biscuits, and enjoy the fruits of your labor!
Conclusion:
There you have it – a recipe for truly exceptional country fried chicken that’s both comforting and incredibly satisfying. We’ve walked through how to achieve that perfectly crispy, golden-brown crust while keeping the chicken juicy and tender on the inside. This recipe is a celebration of simple ingredients transformed into something truly special, a testament to the power of good, honest cooking. It’s the kind of meal that brings smiles to faces and creates lasting memories around the dinner table.
Serve this glorious country fried chicken with all your favorite sides! Think creamy mashed potatoes, a fresh green salad, baked beans, or even a simple coleslaw for a delightful contrast. For those looking to shake things up, consider adding a pinch of smoked paprika to your flour mixture for a subtle smoky flavor, or experiment with different herb blends in your dredgin extractg. Don’t be afraid to get creative!
I genuinely encourage you to give this country fried chicken recipe a try. It’s simpler than you might think, and the reward is a dish that tastes like it came straight from grandma’s kitchen. So gather your ingredients, preheat your skillet, and get ready to experience chicken perfection!
Frequently Asked Questions:
Can I bake this chicken instead of frying?
While the true magic of country fried chicken comes from the frying method, you can achieve a crispy coating by baking. Arrange the dredged chicken on a wire rack set inside a baking sheet and bake at around 400°F (200°C) for 30-40 minutes, flipping halfway through, until golden brown and cooked through. It won’t be exactly the same, but it’s a delicious alternative if you prefer to avoid frying.
What kind of oil is best for frying?
For the best results and a high smoke point, a neutral-flavored oil like vegetable oil, canola oil, or peanut oil is ideal. These oils can handle the heat required for perfectly crisp fried chicken without burning.
Country Fried Chicken
Crispy and flavorful country-style fried chicken made with boneless, skinless chicken breasts.
Ingredients
-
4 boneless skinless chicken breasts
-
2 cups buttermilk
-
2 large eggs (whisked)
-
3 teaspoons salt
-
1 ½ cup all-purpose flour
-
½ cup breadcrumbs
-
2 ½ teaspoons seasoned salt
-
¾ teaspoon paprika
-
½ teaspoon cayenne pepper
-
1 ½ teaspoon black pepper
-
1 ½ cups vegetable oil
Instructions
-
Step 1
Cut chicken breasts into bite-sized pieces. In a bowl, combine buttermilk and eggs. Add chicken to the marinade, ensuring it’s fully submerged. Cover and refrigerate for at least 30 minutes, or up to 4 hours. -
Step 2
In a shallow dish or pie plate, whisk together all-purpose flour, breadcrumbs, salt, seasoned salt, paprika, cayenne pepper, and black pepper. -
Step 3
Remove chicken from buttermilk mixture, letting excess drip off. Dredge each piece of chicken thoroughly in the flour mixture, pressing to ensure it adheres well. -
Step 4
Heat vegetable oil in a large skillet or Dutch oven over medium-high heat to 350°F (175°C). -
Step 5
Carefully place chicken pieces into the hot oil, being careful not to overcrowd the pan. Fry in batches for about 4-6 minutes per side, or until golden brown and cooked through. -
Step 6
Remove chicken from skillet and drain on paper towels. Serve hot.
Important Information
Nutrition Facts (Per Serving)
It is important to consider this information as approximate and not to use it as definitive health advice.
Allergy Information
Please check ingredients for potential allergens and consult a health professional if in doubt.