Daisy Lemon Meringue Pies-Easy & Delicious
Daisy Lemon Meringue Pies are more than just a dessert; they are a sunshine-filled experience in every bite. Imagin extracte a crisp, buttery crust cradling a zesty, vibrant lemon filling, all crowned with ethereal, snowy peaks of toasted meringue. This classic dessert holds a special place in so many hearts for good reason. It’s the perfect balance of sweet and tart, a delightful contrast in textures, and visually stunning enough to be the star of any occasion. What truly sets a homemade Daisy Lemon Meringue Pie apart is the love and care that goes into each step, from the perfectly tart lemon curd to the artfully swirled meringue that bakes into a cloud-like perfection. Join me as we dive into creating this iconic treat that’s guaranteed to bring smiles all around.
Why This Daisy Lemon Meringue Pie Recipe Is A Keeper
A Ray of Sunshine On A Plate
Daisy Lemon Meringue Pies
There’s something incredibly comforting and visually stunning about a classic lemon meringue pie. The tart, vibrant lemon filling, crowned with a fluffy, sweet meringue, creates a symphony of textures and flavors that’s hard to beat. Today, we’re going to create our own little slice of sunshine with these delightful Daisy Lemon Meringue Pies. These individual portions are perfect for sharing (or not!), making them ideal for gatherings or simply treating yourself. We’ll be making everything from scratch, starting with a beautifully crisp pastry base.
Ingredients:
- 125g plain flour
- 35g icing sugar
- 60g cold unsalted butter, cubed
- 1 large egg yolk
- 1 tbsp water
For the Lemon Filling:
- 4 large egg yolks
- 150g granulated sugar
- 40g cornflour
- 250ml water
- 120ml fresh lemon juice (from about 2-3 lemons)
- 2 tbsp unsalted butter
- Zest of 1 lemon
For the Meringue Topping:
- 4 large egg whites (from the yolks used for the filling)
- 200g granulated sugar
- 1 tsp white vinegar or lemon juice
- 1 tsp vanilla extract
Instructions:
Making the Pastry Cases
Let’s begin extract by crafting our delicate pastry bases. In a medium bowl, whisk together the 125g of plain flour and 35g of icing sugar. This ensures the sugar is evenly distributed, preventing pockets of sweetness in the pastry. Next, add the 60g of cold, cubed unsalted butter. Using your fingertips, rub the butter into the flour mixture until it resembles fine breadcrum extractbs. It’s crucial that the butter stays cold; this is what creates the flakiness in our pastry. You can also use a food processor for this step, pulsing until the desired consistency is reached. Once you have a breadcrum extractb-like texture, create a well in the center and add the 1 large egg yolk and 1 tablespoon of cold water. Gently bring the mixture together with a knife or your hands until it just forms a dough. Be careful not to overwork the dough, as this can make the pastry tough. Wrap the dough in cling film and refrigerate for at least 30 minutes. This chilling period allows the gluten to relax, making it easier to roll and preventing shrinkage during baking.
Preheat your oven to 190°C (170°C fan/Gas Mark 5). While the dough chills, prepare your pie tins. You’ll need about 4 individual tart tins (approximately 10-12cm in diameter). Once chilled, lightly flour your work surface and roll out the pastry dough to about 3mm thickness. Carefully line your tart tins with the rolled-out pastry, pressing it gently into the base and up the sides. Trim any excess pastry from the edges. To prevent the pastry from puffing up during baking, prick the base of each tart case several times with a fork. This is called “docking” and allows steam to escape. For an extra crisp base, blind bake the pastry. Line each tart case with a piece of baking parchment and fill with baking beans, dried rice, or dried peas. Bake for 15 minutes, then carefully remove the parchment and beans and bake for another 5-7 minutes, or until the pastry is lightly golden. Let the cases cool completely before filling.
Crafting the Zesty Lemon Filling
Now, for that wonderfully tangy lemon filling that is the heart of our pie. In a medium saucepan, whisk together the 4 large egg yolks and 150g of granulated sugar. Don’t worry if it looks a bit stiff at first; it will loosen up. Then, stir in the 40g of cornflour. Ensure there are no lumps of cornflour, as this can result in a grainy filling. Gradually whisk in the 250ml of water until everything is well combined. Place the saucepan over medium heat and cook, stirring constantly, until the mixture thickens to a pudding-like consistency. This usually takes about 5-8 minutes. Be patient and keep stirring to prevent scorching on the bottom of the pan. Once thickened, remove from the heat and stir in the 120ml of fresh lemon juice and the zest of 1 lemon. The lemon juice will add a wonderful brightness and tang, while the zest provides an even more intense lemon aroma. Finally, stir in the 2 tablespoons of unsalted butter until it has melted and is fully incorporated. This adds a lovely richness and smooth texture to the filling. Pour the hot lemon filling into the cooled pastry cases, dividing it as evenly as possible.
Whipping up the Dreamy Meringue
It’s time to create that cloud-like meringue topping. Ensure your bowl and whisk are scrupulously clean and free from any grease, as this can prevent the egg whites from whipping properly. In a clean, dry bowl, whisk the 4 large egg whites until they form soft peaks. This means when you lift the whisk, the peaks curl over. Gradually add the 200g of granulated sugar, a tablespoon at a time, while continuing to whisk. Keep whisking until the sugar has completely dissolved and the meringue is stiff, glossy, and holds firm peaks. You can test if the sugar has dissolved by rubbing a little meringue between your fingertips; if it feels gritty, keep whisking. Stir in the 1 teaspoon of white vinegar or lemon juice (this helps to stabilize the meringue) and the 1 teaspoon of vanilla extract for a lovely aroma.
Assembling and Baking to Perfection
Spoon the meringue generously over the lemon filling in each pie. You can create swirls and peaks with your spoon to give it a beautiful, decorative finish. The key here is to ensure the meringue completely covers the filling, sealing it in. This prevents the meringue from shrinking away from the crust during baking. Once you’re happy with the appearance, it’s time to bake. Place the pies back into the preheated oven at 190°C (170°C fan/Gas Mark 5) for about 10-12 minutes, or until the meringue is beautifully golden brown. Keep a close eye on them, as meringue can brown very quickly. Once they’re perfectly toasted, carefully remove them from the oven and let them cool completely on a wire rack. This is crucial for the filling to set properly and for the meringue to firm up. Resist the temptation to slice into them while they’re still warm!
These Daisy Lemon Meringue Pies are best enjoyed chilled. The contrast between the crisp pastry, the zesty lemon curd, and the sweet, airy meringue is simply divine. They are a true delight to make and even more of a pleasure to eat. Enjoy every sunny bite!

Conclusion:
And there you have it – your guide to creating a truly delightful Daisy Lemon Meringue Pie! I hope you’ve found this recipe inspiring and achievable. This pie is a winner because it strikes the perfect balance: the bright, zesty tang of lemon curd beautifully complemented by the sweet, cloud-like meringue. It’s a classic for a reason, offering a refreshing and elegant dessert that’s sure to impress. Whether you’re a seasoned baker or just starting out, I encourage you to give this Daisy Lemon Meringue Pie a try. You’ll be rewarded with a show-stopping dessert that tastes as amazing as it looks.
For serving, a slice of this pie is wonderful on its own, but it also pairs beautifully with a light dusting of powdered sugar or a few fresh berries. Consider serving it slightly chilled for an extra refreshing treat, especially on a warm day. If you’re feeling adventurous, try adding a hint of lavender to the meringue for a floral twist, or a touch of limoncello to the lemon filling for an extra kick.
Frequently Asked Questions:
Why is my meringue weeping?
Meringue weeping, or forming liquid beads, often happens due to undissolved sugar or humidity. Ensure your sugar is fully dissolved in the egg whites by whisking until smooth and glossy. Baking the meringue at a slightly lower temperature for longer can also help drive off moisture.
Can I make the lemon filling ahead of time?
Yes, absolutely! The lemon curd can be made up to two days in advance and stored in an airtight container in the refrigerator. This can save you significant time on assembly day, making the process much smoother.
What’s the best way to store leftover pie?
Leftover Daisy Lemon Meringue Pie is best stored, uncovered, in the refrigerator to prevent the meringue from becoming soggy. If you need to cover it, a loose tent of plastic wrap is preferable to a tight seal. It’s generally best enjoyed within a day or two for optimal texture.
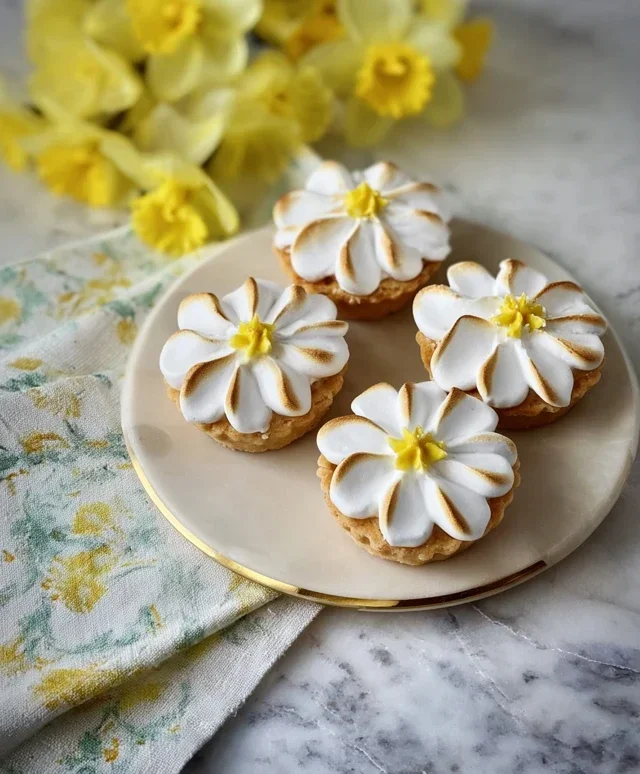
Daisy Lemon Meringue Pies
Individual lemon meringue pies with a crisp shortcrust pastry and a tangy lemon filling topped with fluffy meringue.
Ingredients
-
125g plain flour
-
35g icing sugar
-
60g cold unsalted butter
-
1 large egg yolk
-
1 tbsp water
-
4 large egg whites
-
200g caster sugar
-
4 unwaxed lemons, zested and juiced (approx 150ml juice)
-
50g cornflour
-
50g unsalted butter
Instructions
-
Step 1
For the pastry: Rub the butter into the flour and icing sugar until it resembles breadcrumbs. Stir in the egg yolk and water to form a dough. Wrap and chill for 30 minutes. -
Step 2
Preheat oven to 180°C (160°C fan/Gas Mark 4). Roll out the pastry and line 6 small pie tins. Prick the bases with a fork. Blind bake for 15 minutes. -
Step 3
For the filling: Whisk together the lemon juice, zest, caster sugar, cornflour, and 2 egg yolks (from the meringue eggs) until smooth. Cook gently, stirring, until thickened. -
Step 4
Stir in the 50g of butter until melted. Pour the lemon filling into the blind-baked pastry cases. -
Step 5
For the meringue: Whisk the egg whites until stiff peaks form. Gradually add the 200g caster sugar, whisking continuously until thick and glossy. -
Step 6
Spoon or pipe the meringue over the lemon filling, ensuring it covers the edges to seal. Bake at 170°C (150°C fan/Gas Mark 3) for 15-20 minutes, or until the meringue is golden brown.
Important Information
Nutrition Facts (Per Serving)
It is important to consider this information as approximate and not to use it as definitive health advice.
Allergy Information
Please check ingredients for potential allergens and consult a health professional if in doubt.