Easy No-Knead Focaccia Bread Recipe
No-Knead Focaccia Bread is the kind of culinary magic that makes you feel like a baking wizard, even if you’ve never kneaded dough in your life. Imagin extracte a golden, airy loaf, infused with the fragrant aroma of olive oil and herbs, with a delightfully crisp crust and a pillowy soft interior. That’s the promise of this incredible recipe. People absolutely adore focaccia for its rustic charm and incredible versatility. It’s the perfect accompaniment to soups and salads, a delightful base for sandwiches, or simply a satisfying snack enjoyed on its own. What truly sets this No-Knead Focaccia Bread apart is its astonishing simplicity. You don’t need fancy equipment or hours of labor. The secret lies in a long, slow fermentation that develops incredible flavor and texture with minimal effort, allowing you to achieve bakery-quality results right in your own kitchen.
Ingredients:
- 4¾ cups all-purpose flour, plus more for dusting
- 4½ tablespoons olive oil, plus more for greasing and drizzling
- 2 teaspoons salt
- 1½ tablespoon instant dry yeast
- 2⅓ cups warm water (100–110°F)
- Coarse salt, for topping (optional)
- Dried rosemary, for topping (optional)
Preparing the Dough
Step 1: Combining the Dry Ingredients
In a large bowl, whisk together the 4¾ cups of all-purpose flour and the 2 teaspoons of salt. Ensure these are evenly distributed. This step is crucial for ensuring the leavening agents and salt are spread throughout the flour, leading to a consistent rise and flavor in your No-Knead Focaccia Bread. Next, sprinkle the 1½ tablespoon of instant dry yeast over the flour mixture. Give it another gentle whisk. Instant yeast doesn’t require proofing, which is why this no-knead method is so straightforward. It’s designed to be mixed directly with the other dry ingredients.
Step 2: Adding the Wet Ingredients and Initial Mixing
Create a well in the center of your dry ingredients. Pour in the 2⅓ cups of warm water. The water temperature is important here; it should be between 100–110°F. Water that is too hot can kill the yeast, and water that is too cool won’t activate it effectively. Add the 4½ tablespoons of olive oil to the well. Now, using a wooden spoon or a sturdy spatula, begin extract to mix the ingredients together. Start from the center and gradually incorporate the flour from the sides. Continue mixing until just combined. The dough will be very sticky and shaggy at this stage, and that’s perfectly normal for a no-knead recipe. Don’t be tempted to add more flour; the stickiness is what allows for the development of gluten without any actual kneading.
First Rise and Shaping
Step 3: The First Rise (Bulk Fermentation)
Lightly grease a clean bowl with a little extra olive oil. Transfer the shaggy dough into the prepared bowl, turning it once to coat the surface with oil. This prevents a dry skin from forming. Cover the bowl tightly with plastic wrap or a damp kitchen towel. Place the bowl in a warm, draft-free spot to rise for at least 1 hour, or until it has doubled in size. The ideal environment for rising is around 75–80°F. If your kitchen is cool, you can place it in a slightly warmed oven (turned off after preheating to its lowest setting) or near a sunny window. This extended, slow rise allows the gluten to develop naturally and builds incredible flavor and texture into the No-Knead Focaccia Bread.
Step 4: Preparing for the Second Rise and Dimpling
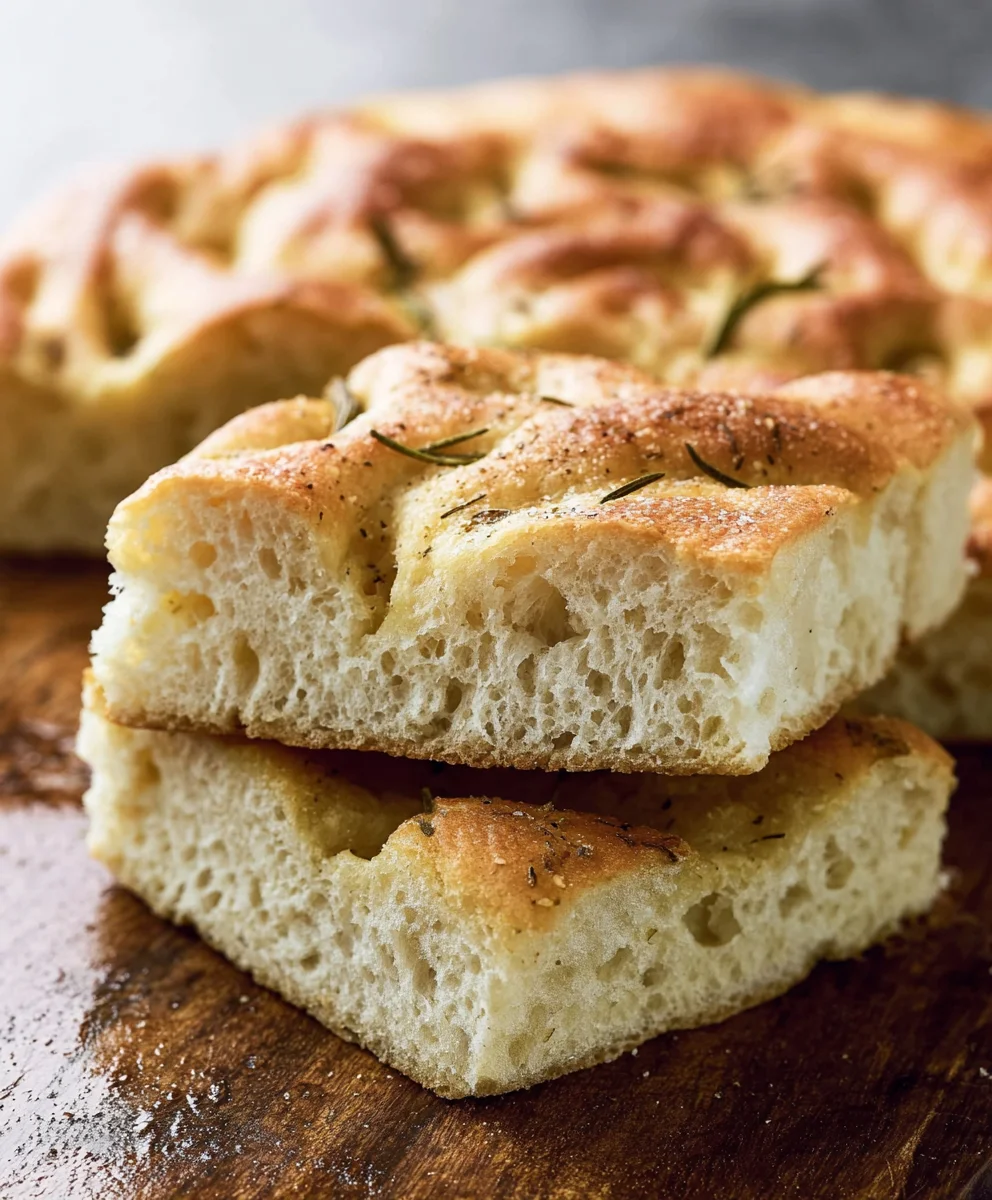
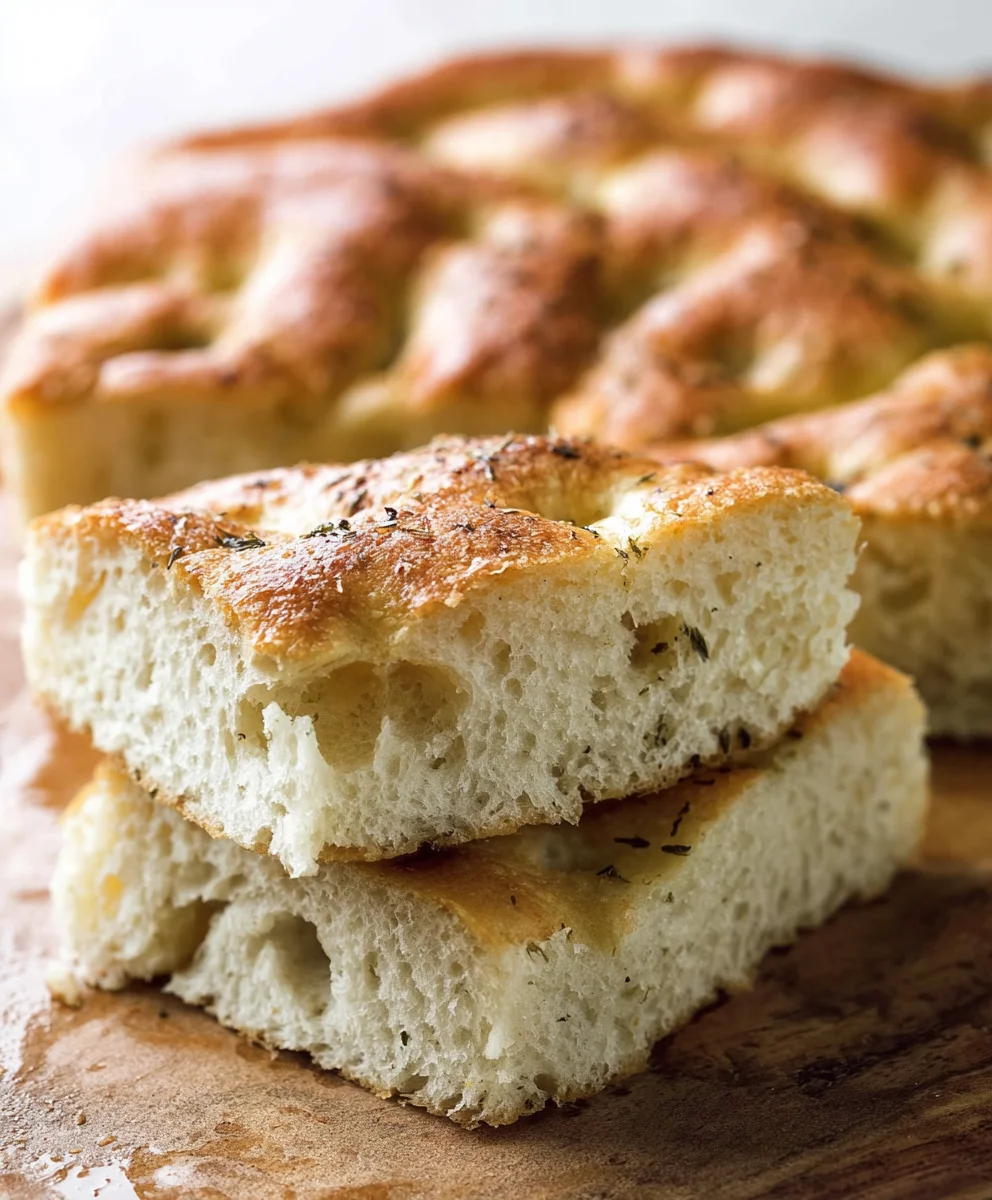
Generously grease a 9×13 inch baking pan or a similar-sized rimmed baking sheet with about 2 tablespoons of olive oil. Pour the risen dough directly into the prepared pan. It will still be quite soft. Gently stretch and coax the dough to fill the corners of the pan. This might take a few minutes and some gentle persuasion. Don’t force it; let it relax for a few minutes if it resists, then try again. Once the dough is mostly spread out, cover the pan again and let it rest for another 30 to 45 minutes. During this time, the dough will puff up again. After this rest, uncover the dough and generously drizzle another 1 to 2 tablespoons of olive oil over the surface. Using your fingertips, gently dimple the entire surface of the dough. Press your fingers into the dough, creating little wells. These dimples are characteristic of focaccia and help create those delightful pockets for oil and toppings to settle into.
Baking the Focaccia
Step 5: Adding Toppings and Baking
Preheat your oven to 425°F (220°C). If you are using optional toppings, now is the time to sprinkle them over the dimpled dough. Scatter some coarse salt evenly across the surface, and sprinkle dried rosemary if desired. The coarse salt will create a beautiful, crunchy crust. Once the oven is fully preheated, carefully place the baking pan on the middle rack. Bake for 25 to 30 minutes, or until the focaccia is deeply golden brown on top and has risen beautifully. You should see some lovely bubbles forming around the edges. When it’s done, the crust will be crisp, and the interior will be airy and tender. Remove the focaccia from the oven and let it cool in the pan for about 5 minutes before carefully inverting it onto a wire rack to cool completely or serving it warm. Drizzling a little more olive oil over the hot focaccia immediately after it comes out of the oven adds an extra layer of richness and shine.
Conclusion:
I hope you’ve enjoyed learning how to create the most delightful No-Knead Focaccia Bread! This recipe is truly a testament to how simple ingredients and minimal effort can yield incredibly rewarding results. The fluffy interior and beautifully crisp crust are sure to impress, whether you’re serving it as an appetizer, a side dish, or the star of your meal. I encourage you to try this recipe and experience the joy of freshly baked focaccia right in your own kitchen. Don’t be afraid to experiment with different toppings to make it your own!
For serving, this No-Knead Focaccia Bread is wonderfully versatile. It’s fantastic served warm with a drizzle of good quality olive oil and a sprinkle of sea salt. It also makes a superb base for sandwiches, bruschetta, or served alongside soups and stews.
When it comes to variations, the possibilities are endless! Consider adding fresh rosemary, thyme, or oregano to the dough for an aromatic twist. For a savory kick, try topping your focaccia with cherry tomatoes, olives, caramelized onions, or a sprinkle of grated Parmesan cheese before baking.
Frequently Asked Questions:
Can I make the No-Knead Focaccia Bread ahead of time?
Yes, you can certainly prepare the dough a day in advance. After the initial rise, punch down the dough, cover it tightly, and refrigerate it. Bring it to room temperature for about 30-60 minutes before proceeding with the final proofing and baking.
My focaccia didn’t get very crispy. What did I do wrong?
A few things can affect crispiness. Ensure your oven is preheated sufficiently, and consider using a baking stone or a heavy-duty baking sheet. Also, don’t shy away from generously oiling the pan and the top of the dough before baking. Baking at a slightly higher temperature for the last few minutes can also help achieve that desired crisp.
Can I freeze the No-Knead Focaccia Bread?
Absolutely! Once the focaccia has cooled completely, you can wrap it tightly in plastic wrap and then in aluminum foil. It will keep well in the freezer for up to 2-3 months. To reheat, thaw it at room temperature and then warm it in a preheated oven at around 350°F (175°C) for a few minutes until heated through.
Easy No-Knead Focaccia Bread
A simple and delicious recipe for no-knead focaccia bread, perfect for beginners. This recipe yields a crusty exterior and a soft, airy interior.
Ingredients
-
4¾ cups all-purpose flour (630 grams), plus more for dusting
-
4½ tablespoons olive oil (59 grams), plus more for greasing and drizzling
-
2 teaspoons salt (12 grams)
-
1½ tablespoon instant dry yeast (13 grams)
-
2⅓ cups warm water (100–110°F; 529 grams)
-
Coarse salt, for topping (optional)
-
Dried rosemary, for topping (optional)
Instructions
-
Step 1
In a large bowl, whisk together the all-purpose flour and salt. Sprinkle the instant dry yeast over the flour mixture and whisk again. Ensure all ingredients are evenly distributed. -
Step 2
Create a well in the center of the dry ingredients. Pour in the warm water and olive oil. Using a wooden spoon or spatula, mix until just combined. The dough will be very sticky and shaggy. -
Step 3
Lightly grease a clean bowl with olive oil. Transfer the dough, turning to coat. Cover tightly and let rise in a warm spot for at least 1 hour, or until doubled in size. -
Step 4
Generously grease a 9×13 inch pan with olive oil. Pour the risen dough into the pan and gently stretch to fill. Cover and let rest for 30-45 minutes. Drizzle with more olive oil and dimple the surface with your fingertips. -
Step 5
Preheat oven to 425°F (220°C). Sprinkle with coarse salt and dried rosemary, if using. Bake for 25-30 minutes, or until deeply golden brown. -
Step 6
Remove from oven and let cool in the pan for 5 minutes. Invert onto a wire rack to cool completely or serve warm. Drizzle with additional olive oil after baking if desired.
Important Information
Nutrition Facts (Per Serving)
It is important to consider this information as approximate and not to use it as definitive health advice.
Allergy Information
Please check ingredients for potential allergens and consult a health professional if in doubt.