Easy Homemade Strawberry Ice Cream Recipe
Homemade strawberry ice cream is a quintessential summer delight, a creamy, dreamy concoction that instantly transports us to sun-drenched afternoons and carefree days. There’s something undeniably magical about the vibrant pink hue and the sweet, slightly tart burst of fresh strawberries that makes this dessert a perennial favorite. We all have those childhood memories tied to a scoop of this iconic treat, and the anticnon-alcoholic ipation of that first spoonful is enough to make your mouth water. What truly makes homemade strawberry ice cream so special is the ability to capture the pure essence of ripe, juicy strawberries, unadulterated by artificial flavors. It’s a taste of pure, unadulterated joy, made with love and a few simple ingredients, resulting in a creamy, luscious experience that store-bought versions simply can’t replicate.
Why You’ll Love This Recipe
Get ready to swirl your spoon through the most delightful homemade strawberry ice cream you’ve ever tasted!
Indulge in Summer’s Sweetness: Your Guide to Homemade Strawberry Ice Cream
There’s something truly magical about homemade strawberry ice cream. The vibrant pink hue, the burst of fresh berry flavor, and the unbelievably creamy texture – it’s a taste of pure summer bliss that store-bought simply can’t replicate. Forget those chalky, artificial-tasting frozen desserts. Today, we’re diving into the delightful world of crafting your very own strawberry masterpiece from scratch. It’s easier than you might think, and the reward is immeasurable. Imagin extracte scooping this luscious treat on a warm afternoon, the sweetness of ripe strawberries melting on your tongue. This recipe is designed to be straightforward, allowing the natural goodness of the ingredients to shine.
Ingredients:
Crafting Your Creamy Strawberry Dream
The process of making homemade strawberry ice cream is a labor of love, but one that yields incredibly delicious results. We’ll be focusing on coaxing the most intense strawberry flavor possible while ensuring a luxuriously smooth and creamy texture. This recipe is perfect for those who appreciate the simple, yet profound, joy of creating something beautiful and delicious with their own two hands.
Preparing the Strawberry Base
The foundation of any great strawberry ice cream is, of course, the strawberries themselves. For the best flavor, I highly recommend using ripe, in-season strawberries. Their natural sweetness and vibrant aroma will translate beautifully into our ice cream. Dicing them allows them to break down more easily and release their juices, infusing the entire mixture with their delightful essence.
1. In a medium bowl, combine the hulled and diced strawberries with the honey and granulated sugar. The honey adds a subtle floral note that complements the strawberries beautifully, while the sugar contributes to both sweetness and texture, preventing the ice cream from becoming icy. Gently stir these ingredients together.
2. Add the lemon juice to the strawberry mixture. The lemon juice might seem counterintuitive in a sweet dessert, but it plays a crucial role. It brightens the strawberry flavor, preventing it from tasting flat or overly sweet, and also helps to cut through the richness of the cream, creating a more balanced and refreshing taste.
3. Let the strawberry mixture sit at room temperature for at least 30 minutes, or even up to an hour. This maceration period is key. As the sugar draws out the juices from the strawberries, they will soften and release their vibrant color and intense flavor. You’ll notice a beautiful pink syrup forming at the bottom of the bowl. This syrupy liquid is packed with all the delicious strawberry essence we want in our ice cream. Give it a gentle stir occasionally during this time.
Creating the Ice Cream Base
Once our strawberries have had time to work their magic, it’s time to create the creamy custard base that will form the body of our ice cream. This is where we’ll bring in the dairy elements and the warm vanilla notes.
4. In a separate, larger bowl, whisk together the heavy whipping cream, half and half, and vanilla extract until just combined. You don’t want to over-whip this mixture at this stage; we’re just creating a smooth liquid base. The heavy whipping cream provides the richness and luxurious texture that defines good ice cream, while the half and half lightens it slightly, making it less dense and more scoopable. The vanilla extract adds a classic, comforting aroma and flavor that pairs wonderfully with strawberries.
Combining and Churning
Now comes the exciting part – bringin extractg all our elements together and transforming them into frozen perfection. The method for churning will depend on whether you have an ice cream maker.
5. Gently mash the macerated strawberries with a fork or potato masher until they reach your desired consistency. Some people prefer small chunks of strawberry, while others like a smoother puree. I personally enjoy a few discernible pieces for a bit of texture. Once mashed, carefully pour the entire strawberry mixture, including all that glorious pink syrup, into the cream mixture. Stir gently to combine thoroughly. Make sure to scrape out every last drop of that delicious strawberry syrup from the bowl!
If you have an ice cream maker: Pour the combined strawberry and cream mixture into your ice cream maker and churn according to the manufacturer’s instructions. This usually takes about 20-30 minutes, or until the ice cream has thickened to a soft-serve consistency.
If you don’t have an ice cream maker: Pour the mixture into a freezer-safe container. Freeze for 1 hour. Remove from the freezer and vigorously whisk the mixture with a fork or hand mixer to break up any ice crystals. Repeat this process every hour for about 4-5 hours, or until the ice cream is firm and scoopable. This manual churning method requires a bit more patience but still yields a wonderful result.
Freezing and Enjoying
Once churned (either by machine or by hand), the ice cream will have a soft-serve consistency. This is the perfect time to transfer it to a freezer-safe container. Cover the surface of the ice cream directly with parchment paper or plastic wrap to prevent ice crystals from forming on top, then seal the container tightly. Place it in the freezer for at least 4 hours, or until it is firm enough to scoop. This final freeze allows the flavors to meld beautifully and the ice cream to reach its ideal texture.
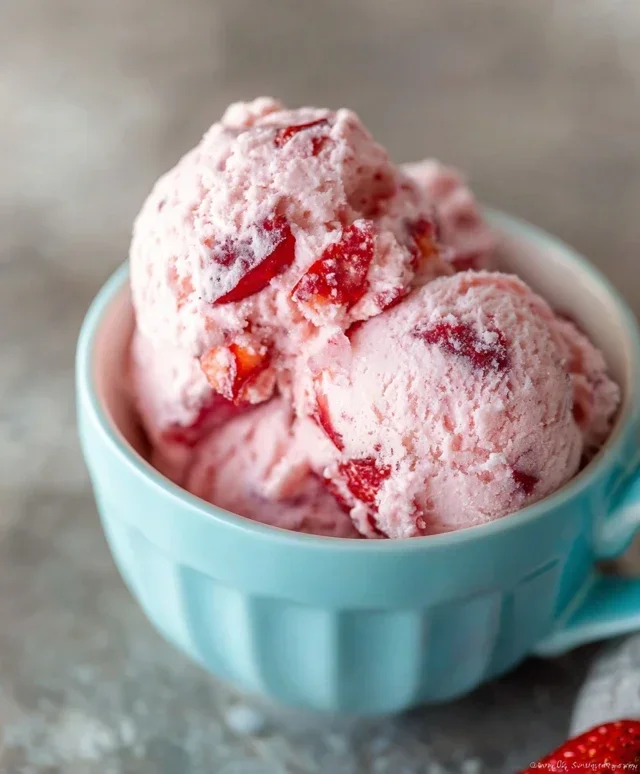
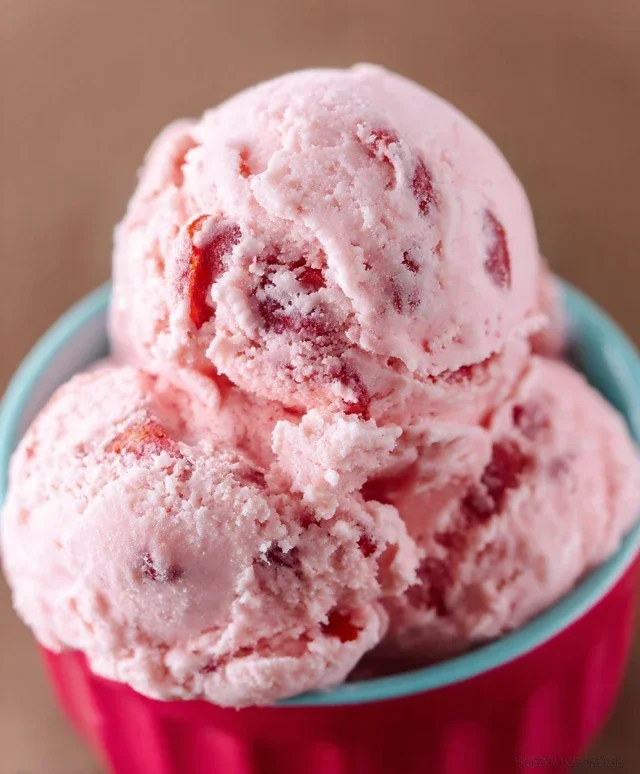
Serve scoops of your glorious homemade strawberry ice cream in bowls or cones. Garnish with a fresh strawberry or a sprig of mint for an extra touch of elegance. Enjoy the fruits of your labor – a truly exceptional dessert that’s bursting with fresh, natural flavor. You’ve just created a taste of pure summer, and it’s absolutely delicious!
Conclusion:
And there you have it – your guide to creating the most wonderfully creamy and intensely flavored homemade strawberry ice cream! This recipe is truly a winner because it lets you control every ingredient, resulting in a fresh, vibrant taste that store-bought versions simply can’t match. Imagin extracte the satisfaction of scooping out your own batch of pure strawberry bliss, bursting with ripe fruit goodness and a perfectly balanced sweet and tangy profile. It’s a delightful summer treat, a fantastic dessert for special occasions, or simply a way to brighten any ordinary day.
To serve, this homemade strawberry ice cream is divine on its own, of course. But for an extra treat, consider topping it with fresh strawberry slices, a drizzle of balsamic glaze for a sophisticated twist, or a sprinkle of toasted almonds for added crunch. You can also use it as the base for decadent milkshakes or as a luscious accompaniment to warm fruit crum extractbles or brownies.
Don’t be afraid to experiment with variations! Add a splash of lemon juice for extra brightness, a hint of vanilla extract to deepen the flavors, or even some finely chopped basil for a surprisingly delightful herbaceous note. The possibilities are endless, and the joy of creating something so delicious from scratch is immense. I truly encourage you to give this recipe a try – I’m confident you’ll fall in love with the results!
Frequently Asked Questions:
Why is my homemade strawberry ice cream icy?
An icy texture often happens if your mixture isn’t churned long enough, or if it’s not chilled thoroughly before churning. Ensure your base is very cold before it goes into the ice cream maker. Also, make sure your ice cream maker’s bowl is frozen solid according to the manufacturer’s instructions. Over-churning can sometimes lead to iciness as well, so aim for the consistency of soft-serve.
Can I make this recipe without an ice cream maker?
Absolutely! While an ice cream maker makes things easier, you can achieve a creamy result by using the no-churn method. This typically involves whipping heavy cream and condensed milk together, then folding in your strawberry puree. You’ll then freeze it in a loaf pan, stirring vigorously every 30-45 minutes for the first 2-3 hours to break up ice crystals. It requires a bit more manual effort but is definitely doable!
Homemade Strawberry Ice Cream
A delicious and easy homemade strawberry ice cream recipe.
Ingredients
-
1 1/2 cups strawberries, hulled and diced
-
2 Tbsp honey
-
1/2 cup granulated sugar
-
1 tsp lemon juice
-
1 cup heavy whipping cream
-
1/2 cup half and half
-
1 tsp vanilla extract
Instructions
-
Step 1
Combine hulled and diced strawberries, honey, granulated sugar, and lemon juice in a bowl. Let sit for 15-20 minutes to macerate. -
Step 2
Puree the strawberry mixture until smooth using an immersion blender or food processor. -
Step 3
In a separate bowl, whisk together the heavy whipping cream, half and half, and vanilla extract. -
Step 4
Gently fold the strawberry puree into the cream mixture. -
Step 5
Pour the mixture into an ice cream maker and churn according to the manufacturer’s instructions. -
Step 6
Transfer the churned ice cream to an airtight container and freeze for at least 4 hours, or until firm.
Important Information
Nutrition Facts (Per Serving)
It is important to consider this information as approximate and not to use it as definitive health advice.
Allergy Information
Please check ingredients for potential allergens and consult a health professional if in doubt.