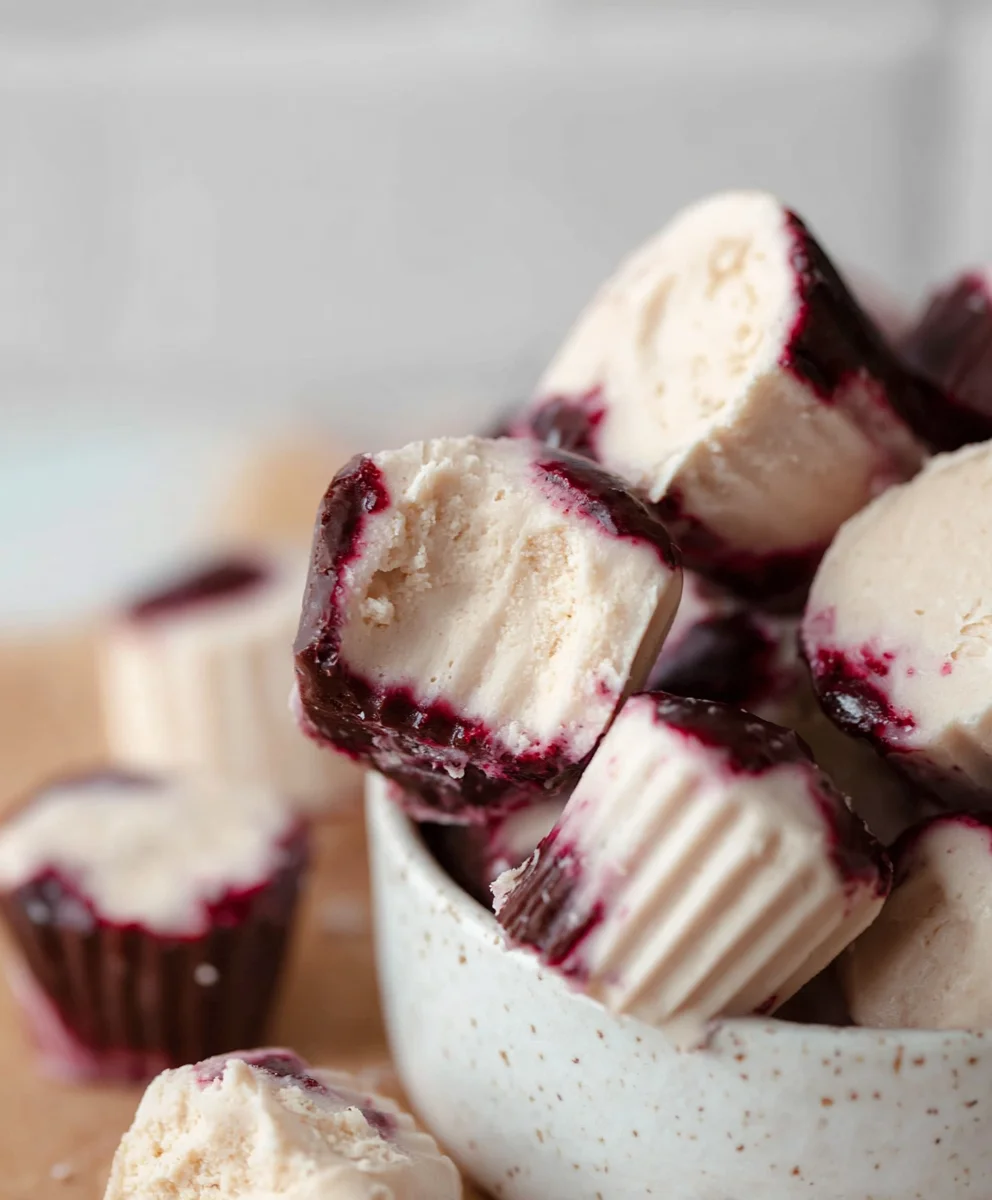
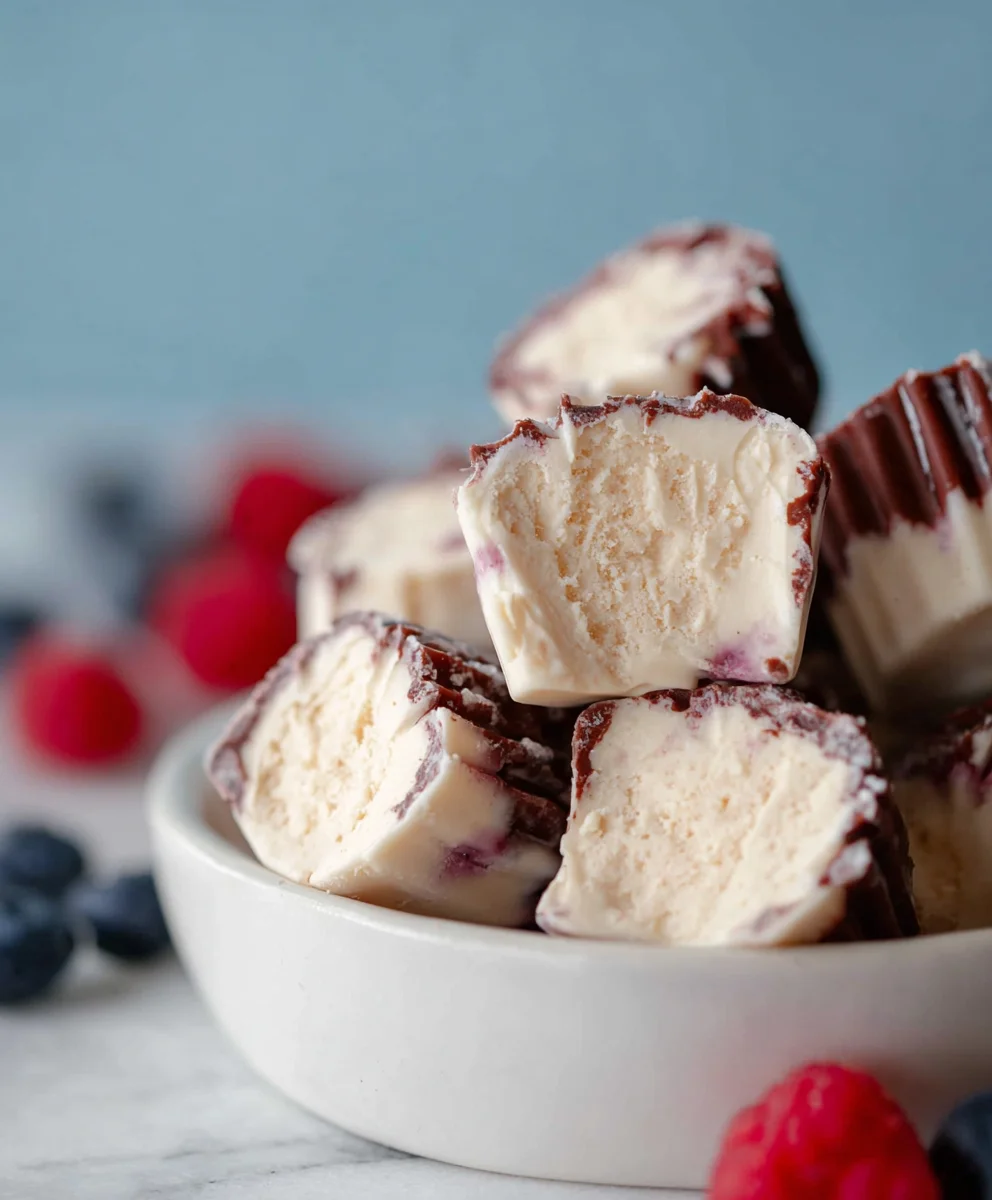
Easy Dairy-free Frozen Yogurt Bites Healthy Treat
Easy Frozen Yogurt Bites (Dairy-free option) are the ultimate guilt-free treat that’s surprisingly simple to whip up! Who doesn’t love a refreshing burst of sweet, creamy goodness, especially when it requires minimal effort and caters to various dietary needs? These delightful morsels have become a go-to for families looking for a healthier alternative to traditional ice cream, and for good reason. They’re customizable, fun to eat, and perfect for those warm afternoons or a post-dinner sweet craving. What truly sets these Easy Frozen Yogurt Bites (Dairy-free option) apart is their incredible versatility; you can flavor them with just about anything you can imagin extracte, from vibrant berries to rich cocoa. Plus, the dairy-free version is a game-changer for those avoiding lactose or looking for plant-based options, proving that indulgence and health can absolutely go hand-in-hand.
Ingredients:
- 1 cup thick Greek yogurt (or thick coconut yogurt for a dairy-free option)
- 3 tablespoons cashew butter (or almond butter as a substitute)
- 3 tablespoons maple syrup (you can add an extra tablespoon if you prefer it sweeter)
- 3 tablespoons of your favorite protein powder (this is entirely optional and only recommended if you genuinely enjoy the taste of your chosen protein powder)
- 1 teaspoon vanilla extract
- A good pinch of sea salt (Maldon or Celtic salt are excellent choices)
- A handful of cacao nibs (optional, but they add a lovely crunch and are packed with antioxidants)
- 3/4 cup chocolate chips (or finely chopped chocolate)
- 1/2 tablespoon coconut oil
Preparing the Base for Your Frozen Yogurt Bites
Step 1: Combine the Yogurt and Nut Butter
First, in a medium-sized mixing bowl, we’ll start by combining our creamy base. Add the 1 cup of thick Greek yogurt (or your chosen coconut yogurt if you’re going dairy-free). Make sure your yogurt is nice and thick; if it’s a bit too runny, you can strain it through a cheesecloth for about 30 minutes to remove excess liquid. To this, add the 3 tablespoons of cashew butter. If you don’t have cashew butter on hand, almond butter is a fantastic alternative, offering a similar rich, nutty flavor and smooth texture. Whisk these two ingredients together thoroughly until they are completely smooth and well-incorporated. You’re looking for a uniform consistency, with no streaks of nut butter visible. This step is crucial for ensuring an even distribution of flavor and texture throughout your frozen bites.
Step 2: Sweeten and Enhance the Flavor
Now it’s time to add the sweetness and a hint of vanilla. Pour in the 3 tablespoons of maple syrup. Remember, this recipe is designed to be customizable, so if you have a preference for a sweeter treat, feel free to add another tablespoon of maple syrup at this stage. Whisk it in until it’s fully combined with the yogurt and nut butter mixture. Next, add the 1 teaspoon of vanilla extract. This classic flavoring will enhance the overall taste profile and add a wonderful aroma. Give it another good stir. Finally, for that subtle depth of flavor that really elevates sweet treats, add a generous pinch of sea salt. I personally love using flaky sea salts like Maldon or Celtic salt for their superior flavor and texture, but any good quality sea salt will do. Mix everything until it’s perfectly blended.
Step 3: Incorporate Optional Protein and Cacao Nibs
This is where you can really tailor these frozen yogurt bites to your needs and preferences. If you’re looking to boost the protein content, now is the time to add your protein powder. Carefully measure in the 3 tablespoons of your favorite protein powder. It’s essential to only use a protein powder you genuinely enjoy the taste of, as its flavor will be present in the final product. Whisk this in until there are no powdery clumps remaining and it’s smoothly integrated into the base. If you’re skipping the protein powder, just proceed to the next step. If you enjoy a little textural contrast and a hint of sophisticated bitterness, this is also the time to add your handful of cacao nibs. These little powerhouses are not only delicious but also rich in antioxidants. Stir them in gently, ensuring they are evenly distributed throughout the mixture.
Creating the Chocolatey Coating
Step 4: Melt the Chocolate and Coconut Oil
For the delicious chocolate shell that encases these bites, we need to prepare our chocolate coating. In a small, microwave-safe bowl or a double boiler, combine the 3/4 cup of chocolate chips (or chopped chocolate) with the 1/2 tablespoon of coconut oil. If you’re using a microwave, heat the mixture in 30-second intervals, stirring well after each interval, until the chocolate is fully melted and smooth. Be careful not to overheat the chocolate, as it can seize up and become grainy. If you’re using a double boiler, place the bowl over a pot of simmering water, ensuring the bottom of the bowl doesn’t touch the water. Stir continuously until the chocolate is melted and glossy. The coconut oil helps to create a smoother, more fluid chocolate coating that will harden nicely.
Assembling and Freezing Your Bites
Step 5: Form and Chill the Bites
Now for the fun part! You’ll want to prepare a baking sheet by lining it with parchment paper or a silicone baking mat. This will prevent the frozen yogurt bites from sticking. Using a small spoon or a mini ice cream scoop, carefully drop small dollops of your yogurt mixture onto the prepared baking sheet. Aim for bite-sized portions, roughly 1 to 1.5 inches in diameter. Once you have your yogurt base formed into individual bites on the tray, place the entire baking sheet into the freezer. Let them freeze for at least 2 to 3 hours, or until they are completely firm to the touch. This step is critical; the yogurt base needs to be solidly frozen before you can dip them in the chocolate. If they aren’t firm enough, the chocolate will melt them instead of coating them.
Step 6: Dip and Harden the Chocolate Coating
Once your yogurt bites are thoroughly frozen and firm, it’s time to add that irresistible chocolate shell. Take your baking sheet out of the freezer. Working quickly to prevent the yogurt from melting too much, dip each frozen yogurt bite into the melted chocolate mixture. You can use a fork to gently dip and coat each one, allowing any excess chocolate to drip back into the bowl. Alternatively, you can place a frozen bite on a fork and pour the melted chocolate over it until it’s fully covered. Place the chocolate-coated bites back onto the parchment-lined baking sheet. If the chocolate starts to harden too quickly, you can gently rewarm it slightly. Once all the bites are coated, return the baking sheet to the freezer and allow them to freeze for at least another 1 to 2 hours, or until the chocolate shell is completely hardened. This ensures a satisfying snap when you bite into them. Store your finished Easy Frozen Yogurt Bites in an airtight container in the freezer.
Conclusion:
There you have it! Crafting these Easy Frozen Yogurt Bites (Dairy-free option) is a delightful and rewarding experience. We’ve explored how simple ingredients can transform into a healthy, delicious, and refreshing treat perfect for any occasion. Whether you’re looking for a quick snack, a guilt-free dessert, or a fun activity to do with kids, these bites are sure to be a hit. Don’t be afraid to get creative and experiment with different flavors and toppings – that’s part of the fun!
For serving suggestions, these frozen yogurt bites are fantastic on their own, but they also make a wonderful addition to a breakfast parfait, a fruit salad, or even as a colorful garnish for other desserts. Think of them as little bursts of joy!
We’ve also touched upon variations, such as using different fruit purees for vibrant colors and natural sweetness, or adding a sprinkle of chia seeds for extra texture and nutrients. The possibilities are truly endless, allowing you to tailor these bites to your specific preferences and dietary needs.
I truly hope you enjoy making and, more importantly, devouring these Easy Frozen Yogurt Bites (Dairy-free option). They’re a testament to how simple, wholesome ingredients can create something truly special. So go ahead, give them a try, and let the frozen goodness begin extract!
Frequently Asked Questions:
Can I make these without a blender or food processor?
While a blender or food processor makes the initial pureeing process much easier, you could technically mash soft fruits like bananas or berries with a fork and then combine them with your yogurt. It might result in a slightly chunkier texture, but it would still be delicious!
How long do the Easy Frozen Yogurt Bites (Dairy-free option) last in the freezer?
Stored in an airtight container or freezer bag, these bites should stay fresh and delicious for up to 2-3 weeks. However, they are best enjoyed within the first week for optimal texture and flavor.
What are some good fruit combinations for the dairy-free version?
For the dairy-free option, consider combinations like mango and passionfruit for a tropical twist, or raspberry and blueberry for a classic berry flavor. Apple sauce or pear puree also work wonderfully as a base for sweetness and smooth texture.
Easy Dairy-free Frozen Yogurt Bites Healthy Treat
Deliciously simple dairy-free frozen yogurt bites with a customizable coating, perfect for a healthy treat.
Ingredients
-
1 cup thick Greek yogurt (or thick coconut yogurt for a dairy-free option)
-
3 tablespoons cashew butter (or almond butter as a substitute)
-
3 tablespoons maple syrup
-
3 tablespoons of your favorite protein powder (optional)
-
1 teaspoon vanilla extract
-
A good pinch of sea salt
-
A handful of cacao nibs (optional)
-
3/4 cup chocolate chips (or finely chopped chocolate)
-
1/2 tablespoon coconut oil
Instructions
-
Step 1
In a medium-sized mixing bowl, combine 1 cup of thick Greek yogurt (or coconut yogurt) with 3 tablespoons of cashew butter (or almond butter). Whisk until smooth and well-incorporated. -
Step 2
Add 3 tablespoons of maple syrup and 1 teaspoon of vanilla extract to the yogurt mixture. Stir until fully combined. Add a generous pinch of sea salt and mix again. -
Step 3
If using, stir in 3 tablespoons of your favorite protein powder until smooth. Optionally, add a handful of cacao nibs and stir gently to distribute. -
Step 4
Melt 3/4 cup of chocolate chips (or chopped chocolate) with 1/2 tablespoon of coconut oil in a microwave-safe bowl or double boiler until smooth and glossy. -
Step 5
Line a baking sheet with parchment paper. Drop small dollops (1-1.5 inches) of the yogurt mixture onto the prepared baking sheet. Freeze for at least 2-3 hours, or until firm. -
Step 6
Once frozen, quickly dip each yogurt bite into the melted chocolate mixture, allowing excess to drip off. Place the coated bites back onto the parchment-lined baking sheet. Return to the freezer for at least 1-2 hours, or until the chocolate is hardened. Store in an airtight container in the freezer.
Important Information
Nutrition Facts (Per Serving)
It is important to consider this information as approximate and not to use it as definitive health advice.
Allergy Information
Please check ingredients for potential allergens and consult a health professional if in doubt.