Easy Chia Seed Pudding – Healthy & Delicious Treat
Chia seed pudding is a true game-changer in my kitchen, and I’m so excited to share my favorite way to make it with you. If you’re looking for a ridiculously simple yet incredibly satisfying breakfast or snack, then this recipe is for you. It’s the kind of dish that makes you feel like you’ve accomplished something healthy and delicious before 9 AM, and honestly, who doesn’t want that? People adore chia seed pudding because it’s so versatile – you can flavor it endlessly and top it with whatever your heart desires. What truly makes this chia seed pudding special, beyond its ease and customizability, is its magical ability to transform from tiny seeds into a creamy, pudding-like texture that’s both comforting and invigorating. Get ready to fall in love with this healthy marvel!
Ingredients:
Let’s get started on making some incredibly easy and utterly delicious chia seed pudding! This recipe is my absolute go-to for a quick breakfast, a healthy snack, or even a light dessert. It’s packed with nutrients, incredibly versatile, and requires minimal effort. The magic of chia seeds is their ability to absorb liquid and transform into a wonderfully thick, pudding-like consistency. It’s a nutritional powerhouse, boasting fiber, omega-3 fatty acids, and protein, making it a fantastic way to fuel your day. I love how customizable it is – you can play with the milk, the sweetener, and the toppings to create endless variations.
Cooking Instructions
Making chia seed pudding is more about assembly and patience than actual cooking. The “cooking” happens magically in the refrigerator! Here’s how you do it, step by step:
Step 1: Combine the Base Ingredients
First, grab a bowl, jar, or even a shaker bottle. A wide-mouthed container is best for easy stirring and cleaning. Into your chosen vessel, carefully measure out your 3 tablespoons of chia seeds. These tiny powerhouses are the foundation of our pudding. Next, add your 1 tablespoon of maple syrup. If you prefer a less sweet pudding, you can always start with a little less and add more later. Alternatively, feel free to experiment with other sweeteners like agave nectar, honey (if not vegan), or even a sugar-free alternative like erythritol. Just ensure it’s a liquid or dissolves easily. Finally, add that fragrant 1 teaspoon of vanilla extract. Vanilla adds a wonderful depth of flavor that complements the subtle nuttiness of the chia seeds beautifully.
Step 2: Pour in the Liquid
Now comes the liquid component! Measure out your 3/4 cup of milk of choice. I often use unsweetened almond milk because it’s low in calories and has a neutral flavor, but oat milk adds a lovely creaminess. Coconut milk, especially the full-fat canned version, will give you a richer, more decadent pudding. Dairy milk is, of course, a classic choice as well. The key here is to ensure you have the right ratio of liquid to chia seeds. Too little liquid and your pudding might be too thick or clumpy. Too much, and it will be too runny. This 3/4 cup is a great starting point for a satisfying pudding consistency. Pour the milk gently over the chia seeds, maple syrup, and vanilla.
Step 3: Stir Thoroughly to Prevent Clumping
This is arguably the most crucial step for achieving a smooth, lump-free chia seed pudding. You need to stir everything together very, very well. Use a spoon or a whisk to break up any clumps of chia seeds that might try to form immediately. You want to ensure every single chia seed is coated in liquid. Continue stirring for about 30 seconds to a minute. It might seem like you’re stirring a lot, but it’s worth it. If you skip this thorough initial stir, you’ll likely end up with a layer of dense gel at the bottom and seeds floating on top.
Step 4: The First Rest and Second Stir
After your initial thorough stir, let the mixture sit undisturbed for about 5 to 10 minutes. During this short rest period, you’ll notice the chia seeds starting to absorb the liquid and swell. This is when they begin extract to form their gel-like coating. After this short rest, give the mixture another good stir. This second stir is vital for breaking up any new clumps that may have formed as the seeds began to hydrate. Make sure to scrape the bottom and sides of your container. This second stir ensures a more even distribution of the seeds and a smoother final texture.
Step 5: Refrigerate Until Thickened
Now for the patience part! Cover your container tightly with a lid or plastic wrap. Place it in the refrigerator. You need to let the chia seeds work their magic and thicken the pudding. The minimum time for this is about 2 to 3 hours, but for the best, thickest, and creamiest results, I highly recommend letting it chill overnight. The longer it sits, the thicker and more pudding-like it will become. When you take it out of the fridge, it should have a wonderfully thick, spoonable consistency. If it’s still a little too thin for your liking, you can always add a few more chia seeds and let it chill for another hour or so.
Step 6: Serve and Enjoy!
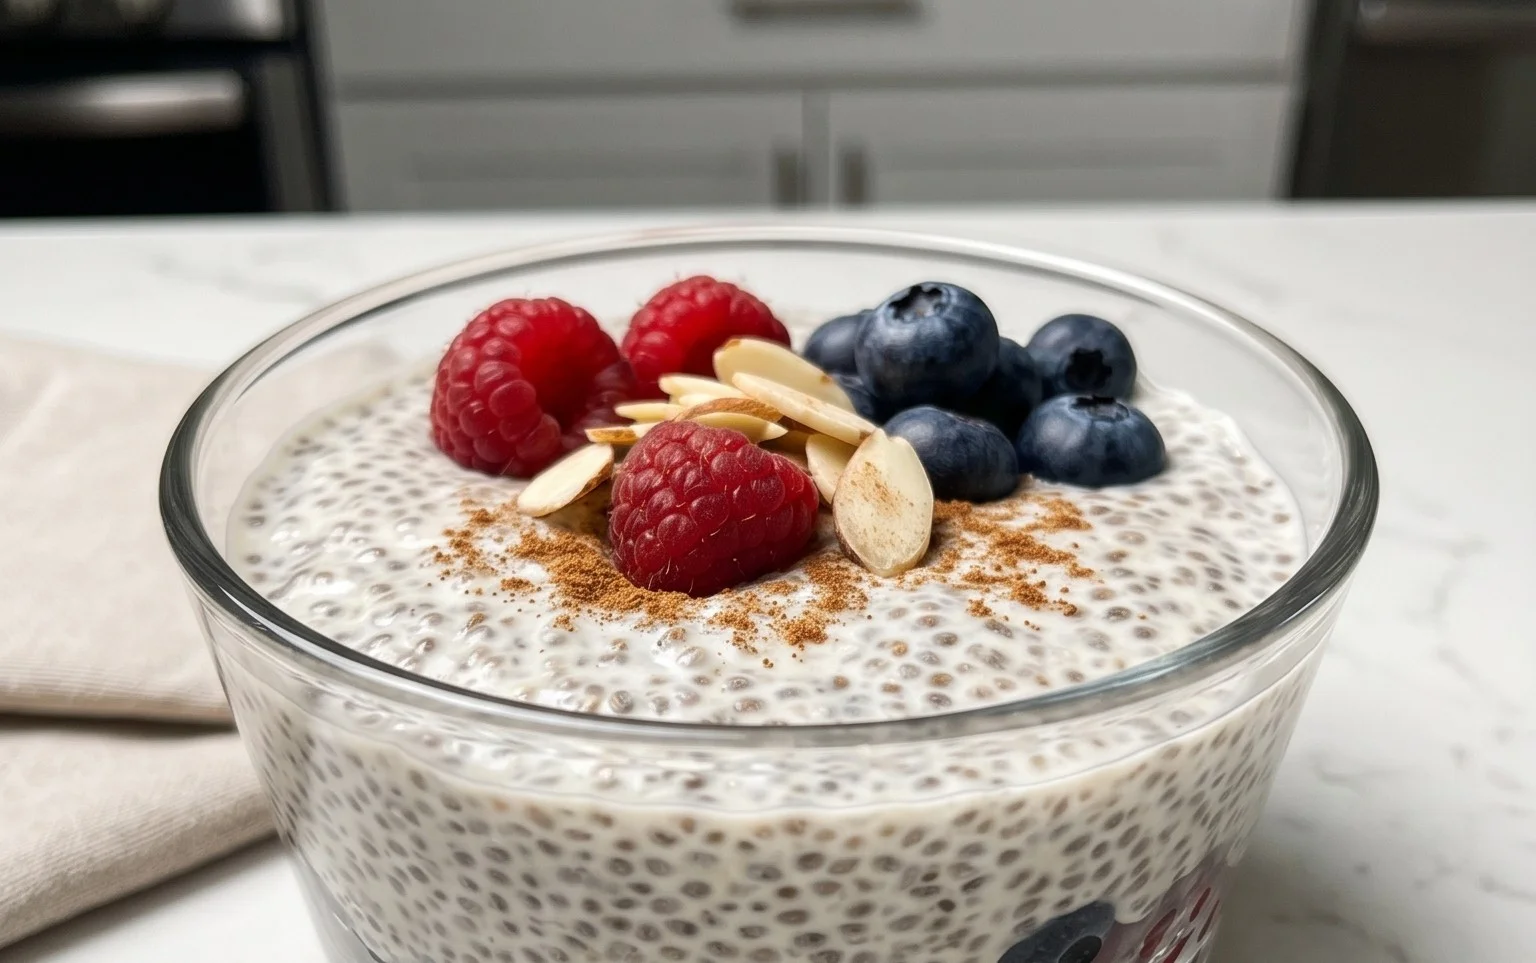
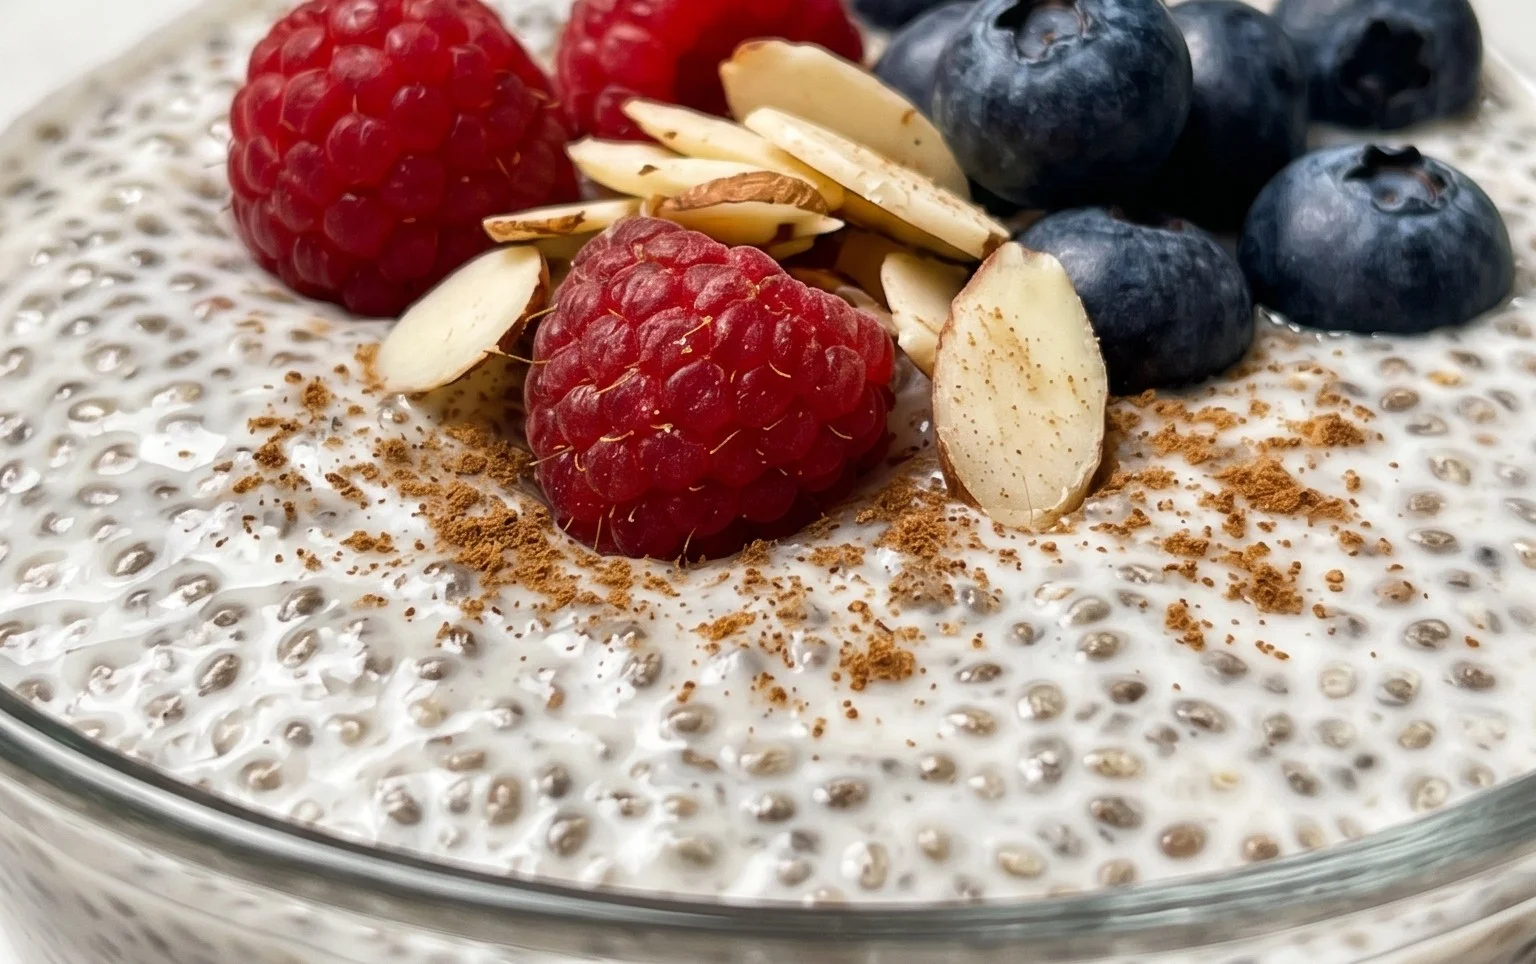
Once your chia seed pudding has reached your desired consistency, it’s ready to be enjoyed! You can serve it straight from the refrigerator. This is where the fun really begin extracts because chia seed pudding is incredibly versatile when it comes to toppings. Some of my favorites include fresh berries (strawberries, blueberries, raspberries), sliced banana, a sprinkle of granola for crunch, a dollop of yogurt, shredded coconut, or even a drizzle of extra maple syrup. You can also add a pinch of cinnamon or cocoa powder to the mixture before chilling for a flavored variation. It’s the perfect make-ahead meal or snack. Enjoy every spoonful of this healthy and delicious creation!
Conclusion:
You’ve now seen how incredibly simple and rewarding it is to make delicious chia seed pudding. This recipe is fantastic because it requires minimal effort, uses just a few pantry staples, and delivers a wonderfully creamy, nutrient-dense treat that’s perfect for breakfast, a snack, or even dessert. The natural gelling properties of chia seeds create a satisfying texture, and their rich omega-3 fatty acid and fiber content make it a healthy choice you can feel great about. Don’t hesitate to get creative with your toppings! Fresh berries, a drizzle of honey or maple syrup, toasted nuts, or a sprinkle of cinnamon are all wonderful additions. Feel free to experiment with different milk alternatives like almond milk, oat milk, or coconut milk to discover your favorite flavor profile. I truly encourage you to give this chia seed pudding recipe a try – it’s a game-changer for quick, healthy eating!
Frequently Asked Questions:
Can I make chia seed pudding ahead of time?
Absolutely! In fact, it’s best when made ahead. Refrigerating it for at least 4 hours, or preferably overnight, allows the chia seeds to fully absorb the liquid and create that perfect pudding consistency. It’s an ideal make-ahead breakfast or snack.
What if my chia seed pudding is too thick or too thin?
No worries! If it’s too thick, simply stir in a little more milk until it reaches your desired consistency. If it’s too thin, you can either let it sit in the refrigerator for a bit longer, as it will continue to thicken, or stir in a few more chia seeds and let it sit again.
Chia Seed Pudding Recipe
A simple and healthy chia seed pudding, perfect for breakfast or a light dessert. Customizable with your favorite milk and sweetener.
Ingredients
-
3 tablespoons chia seeds
-
1 tablespoon maple syrup
-
1 teaspoon vanilla
-
3/4 cup almond milk
-
1/4 cup blueberries
-
Pinch of cinnamon
Instructions
-
Step 1
In a bowl or jar, combine the chia seeds, maple syrup, and vanilla. -
Step 2
Add the almond milk and stir well to combine, ensuring no clumps of chia seeds. -
Step 3
Let the mixture sit for 5 minutes, then stir again to break up any gelled clumps. -
Step 4
Cover the bowl or jar and refrigerate for at least 30 minutes, or preferably overnight, until thickened. -
Step 5
Before serving, stir the pudding. Top with fresh blueberries and a pinch of cinnamon.
Important Information
Nutrition Facts (Per Serving)
It is important to consider this information as approximate and not to use it as definitive health advice.
Allergy Information
Please check ingredients for potential allergens and consult a health professional if in doubt.