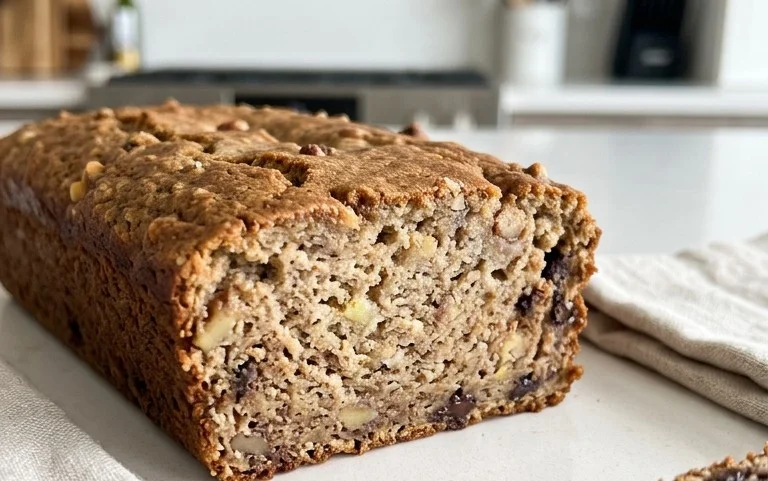
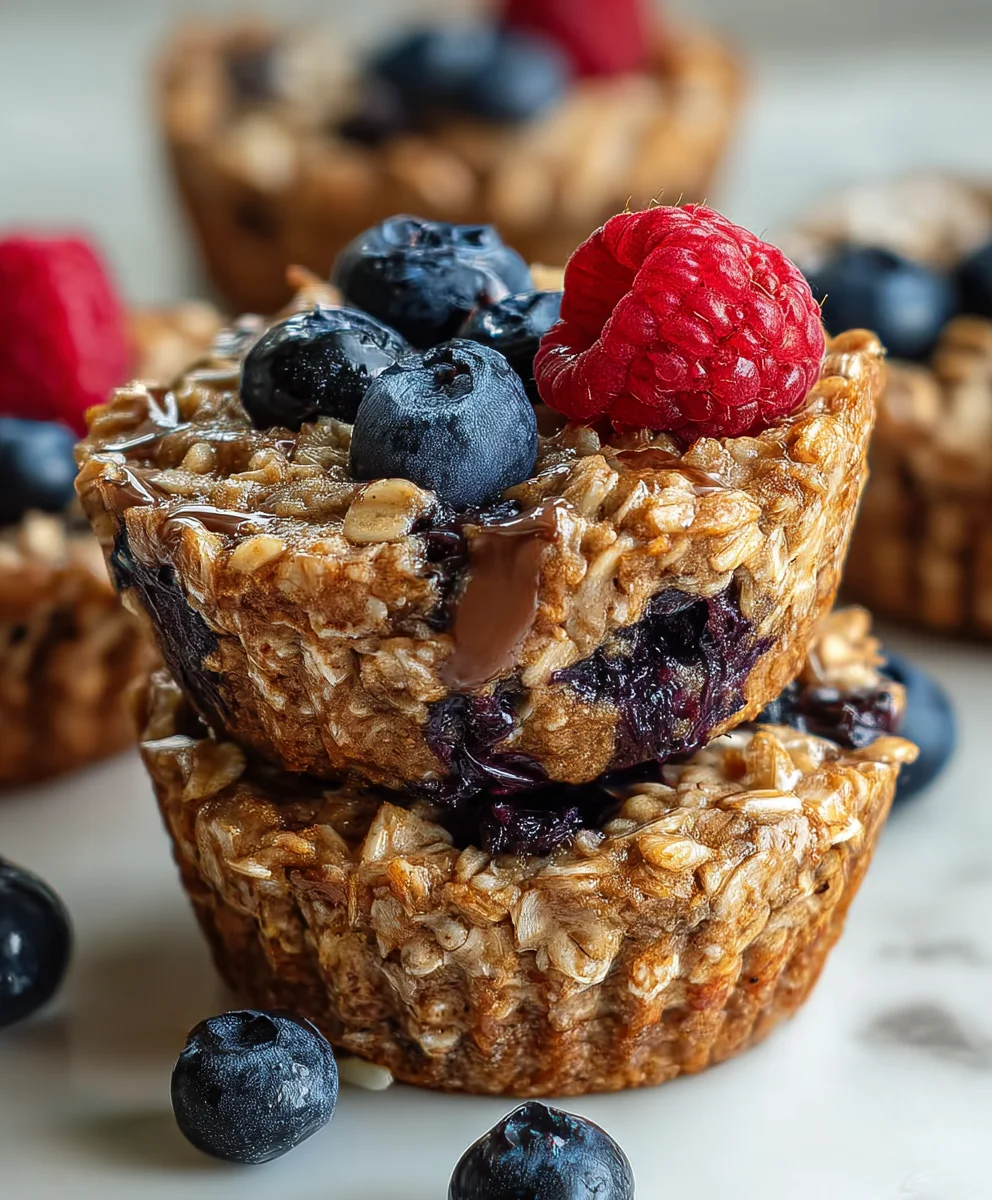
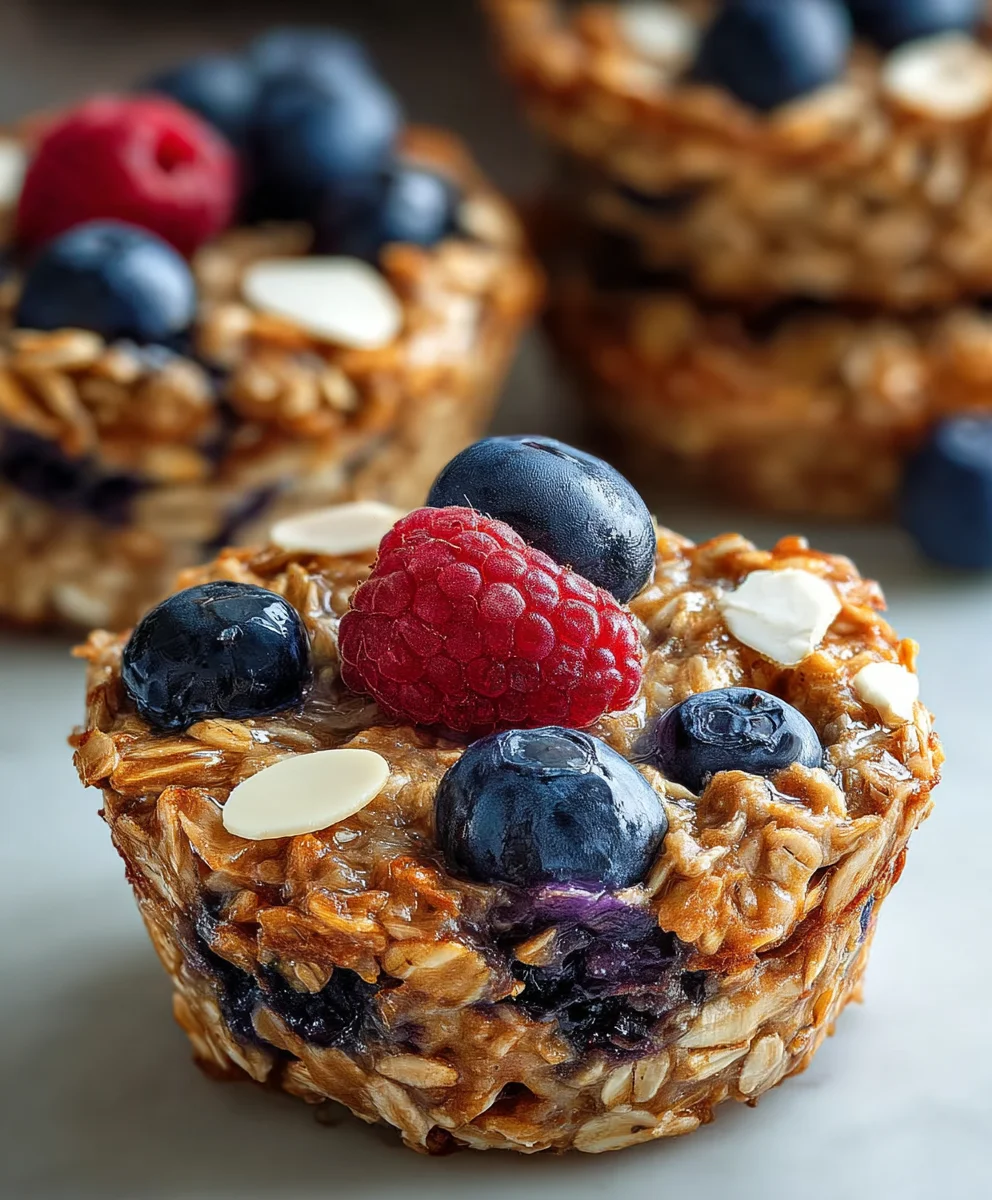
Easy Baked Oatmeal Breakfast Cups-Healthy Make Ahead
Baked Oatmeal Breakfast Cups are more than just a convenient breakfast option; they’re a tiny edible hug for your morning. Imagin extracte waking up to the aroma of warm, spiced oats, baked to golden perfection in adorable, individual portions. That’s the magic of these delightful cups! People absolutely adore them because they strike that perfect balance between wholesome goodness and satisfyingly sweet indulgence. They’re packed with fiber, customizable with your favorite fruits and nuts, and best of all, they’re portable. Forget mushy, one-note oatmeal; these Baked Oatmeal Breakfast Cups offer delightful texture and a burst of flavor in every bite. What truly makes them special is their inherent versatility – you can whip up a batch on Sunday and have perfectly portioned, delicious breakfasts ready to grab all week long. They are the ultimate make-ahead solution for busy mornings, proving that healthy eating can be incredibly delicious and fuss-free.
Ingredients:
- 2 cups rolled oats
- 2 medium ripe bananas
- 1 cup brown sugar
- 2 large eggs
- 1 teaspoon baking powder
- 1 teaspoon vanilla extract
- 1 cup fresh or frozen blueberries
- Non-stick cooking spray or butter for greasing muffin tin
Preparing the Batter
Mashing the Bananas
The first crucial step in creating these delicious Baked Oatmeal Breakfast Cups is to properly prepare your bananas. You’ll want to use bananas that are ripe – the riper, the better! Look for bananas with plenty of brown spots; this indicates they are sweet and will mash easily, contributing to the natural sweetness and moisture of your breakfast cups. Take your two medium ripe bananas and place them in a medium-sized mixing bowl. Using a fork or a potato masher, mash them thoroughly until they are mostly smooth with just a few small lumps remaining. Don’t worry about getting them perfectly pureed; a little texture is nice. This mashed banana will act as a binder and add a wonderful subtle flavor to your oatmeal cups.
Combining Wet Ingredients
Once your bananas are mashed, it’s time to incorporate the other wet ingredients. Add the 2 large eggs directly into the bowl with the mashed bananas. Whisk the eggs and bananas together until they are well combined. Next, add the 1 teaspoon of vanilla extract to the mixture. Vanilla extract is a fantastic flavor enhancer that complements both the banana and the oats beautifully, so don’t skip this ingredient! Give it another gentle whisk to ensure the vanilla is evenly distributed.
Sweetening and Leavening
Now, let’s add the sweetness and leavening agents. Sprinkle the 1 cup of brown sugar over the banana and egg mixture. Brown sugar lends a lovely caramel-like depth of flavor and helps create a tender texture in baked goods, making it ideal for these breakfast cups. Stir the brown sugar in until it’s well incorporated. Following the brown sugar, add the 1 teaspoon of baking powder. Baking powder is essential for giving your oatmeal cups a slight lift, making them lighter and preventing them from becoming too dense. Stir this in thoroughly. You’ll notice the mixture might start to get a little foamy from the baking powder; this is a good sign!
Incorporating the Oats and Berries
Adding the Rolled Oats
With your wet ingredients and sweeteners combined, it’s time to add the star of the show: the rolled oats. Pour the 2 cups of rolled oats into the mixing bowl. It’s important to use rolled oats (also known as old-fashioned oats) and not instant oats, as rolled oats hold their shape better during baking and provide a more satisfying chewy texture. Stir the oats into the wet ingredients until they are evenly coated. Ensure there are no dry pockets of oats. The mixture will start to thicken considerably at this point.
Folding in the Blueberries
Finally, it’s time to add the burst of fruity goodness with the blueberries. Gently fold in the 1 cup of blueberries. You can use fresh or frozen blueberries. If using frozen blueberries, do not thaw them before adding; this will help prevent them from bleeding too much color into the batter during baking. Be careful not to overmix when adding the blueberries. A gentle fold ensures they remain mostly intact and distributed throughout the cups, providing delightful little pockets of sweet and tart flavor in every bite.
Baking the Breakfast Cups
Preparing the Muffin Tin
Before you can bake your delicious Baked Oatmeal Breakfast Cups, you need to prepare your muffin tin. Preheating your oven to 375°F (190°C) is also a crucial step to ensure even baking. Take a standard 12-cup muffin tin and thoroughly grease each cup. You can use non-stick cooking spray, which is very convenient, or a little butter. Make sure to coat the sides and bottoms of each cavity well to prevent the oatmeal cups from sticking. If you find that your muffin tin tends to stick, you can also use paper liners, but greasing usually suffices.
Filling the Muffin Cups
Once your muffin tin is greased and your oven is preheated, it’s time to fill the cups with your delicious oatmeal mixture. Spoon the batter evenly into each of the 12 prepared muffin cups. Fill each cup about two-thirds to three-quarters full. The batter will expand slightly as it bakes, so avoid overfilling, which can lead to overflow and unevenly shaped cups. You can use a spoon or a small ice cream scoop to help portion the batter evenly. Gently tap the muffin tin on the counter a couple of times after filling to help settle the batter and remove any large air pockets.
Baking to Golden Perfection
Place the filled muffin tin into the preheated oven. Bake for approximately 20 to 25 minutes. The exact baking time will vary depending on your oven, so keep an eye on them. You’ll know the Baked Oatmeal Breakfast Cups are ready when the edges are golden brown and firm to the touch. The centers should be set, meaning they no longer look wet or gooey. If you’re unsure, you can insert a toothpick into the center of a cup; it should come out clean or with just a few moist crum extractbs attached.
Cooling and Serving
After baking, carefully remove the muffin tin from the oven. Let the Baked Oatmeal Breakfast Cups cool in the muffin tin for about 5 to 10 minutes. This cooling period is important as it allows them to firm up further and makes them easier to remove from the tin. Once slightly cooled, use a small spatula or a butter knife to gently loosen the edges of each cup and then carefully transfer them to a wire rack to cool completely. They can be enjoyed warm or at room temperature. These are perfect for a grab-and-go breakfast, a healthy snack, or even a light dessert. Store any leftovers in an airtight container in the refrigerator for up to 3-4 days.
Conclusion:
And there you have it – the delightful and incredibly versatile Baked Oatmeal Breakfast Cups! We hope you’ve enjoyed learning how to whip up this fantastic breakfast or snack option. These cups are a testament to how simple ingredients can transform into something truly special. Their make-ahead nature makes busy mornings a breeze, offering a healthy and satisfying start to your day without the rush. They are perfect for meal prepping, ensuring you always have a nutritious bite ready to go.
We love serving our Baked Oatmeal Breakfast Cups warm, perhaps with a drizzle of honey or a dollop of Greek yogurt. They also taste wonderful at room temperature, making them ideal for packing into lunchboxes or enjoying on the go. Don’t be afraid to get creative with variations! Feel free to add in different fruits like blueberries or raspberries, a sprinkle of nuts for extra crunch, or even a touch of cinnamon or nutmeg for added warmth. The possibilities are truly endless!
We encourage you to give these Baked Oatmeal Breakfast Cups a try. They are forgiving, delicious, and endlessly customizable. Happy baking!
Frequently Asked Questions:
How can I store Baked Oatmeal Breakfast Cups?
You can store your Baked Oatmeal Breakfast Cups in an airtight container in the refrigerator for up to 4-5 days. For longer storage, they freeze beautifully! Once completely cooled, place them in a freezer-safe bag or container and freeze for up to 2-3 months. Thaw them in the refrigerator overnight or reheat gently in a microwave or toaster oven.
Can I make Baked Oatmeal Breakfast Cups gluten-free?
Absolutely! To make these Baked Oatmeal Breakfast Cups gluten-free, simply ensure you are using certified gluten-free rolled oats. All other common ingredients are typically gluten-free, but it’s always a good idea to check the labels of any add-ins like chocolate chips or nut butters to be certain.
Easy Baked Oatmeal Breakfast Cups-Healthy Make Ahead
Healthy and delicious make-ahead breakfast cups featuring rolled oats, ripe bananas, and blueberries.
Ingredients
-
2 cups rolled oats
-
2 medium ripe bananas
-
1 cup brown sugar
-
2 large eggs
-
1 teaspoon baking powder
-
1 teaspoon vanilla extract
-
1 cup fresh or frozen blueberries
Instructions
-
Step 1
Mash two ripe bananas in a bowl until mostly smooth. Add two large eggs and one teaspoon of vanilla extract. Whisk to combine. -
Step 2
Stir in one cup of brown sugar until incorporated. Add one teaspoon of baking powder and stir thoroughly. -
Step 3
Pour two cups of rolled oats into the mixture and stir until evenly coated. Gently fold in one cup of blueberries. -
Step 4
Preheat oven to 375°F (190°C). Grease a 12-cup muffin tin with non-stick cooking spray or butter. -
Step 5
Spoon the batter evenly into each muffin cup, filling about two-thirds to three-quarters full. Tap the tin gently to settle the batter. -
Step 6
Bake for 20-25 minutes, or until the edges are golden brown and the centers are set. Let cool in the tin for 5-10 minutes before transferring to a wire rack to cool completely.
Important Information
Nutrition Facts (Per Serving)
It is important to consider this information as approximate and not to use it as definitive health advice.
Allergy Information
Please check ingredients for potential allergens and consult a health professional if in doubt.