Cheesy Garlic Chicken Wraps Quick Easy Recipe
Cheesy Garlic Chicken Wraps are the answer to those weeknight dinner dilemmas! Seriously, who can resist the siren song of warm, pillowy tortillas stuffed with tender, garlicky chicken and an irresistible blanket of melted cheese? I know I can’t. These Cheesy Garlic Chicken Wraps have become an absolute staple in my kitchen because they’re just so darn satisfying. They hit all the right notes: savory, cheesy, a little bit zesty from the garlic, and incredibly comforting. What truly makes these Cheesy Garlic Chicken Wraps special is how effortlessly they come together without sacrificing flavor. It’s that perfect blend of simplicity and pure deliciousness that makes you feel like a culinary rockstar, even on your busiest evenings. Get ready to impress yourself (and anyone you share them with!).
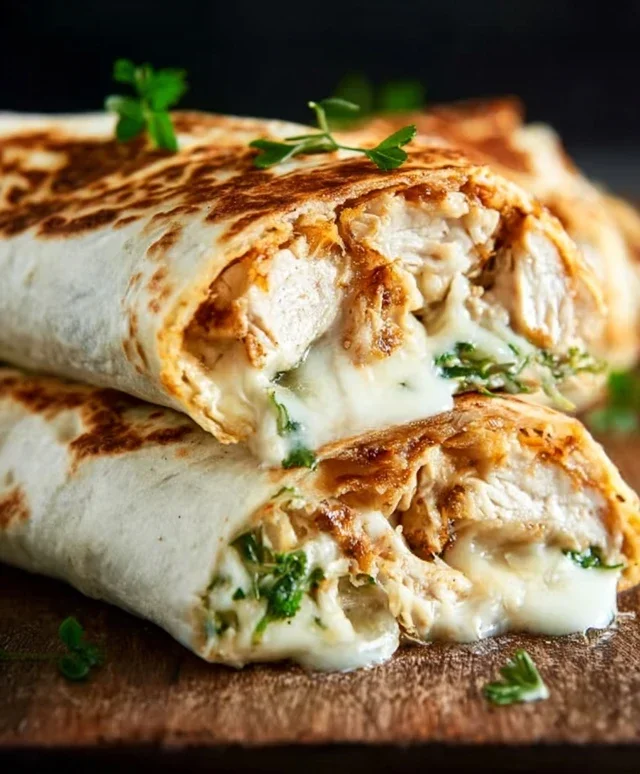
Cheesy Garlic Chicken Wraps
These Cheesy Garlic Chicken Wraps are an absolute game-changer for a quick and delicious meal. Whether you’re looking for a satisfying lunch, a speedy weeknight dinner, or even a crowd-pleasing appetizer, these wraps deliver on all fronts. The creamy, garlicky aioli combined with tender shredded chicken and gooey melted cheddar cheese, all wrapped up in a warm tortilla, is pure comfort food. They’re so simple to put together, you’ll find yourself making them again and again. Let’s get started on creating these delightful wraps!
Ingredients:
Preparing Your Delicious Filling
The foundation of these fantastic wraps is the flavorful chicken filling. We’re going to bring together just a few key ingredients to create something truly special. The beauty of this recipe lies in its simplicity, making it perfect for even the most novice cooks.
Step 1: Combine the Chicken and Aioli
In a medium-sized mixing bowl, gently combine your 2 cups of shredded cooked chicken with the 1/2 cup of garlic aioli. Use a spoon or a spatula to thoroughly mix everything together, ensuring that every piece of chicken is coated in that wonderfully pungent and creamy aioli. The aioli is going to be our flavor powerhouse here, infusing the chicken with a delightful garlic kick and a rich, smooth texture. Take a moment to taste the mixture. This is your chance to adjust the seasoning. If you prefer a stronger garlic flavor, you could even add a tiny bit more aioli, but start with the specified amount. Now, season generously with salt and pepper to your personal preference. Remember, cooked chicken can sometimes be a bit bland, so don’t be shy with the seasonings.
Step 2: Incorporate the Cheese
Once the chicken and aioli are perfectly combined, it’s time to add the star ingredient for that irresistible cheesy goodness: the 1 cup of shredded cheddar cheese. Sprinkle the shredded cheddar cheese over the chicken and aioli mixture. Gently fold the cheese into the chicken, again ensuring an even distribution. We want pockets of melted cheese throughout our filling, so try not to overmix to the point where the cheese completely disappears into the chicken. Some small clumps of cheese are perfectly fine and will create delightful cheesy bites within the wrap.
Assembling and Warming Your Wraps
Now that our flavorful filling is ready, it’s time to bring it all together and create those warm, comforting wraps. This is where the magic happens!
Step 3: Preparing the Tortillas
Take your 4 large tortillas. To make them pliable and easier to wrap, and to also enhance their flavor slightly, we’re going to warm them up. You have a few options here. You can gently warm them in a dry skillet over medium heat for about 15-30 seconds per side until they are soft and flexible. Alternatively, you can wrap them loosely in damp paper towels and microwave them for about 30-45 seconds until they are warm and pliable. Another option is to briefly warm them directly over a low gas flame on your stovetop, being very careful not to burn them. Whichever method you choose, the goal is to make them soft and ready to hold our delicious filling without tearing.
Step 4: Filling the Tortillas
Lay each warmed tortilla flat on a clean surface. Spoon approximately one-quarter of the cheesy chicken mixture onto the center of each tortilla. You want to place the filling slightly closer to one edge than the other, which will make rolling easier. Don’t overfill the tortillas, as this can make them difficult to roll and prone to breaking. A generous, but manageable, amount is key.
Step 5: Rolling the Wraps
Now for the rolling technique. This is where you can get creative and perfect your wrap-making skills!
First, fold the edge closest to the filling over the filling itself, tucking it in snugly. Then, fold in the two sides of the tortilla towards the center, creating a neat package. Finally, tightly roll the tortilla away from you, tucking as you go, to create a secure and compact wrap. The goal is to have a tightly rolled wrap that will hold all the delicious ingredients inside. If your tortilla seems a bit dry and is cracking, don’t worry, just press gently and continue rolling.
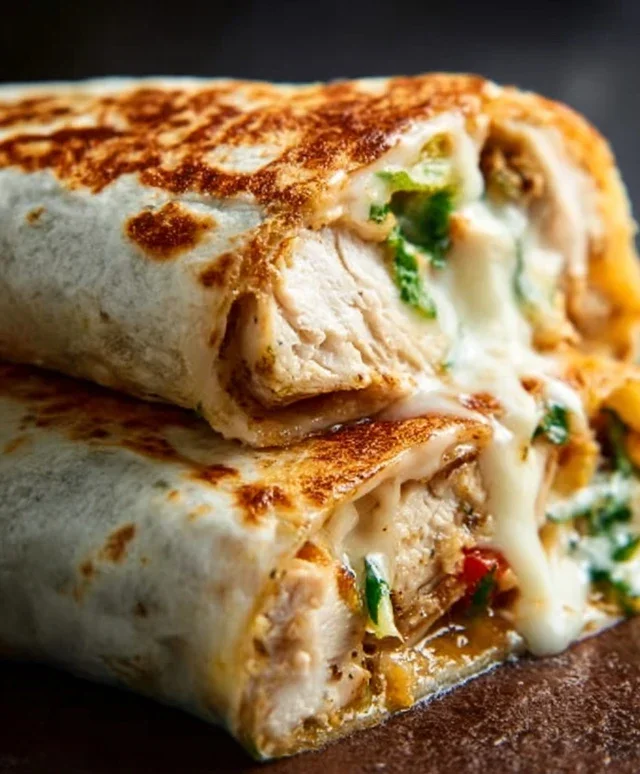
Step 6: Optional Grilling for Extra Flavor and Meltiness
For an extra layer of deliciousness and a perfectly melted cheese experience, you can lightly grill or toast your assembled wraps. This step is entirely optional but highly recommended! You can either place the seam-side down in a lightly greased, preheated skillet or on a griddle over medium heat for a few minutes per side, until golden brown and the cheese is visibly melted and gooey. Alternatively, you can use a panini press or even place them on a baking sheet and bake them in a preheated oven at 375°F (190°C) for about 5-7 minutes, or until heated through and the cheese is melted. This final touch adds a wonderful crispness to the tortilla and ensures that the cheese is perfectly melted throughout, creating a truly irresistible wrap.
Enjoy these Cheesy Garlic Chicken Wraps warm! They are perfect on their own or served with a side salad or your favorite dipping sauce. They are incredibly versatile and are sure to become a go-to recipe in your kitchen.
Conclusion:
And there you have it – your guide to creating incredibly delicious and satisfying Cheesy Garlic Chicken Wraps! This recipe truly shines because it’s a perfect marriage of comforting flavors: tender, garlicky chicken, melty cheese, and that satisfying bite of a warm tortilla. It’s a weeknight meal hero, a fantastic lunchbox option, and even impressive enough for casual entertaining. The beauty of these wraps lies in their versatility. I love serving them with a crisp side salad dressed with a light vinaigrette, some sweet potato fries, or even a simple bowl of tomato soup for a truly comforting meal. Don’t be afraid to get creative with your fillings! You can easily swap out the chicken for seasoned ground turkey or even a plant-based protein. Adding a handful of sautéed bell peppers and onions, some fresh spinach, or a drizzle of sriracha for a kick are all wonderful ways to personalize your Cheesy Garlic Chicken Wraps.
I truly hope you give this recipe a try. It’s so simple to make and the payoff in terms of flavor and enjoyment is immense. Let me know in the comments what variations you discover!
Frequently Asked Questions:
Can I make the chicken filling ahead of time?
Absolutely! You can cook and shred the chicken mixture a day or two in advance and store it in an airtight container in the refrigerator. When you’re ready to assemble your wraps, simply reheat the filling gently on the stovetop or in the microwave before stuffing your tortillas.
What kind of cheese works best for these wraps?
While I love a good cheddar or Monterey Jack for its melting capabilities and mild flavor that complements the garlic, you can experiment with others! A blend of mozzarella and parmesan would be delightful for extra Italian flair, or even a sharp provolone for a more robust taste. The key is to use a cheese that melts well.
Cheesy Garlic Chicken Wraps
Quick and easy cheesy garlic chicken wraps, perfect for a weeknight meal or lunch.
Ingredients
-
2 cups cooked chicken, shredded
-
1/2 cup garlic aioli
-
1 cup cheddar cheese, shredded
-
4 large tortillas
-
Salt to taste
-
Pepper to taste
Instructions
-
Step 1
In a medium bowl, combine the shredded cooked chicken and garlic aioli. -
Step 2
Season the chicken mixture with salt and pepper to taste. -
Step 3
Lay out the large tortillas on a clean surface. -
Step 4
Divide the chicken mixture evenly among the tortillas, spreading it down the center of each. -
Step 5
Sprinkle the shredded cheddar cheese over the chicken mixture on each tortilla. -
Step 6
Fold in the sides of each tortilla, then tightly roll them up from the bottom. -
Step 7
Optional: Sear the wraps in a skillet for a few minutes on each side until golden brown and the cheese is melted.
Important Information
Nutrition Facts (Per Serving)
It is important to consider this information as approximate and not to use it as definitive health advice.
Allergy Information
Please check ingredients for potential allergens and consult a health professional if in doubt.