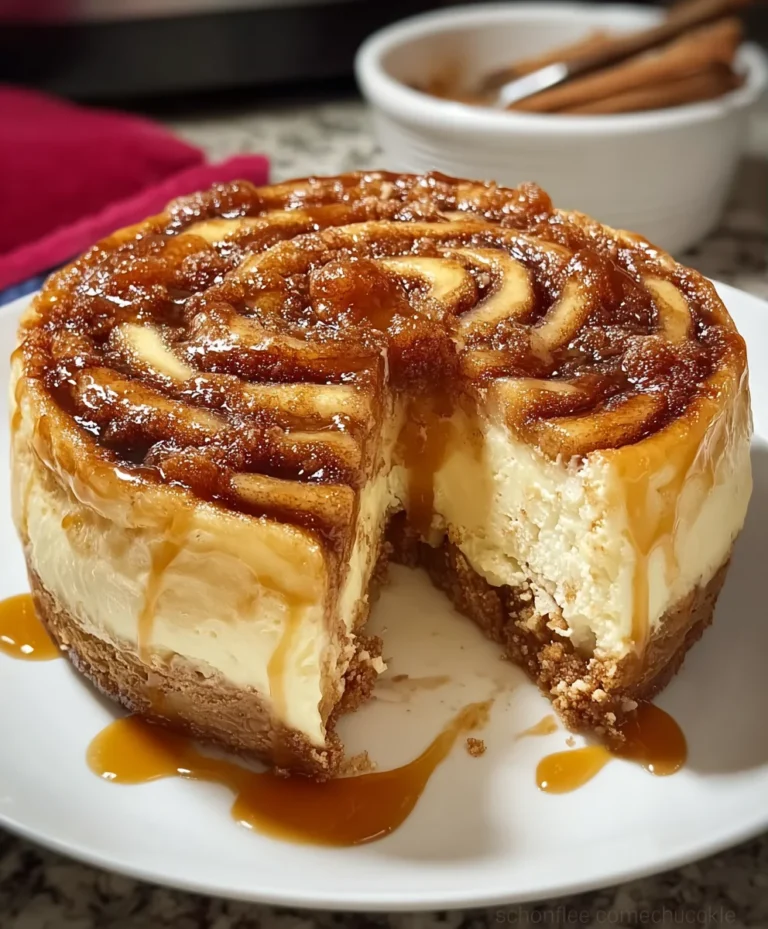
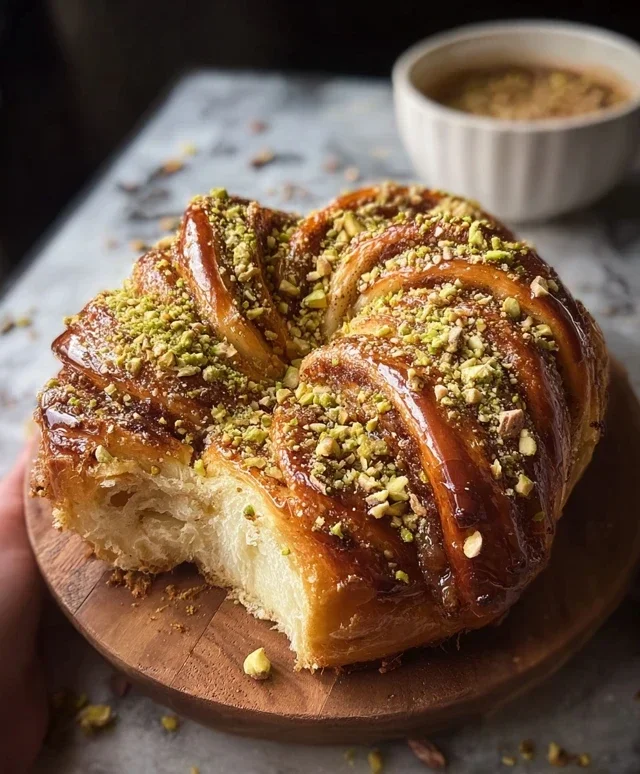
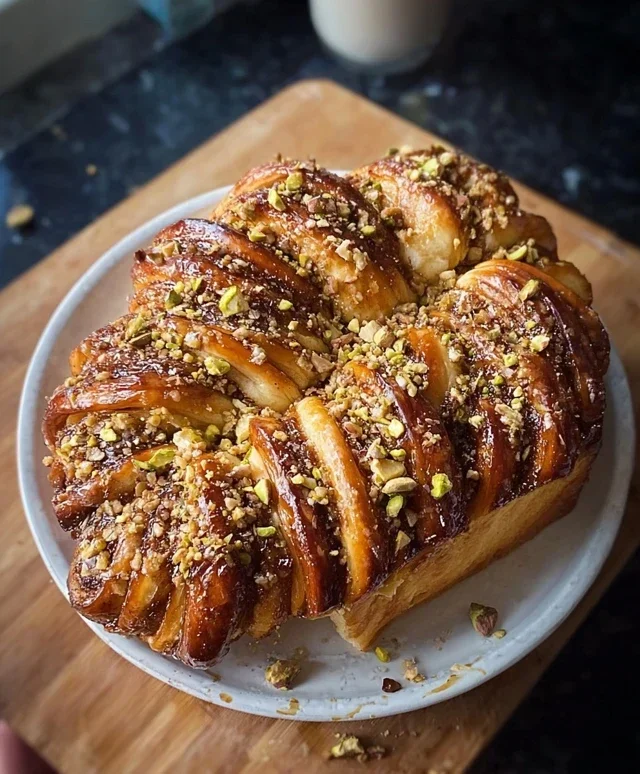
Baklava Babka Buns- Sweet- Flaky- Irresistible Treats
Baklava Babka Buns are a revelation, a glorious fusion that takes two beloved desserts and elevates them to something truly extraordinary. If you’ve ever swooned over the flaky, honey-drenched layers of traditional baklava or fallen for the rich, swirled beauty of a babka, then prepare for your taste buds to embark on an epicurean adventure. We’ve captured the essence of both, reimagin extracting them into delightful, individual buns that are perfect for sharing – or for indulgin extractg yourself! People adore this dish because it offers an unparalleled symphony of textures and flavors: the satisfying crunch of phyllo pastry, the warming embrace of cinnamon and nuts, and that irresistible, syrupy sweetness. What makes these Baklava Babka Buns so special is their ingenious construction, marrying the familiar comfort of a brioche-like dough with the exotic allure of Mediterranean and Eastern European baking traditions. It’s a showstopper that’s surprisingly approachable for home bakers.
Baklava Babka Buns
Get ready to embark on a culinary adventure that fuses the irresistible layers of baklava with the delightful swirl of babka, all in a convenient and utterly delicious bun form! These Baklava Babka Buns are a true testament to indulgence, offering a symphony of textures and flavors. Imagin extracte flaky, buttery dough encasing a sweet, spiced nut filling, all drizzled with a fragrant honey syrup. It sounds decadent, I know, and it absolutely is. But the beauty of these buns is that while they look impressive, they are surprisingly manageable to make. Whether you’re a seasoned baker or just starting out, this recipe will guide you through creating a show-stopping treat that’s perfect for brunch, dessert, or anytime you need a little something special.
Let’s dive into what you’ll need to create these delightful little parcels of joy.
Ingredients:
Let’s Get Baking!
The journey to creating these Baklava Babka Buns is broken down into several rewarding stages. We’ll start by crafting the perfect dough, then move on to preparing our luscious filling, assembling the buns, and finally, bathing them in a sweet, sticky embrace.
1. Crafting the Sweet Dough:
In a large mixing bowl, I like to combine the dry ingredients first. So, whisk together the 3 ½ cups of all-purpose flour, ¼ cup of granulated sugar, the packet of instant yeast, and ½ teaspoon of salt. This ensures everything is evenly distributed before we introduce the wet ingredients. Next, in a separate, smaller bowl, lightly beat the 2 eggs. Then, I add the warm milk to the beaten eggs and stir gently. Gradually pour this wet mixture into the dry ingredients in the large bowl. Using a sturdy spoon or a dough hook attachment on your stand mixer, begin extract to mix until a shaggy dough starts to form. It might seem a bit dry at first, but don’t worry. Now, it’s time to add the ½ cup of melted unsalted butter. Continue mixing until the dough comes together and becomes smooth and elastic. This usually takes about 8-10 minutes in a stand mixer on medium speed, or about 10-12 minutes of vigorous kneading by hand. You’ll know it’s ready when it springs back slowly when you poke it. Place the dough in a lightly greased bowl, cover it with a clean kitchen towel or plastic wrap, and let it rise in a warm place for about 1 to 1.5 hours, or until it has doubled in size.
2. Preparing the Irresistible Nut Filling:
While our dough is happily rising, let’s get our baklava-inspired filling ready. In a medium bowl, combine the 1 cup of finely chopped walnuts, ½ cup of finely chopped pistachios, ¼ cup of granulated sugar, and 1 tablespoon of cinnamon. Give this a good stir to ensure the spices and sugar are evenly coating the nuts. This mixture is going to be the heart of our buns, providing that classic baklava crunch and aromatic spice. I like to chop my nuts fairly finely, but not so fine that they turn into powder. You want to have some texture.
3. Assembling the Swirls:
Once your dough has beautifully doubled in size, gently punch it down to release the air. Turn the dough out onto a lightly floured surface. Now, we’re going to roll it out into a large rectangle, about 12×18 inches. Don’t worry too much about perfect edges; we’re going for rustic charm! Now, brush the entire surface of the dough rectangle evenly with the ¼ cup of melted unsalted butter. Don’t be shy with the butter – it’s key to that flaky, layered texture. Evenly sprinkle the prepared nut filling over the buttered dough, all the way to the edges. Gently press the filling into the butter so it adheres well. Starting from one of the longer sides, tightly roll up the dough into a log. Be sure to keep the roll as tight as possible to create those beautiful swirls. Once rolled, pinch the seam closed to seal it.
4. Shaping and Baking the Buns:
Now, for the fun part! Using a sharp knife or dental floss (which is great for getting clean cuts without squishing the dough), slice the log into 12 equal pieces, about 1.5 inches thick each. Arrange these bun slices, cut-side up, in a greased 9×13 inch baking dish. They will be a bit snug, which is good as they’ll help each other rise and maintain their shape. Cover the dish loosely with plastic wrap and let the buns rise again for another 30-45 minutes, until they look puffy and have increased in size. Preheat your oven to 375°F (190°C). Bake the buns for 20-25 minutes, or until they are golden brown and cooked through.
5. The Sweet Honey Glaze:
While the buns are baking, let’s prepare the luxurious honey syrup that will take them over the top. In a small saucepan, combine the ½ cup of honey and ¼ cup of water. Heat this mixture over medium heat, stirring until the honey is fully dissolved and the syrup is warm. Stir in the 1 teaspoon of vanilla extract. Once the buns come out of the oven, immediately and generously brush or spoon this warm honey syrup all over the hot buns. The buns will absorb this sweet nectar, making them incredibly moist and flavorful. Let the buns cool in the pan for at least 15-20 minutes before serving. This allows the syrup to fully soak in and the buns to set a bit. They are absolutely divine served warm, perhaps with a dollop of Greek yogurt or a scoop of vanilla ice cream. Enjoy every delicious bite of these extraordinary Baklava Babka Buns!
Conclusion:
I hope you’ve enjoyed diving into the world of Baklava Babka Buns with me! This recipe truly is a showstopper, blending the rich, nutty sweetness of baklava with the delightful, swirled texture of babka. The result is a unique, decadent treat that’s surprisingly achievable in your own kitchen. The layers of flaky dough, infused with cinnamon, nuts, and a honey-citrus syrup, create an irresistible aroma and flavor profile that’s perfect for special occasions or simply elevating your everyday baking.
These Baklava Babka Buns are incredibly versatile. They are fantastic served warm, drizzled with a little extra syrup, alongside a cup of strong coffee or tea. For an extra touch of indulgence, consider serving them with a dollop of Greek yogurt or a scoop of vanilla ice cream. Don’t be afraid to experiment with variations! You could try different nut combinations like pistachios and walnuts, or even add a hint of cardamom or orange zest to the filling for a different aromatic dimension. I wholeheartedly encourage you to give this recipe a try. It’s a labor of love, yes, but the joy of pulling these gorgeous buns from your oven and sharing them will be well worth it!
Frequently Asked Questions:
Can I make the dough ahead of time?
Absolutely! The babka dough can be made and refrigerated overnight after the first rise. This is a great way to break up the process and allows the flavors to meld beautifully.
What kind of nuts are best for the filling?
While walnuts and pistachios are traditional and delicious, feel free to experiment! Almonds, pecans, or even a mix of your favorite nuts will work wonderfully in this Baklava Babka Buns recipe.
How should I store any leftovers?
Store cooled Baklava Babka Buns in an airtight container at room temperature for up to 3 days. For longer storage, they can be frozen, and then reheated gently in the oven or toaster oven.
Baklava Babka Buns
A delightful fusion of flaky baklava flavors and the soft, swirled texture of babka, baked into individual buns. Perfect for a sweet breakfast or dessert treat.
Ingredients
-
3 ½ cups all-purpose flour
-
¼ cup granulated sugar
-
1 packet (2 ¼ tsp) instant yeast
-
½ cup warm milk
-
2 eggs
-
½ cup unsalted butter, melted
-
½ tsp salt
-
1 cup walnuts, finely chopped
-
½ cup pistachios, finely chopped
-
¼ cup granulated sugar
-
1 tbsp cinnamon
-
¼ cup unsalted butter, melted
-
½ cup honey
-
¼ cup water
-
1 tsp vanilla extract
Instructions
-
Step 1
In a large bowl, whisk together the flour, ¼ cup granulated sugar, yeast, and salt. Make a well in the center. -
Step 2
In a separate bowl, whisk together the warm milk, eggs, and ½ cup melted butter. Pour the wet ingredients into the well of the dry ingredients. Mix until a shaggy dough forms. -
Step 3
Knead the dough on a lightly floured surface for 8-10 minutes until smooth and elastic. Place in a greased bowl, cover, and let rise in a warm place for 1 hour, or until doubled in size. -
Step 4
While the dough rises, prepare the filling: In a bowl, combine the chopped walnuts, pistachios, ¼ cup granulated sugar, and cinnamon. Stir to combine. -
Step 5
Punch down the risen dough and roll it out into a large rectangle (approximately 12×18 inches). Spread the ¼ cup melted butter evenly over the surface of the dough. -
Step 6
Sprinkle the nut and cinnamon mixture evenly over the buttered dough. Tightly roll up the dough from the long end. Slice the roll into 12 equal portions. -
Step 7
Place the bun portions, cut-side up, into a greased muffin tin or baking dish. Cover and let rise for another 30 minutes. -
Step 8
Preheat oven to 375°F (190°C). Bake for 20-25 minutes, or until golden brown. -
Step 9
While the buns are baking, prepare the syrup: In a small saucepan, combine the honey, ¼ cup water, and vanilla extract. Bring to a simmer and cook for 2 minutes. Remove from heat. -
Step 10
Once the buns are out of the oven, brush the warm syrup over the hot buns. Let cool slightly before serving.
Important Information
Nutrition Facts (Per Serving)
It is important to consider this information as approximate and not to use it as definitive health advice.
Allergy Information
Please check ingredients for potential allergens and consult a health professional if in doubt.