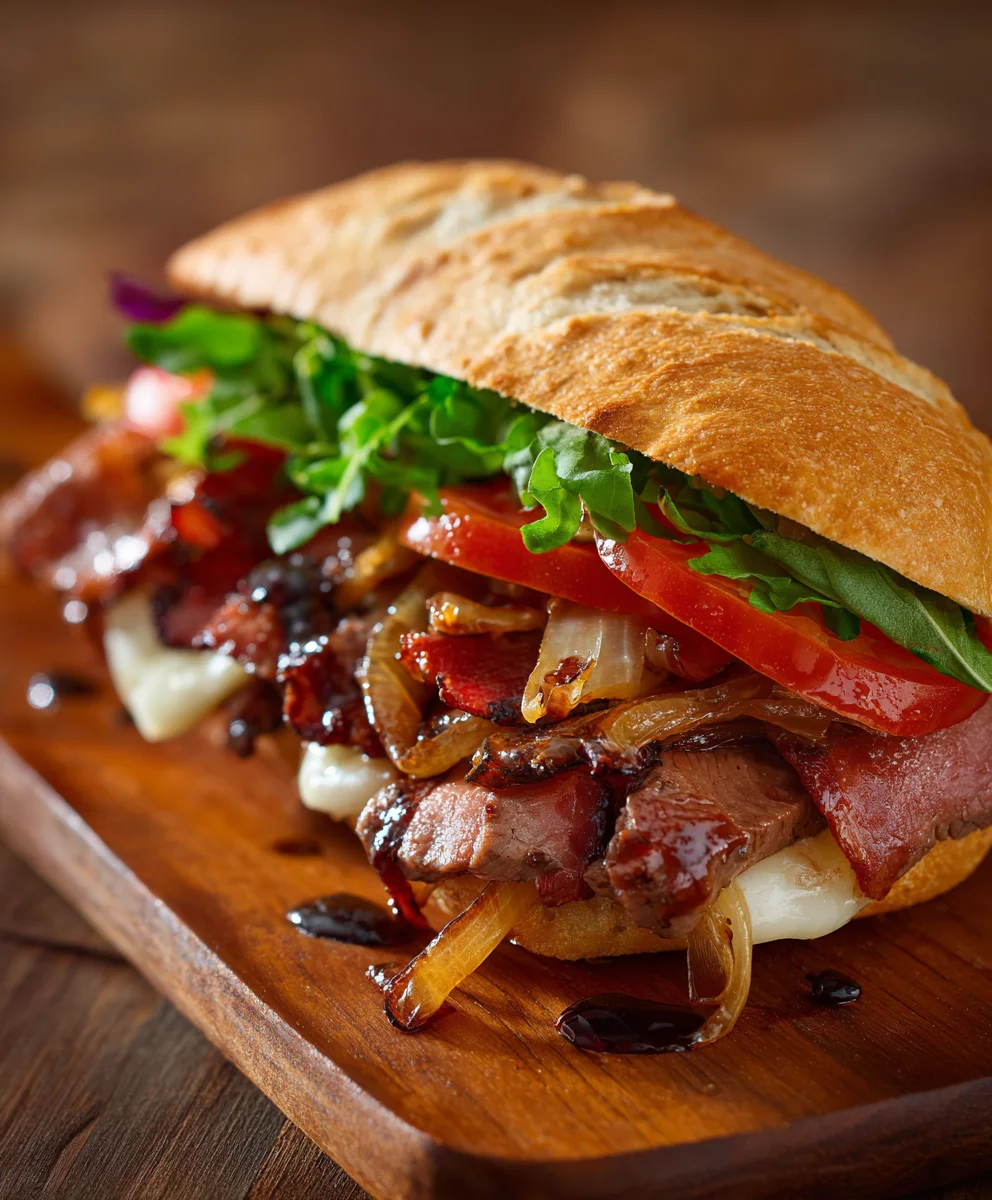
Best Beef Beef Bacon Sandwich Caramelized Onions
Best Beef Beef Beef Bacon Sandwich with Caramelized Onions Recipe is not just a meal; it’s an experience, a symphony of savory, sweet, and smoky flavors that dances across your palate. We all crave those comforting, yet undeniably gourmet dishes that feel both familiar and exciting, and this sandwich delivers precisely that. What makes this particular creation so beloved? It’s the perfect marriage of tender, slow-cooked beef that practically melts in your mouth, crispy, smoky beef baconbacon that adds an irresistible crunch, and those sweet, deeply flavored caramelized onions that elevate the whole ensemble. This isn’t your average weeknight dinner; it’s a weekend indulgence, a celebratory bite, or simply the ultimate answer to a craving for something truly extraordinary. Prepare to be amazed by the depth of flavor and the sheer satisfaction this sandwich provides, solidifying its place as the Best Beef BaconBeef Bacon Sandwich with Caramelized Onions Recipe you’ll ever try.
Ingredients:
- 2 large boneless skinless chicken breasts
- 1/3 cup flour
- 1 teaspoon parsley
- ½ teaspoon dried basil
- ½ teaspoon dried oregano
- ½ teaspoon mustard powder
- Lemon Pepper Seasoning (for seasoning chicken)
- 2 tablespoons olive oil
- 3 tablespoons butter
- 3 cloves garlic, minced
- 3 tablespoons flour
- ¾ cup chicken broth
- 1 chicken bouillon
- 1 ¼ cups half and half (half cream/half milk)
- 3 tablespoons cream cheese, softened
- ¾ cup grated Parmesan cheese
- 3 cups fresh spinach
- ½ cup dry white grape juice (see notes for substitution)
- 1-2 tablespoons lemon juice, optional
Preparing the Chicken
Step 1: Pounding and Seasoning the Chicken
First, let’s get our chicken ready. Take your two large boneless, skinless chicken breasts and place them on a cutting board. If they are particularly thick, you might want to slice them horizontally to create thinner, more even cutlets. This ensures they cook through uniformly and quickly. Once they are of a manageable thickness, cover each chicken breast with a piece of plastic wrap or place them inside a large zip-top bag. Using a meat mallet or even the bottom of a heavy skillet, gently pound the chicken breasts until they are about ½ inch thick. This tenderizes the meat and helps it cook more evenly. In a shallow dish, combine the 1/3 cup of flour with the parsley, dried basil, dried oregano, and mustard powder. Season this flour mixture generously with lemon pepper seasoning, adding a bit more if you like a stronger lemon-pepper flavor. Dredge each pounded chicken breast in this seasoned flour, ensuring both sides are well coated. Shake off any excess flour; we want a light, even coating.
Cooking the Chicken
Step 2: Searing the Chicken for a Golden Crust
Now it’s time to give our chicken a beautiful golden crust. Heat the 2 tablespoons of olive oil in a large skillet over medium-high heat. You’ll know the oil is hot enough when it shimmers. Carefully place the flour-dredged chicken breasts into the hot skillet. Be sure not to overcrowd the pan; if your skillet isn’t large enough, cook the chicken breasts one at a time. Cook for about 4-5 minutes per side, or until the chicken is golden brown and cooked through. The internal temperature should reach 165°F (74°C). Once cooked, remove the chicken from the skillet and set it aside on a plate. You can tent it loosely with foil to keep it warm while you prepare the sauce. Don’t wipe out the skillet just yet; those browned bits at the bottom are full of flavor and will be essential for our sauce.
Creating the Creamy Lemon-Garlic Sauce
Step 3: Building the Flavor Base with Garlic and Butter
This is where the magic happens! Reduce the heat to medium. Add the 3 tablespoons of butter to the same skillet you used for the chicken. Once the butter has melted, add the 3 cloves of minced garlic. Sauté the garlic for about 1 minute, stirring constantly, until it’s fragrant but not browned. Burnt garlic can turn bitter, so keep a close eye on it. This fragrant garlic will form the aromatic base of our delicious sauce.
Step 4: Thickening the Sauce and Incorporating Liquids
Now, we’re going to thicken our sauce. Sprinkle the 3 tablespoons of flour over the sautéed garlic and butter. Whisk this together for about 1 minute, cooking out the raw flour taste. This mixture is called a roux and will help create a smooth, creamy texture for our sauce. Gradually whisk in the ¾ cup of chicken broth and the 1 chicken bouillon cube, stirring continuously to prevent lumps. Bring the mixture to a simmer and let it cook for 2-3 minutes, allowing it to thicken slightly. Then, slowly whisk in the 1 ¼ cups of half and half. Continue to stir until the sauce is smooth and has reached your desired consistency.
Step 5: Enriching the Sauce and Adding the Greens
To make our sauce truly irresistible, we’ll add some richness. Stir in the 3 tablespoons of softened cream cheese until it’s fully melted and incorporated into the sauce. This adds a wonderful velvety texture and a subtle tang. Next, stir in the ¾ cup of grated Parmesan cheese. Continue stirring until the cheese is completely melted and the sauce is smooth and creamy. Now it’s time to add our vibrant spinach. Add the 3 cups of fresh spinach to the skillet. Stir gently; the heat from the sauce will wilt the spinach quickly. It will seem like a lot of spinach at first, but it will reduce down considerably. Once the spinach has wilted, if you desire a brighter flavor, stir in 1-2 tablespoons of lemon juice. This is optional, but it really lifts the flavors of the dish. Taste the sauce and adjust seasoning if needed, perhaps with a pinch more lemon pepper or salt.
Return the cooked chicken breasts to the skillet, nestling them into the sauce. Spoon some of the creamy sauce over the chicken. Let it simmer gently for another 2-3 minutes, allowing the chicken to absorb some of the sauce’s flavor.
Conclusion:
And there you have it – the guide to crafting the truly magnificent Best Beef Beef Beef Bacon Sandwich with Caramelized Onions Recipe. This sandwich is more than just a meal; it’s an experience. The rich, savory beef, the crispy, sbeef baconbacon, and the sweet, tender caramelized onions all come together in a symphony of flavors that is simply unforgettable. We’ve walked through each step to ensure you can recreate this masterpiece in your own kitchen, no matter your cooking skill level.
For the ultimate enjoyment, consider serving your Best Beef BaconBeef Bacon Sandwich with Caramelized Onions Recipe with a side of crispy sweet potato fries, a simple arugula salad with a light vinaigrette, or even a creamy coleslaw. The possibilities are as endless as your appetite!
Don’t be afraid to get creative with variations! You could add a touch of Dijon mustard to the caramelized onions for an extra kick, a slice of sharp cheddar or Gruyere cheese for added decadence, or even a smear of garlic aioli. Experiment and make it your own!
We sincerely hope you enjoy making and devouring this exceptional sandwich. It’s a crowd-pleaser and a personal favorite for a reason. Happy cooking!
Frequently Asked Questions:
Q1: How long does it take to caramelize the onions for the Beef BaconBeef Beef Bacon Sandwich with Caramelized Onions Recipe?
Caramelizing onions for the
Q2: Can I prepare some componenBeef Bacon the Best Beef Beef Bacon Sandwich with Caramelized Onions Recipe in advance?
Absolutely! The caramelized onions can be made a day or two ahead and stored in an airtight container in the refrigerator. They can be gently reheated before assembling the sandwich. This is a great way to save time on the day you plan to serBeef Bacone Best Beef Beef Bacon Sandwich with Caramelized Onions Recipe.
Best Beef Bacon Sandwich with Caramelized Onions
A delicious and savory sandwich featuring tender beef bacon and sweet caramelized onions.
Ingredients
-
1/3 cup flour
-
1 teaspoon parsley
-
½ teaspoon dried basil
-
½ teaspoon dried oregano
-
½ teaspoon mustard powder
-
Lemon Pepper Seasoning
-
2 tablespoons olive oil
-
3 tablespoons butter
-
3 cloves garlic, minced
-
3 tablespoons flour
-
¾ cup beef broth
-
1 beef bouillon cube
-
1 ¼ cups half and half
-
3 tablespoons cream cheese, softened
-
¾ cup grated Parmesan cheese
-
3 cups fresh spinach
-
½ cup white grape juice
-
1-2 tablespoons lemon juice, optional
-
Beef bacon
-
Caramelized onions
-
Bread for sandwiches
Instructions
-
Step 1
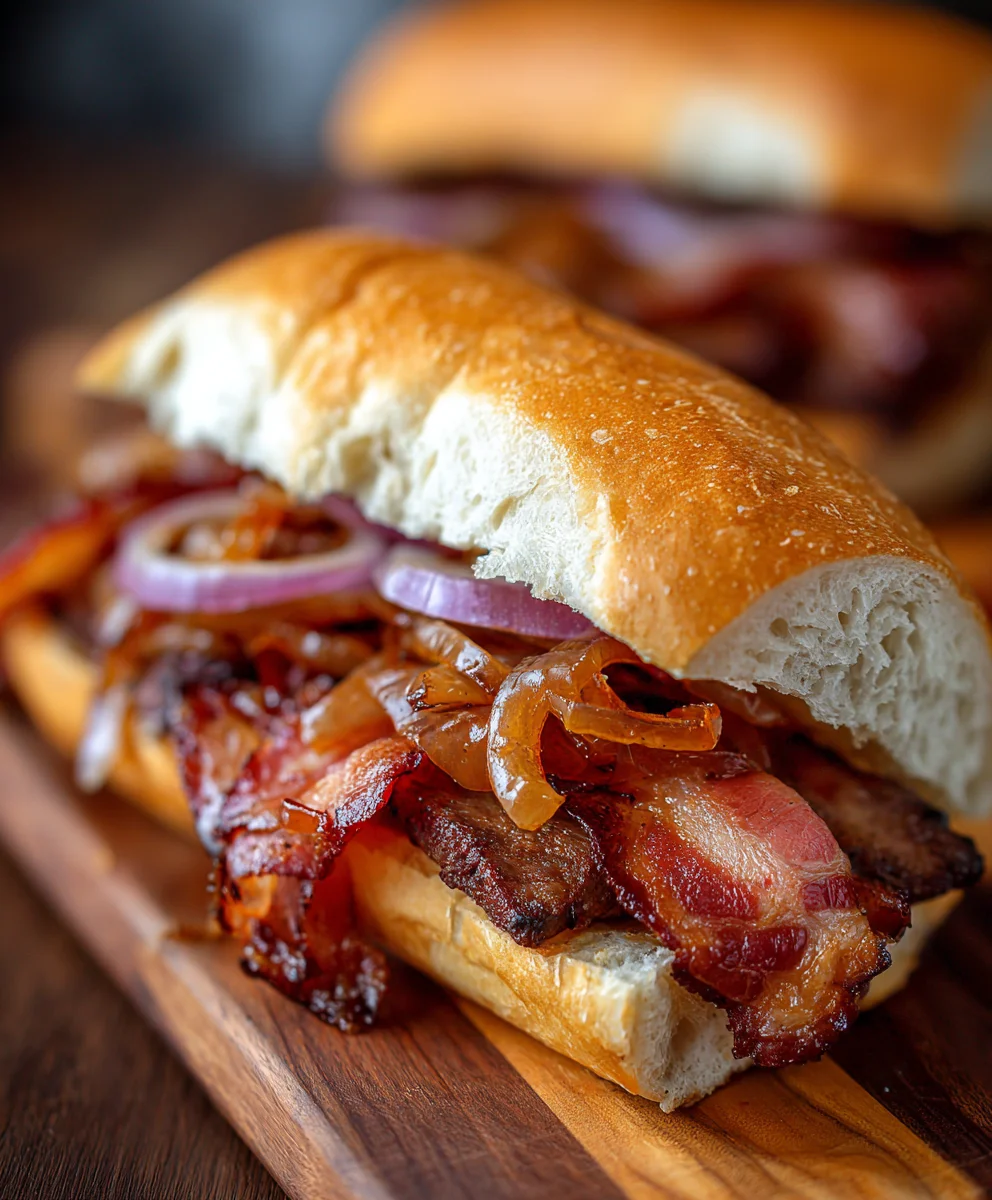
Prepare the beef bacon by seasoning and cooking it until crispy. Prepare caramelized onions by slowly cooking sliced onions in butter and oil until deeply golden brown and sweet. -
Step 2
While the beef bacon and onions are cooking, prepare the creamy sauce. In a skillet, melt butter over medium heat. Add minced garlic and sauté until fragrant, about 1 minute. -
Step 3
Sprinkle 3 tablespoons of flour over the garlic and butter. Whisk for 1 minute to create a roux. Gradually whisk in the beef broth and beef bouillon cube until smooth. Simmer for 2-3 minutes to thicken. -
Step 4
Slowly whisk in the half and half. Stir in the softened cream cheese and grated Parmesan cheese until fully melted and the sauce is smooth and creamy. -
Step 5
Add the fresh spinach to the sauce and stir until wilted. Stir in lemon juice if desired for brightness. Taste and adjust seasoning. -
Step 6
Toast your bread slices. Layer the toasted bread with a generous amount of the creamy sauce, followed by the cooked beef bacon and caramelized onions. Top with another slice of bread.
Important Information
Nutrition Facts (Per Serving)
It is important to consider this information as approximate and not to use it as definitive health advice.
Allergy Information
Please check ingredients for potential allergens and consult a health professional if in doubt.