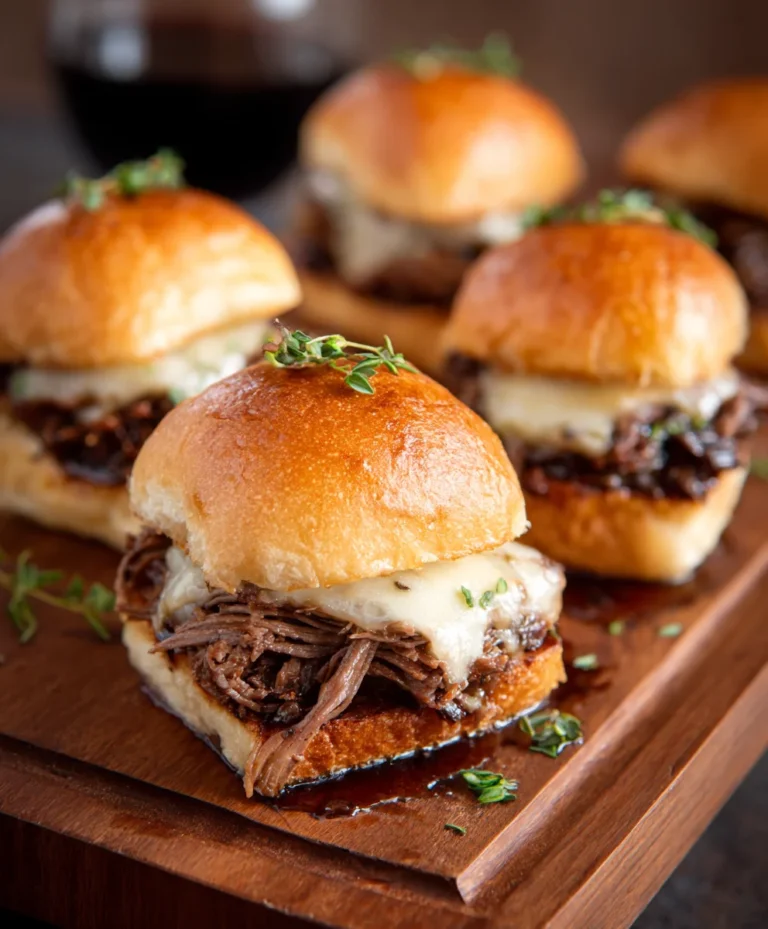
Easy Italian Beef Sliders – Quick & Delicious Appetizer
Italian Sliders are more than just a bite-sized snack; they are a delightful explosion of classic Italian flavors, miniaturized for maximum enjoyment. Whether you’re hosting a game night, planning a casual get-together, or simply craving a comforting and incredibly satisfying meal, these miniature delights are always a guaranteed hit. What’s not to love? They capture the essence of beloved Italian dishes – think savory meats, rich cheeses, and aromatic herbs – all bundled into a perfectly portioned, easy-to-handle package. The beauty of these Italian Sliders lies in their versatility and the sheer joy they bring to any occasion. Each bite offers a complex yet harmonious blend of tastes and textures, making them utterly irresistible and a welcome change from your typical party fare.
Ingredients:
- 12 Hawaiian rolls, split horizontally
- ⅓ cup mayonnaise (for the meat mixture)
- 12 slices provolone cheese
- ½ pound hard beef beef salami, coarsely chopped
- ½ pound beef beef pepperoni, coarsely chopped
- ½ pound beef beef ham, coarsely chopped
- ¼ cup butter, melted
- ½ teaspoon garlic powder
- ½ teaspoon dried oregano
- ½ teaspoon dried basil
- 8 ounce bag shredded lettuce
- ½ cup red onion, finely diced
- ½ cup chopped banana peppers
- ¼ cup mayonnaise (for the relish)
- ¼ cup dill relish
Preparing the Savory Meat Filling
Step 1: Combine the Meats and Binder
To begin extract crafting these irresistible Italian Sliders, we first need to assemble our hearty meat mixture. In a medium-sized mixing bowl, combine the coarsely chopped hard beef salamialami, beef pepperonieroni, and beef hamf ham. These three cured meats will form the robust and flavorful base of our sliders. Once the meats are in the bowl, add the first portion of mayonnaise – the ⅓ cup. This mayonnaise acts as a binder, helping to hold the chopped meats together and adding a subtle creaminess that complements the saltiness of the cured meats. Don’t overmix; you want to gently combine everything so the texture of the individual meats is still apparent.
Step 2: Season the Meat Mixture
Now it’s time to infuse our meat mixture with classic Italian-inspired seasonings. Sprinkle the garlic powder, dried oregano, and dried basil evenly over the meat and mayonnaise. These herbs and aromatics are essential for that authentic Italian flavor profile we’re aiming for. Gently fold the seasonings into the mixture, ensuring an even distribution. You should start to smell the fragrant herbs as you do this. The goal here is to lightly coat the meat pieces, allowing the flavors to meld beautifully during the baking process.
Assembling the Italian Sliders
Step 3: Preparing the Rolls and Layering the Cheese
Take your 12 Hawaiian rolls and carefully split them horizontally. It’s often easiest to do this with a serrated knife, running it along the side of the rolls. Place the bottom halves of the rolls onto a baking sheet lined with parchment paper for easy cleanup. On top of each bottom roll half, arrange one slice of provolone cheese. You want the cheese to cover the majority of the roll. The provolone will melt and create a wonderful cheesy layer that will bind the meat filling to the bottom of the roll.
Step 4: Adding the Meat Filling and Top Rolls
Now, carefully spoon the prepared meat mixture evenly over the provolone cheese on each roll. Be generous, but try to keep the filling relatively contained within the boundaries of the roll. Once the meat filling is in place, place the top halves of the Hawaiian rolls over the meat. Gently press down on the sliders to help them hold their shape. This initial assembly is crucial for ensuring each slider is packed with flavor.
Baking and Finishing Touches
Step 5: Buttering and Baking for Golden Perfection
In a small bowl, melt your ¼ cup of butter. This melted butter is going to be the key to achieving those perfectly golden and slightly crispy tops on our Italian Sliders. Using a pastry brush, generously brush the melted butter over the top of each assembled slider. Don’t be shy with the butter – it’s going to add incredible flavor and a beautiful sheen. Preheat your oven to 350 degrees Fahrenheit (175 degrees Celsius). Bake the sliders for 12-15 minutes, or until the rolls are golden brown and the cheese is fully melted and gooey. The aroma filling your kitchen will be absolutely divine.
Creating the Zesty Relish and Final Assembly
Step 6: Whipping Up the Creamy Dill Relish
While the sliders are baking, let’s prepare our zesty relish, which adds a bright and tangy counterpoint to the rich, savory filling. In another small bowl, combine the remaining ¼ cup of mayonnaise with the ¼ cup of dill relish. Stir these together until they are well incorporated. This simple relish provides a wonderful creaminess and a pleasant tang that cuts through the richness of the meats and cheese.
Step 7: Dressing the Sliders for Ultimate Enjoyment
Once the sliders have finished baking and are out of the oven, let them cool slightly for a couple of minutes – just enough so you can handle them. Carefully lift the top halves of the rolls. Spread a generous layer of the prepared creamy dill relish onto the inside of the top roll halves. Then, pile a good portion of the shredded lettuce onto the bottom half of each slider, on top of the melted cheese and meat. Sprinkle the finely diced red onion and chopped banana peppers over the lettuce. Finally, place the top halves of the rolls back onto the sliders. Serve immediately and enjoy these incredible Italian Sliders!
Conclusion:
There you have it! You’ve just learned how to create absolutely delicious Italian Sliders that are sure to be a hit at any gathering. The blend of savory Italian sausage, melted mozzarella, and a hint of zesty marinara stuffed into soft slider buns is simply irresistible. These little flavor bombs are incredibly versatile and can be whipped up for a quick weeknight dinner, an impressive appetizer for game day, or a crowd-pleasing addition to your next potluck.
For serving suggestions, I love to pair these Italian Sliders with a fresh side salad, some crispy potato wedges, or even a cup of your favorite minestrone soup. Don’t be afraid to get creative with variations! You can easily swap out the Italian sausage for ground beef or turkey, add some sautéed onions and peppers, or even try different cheeses like provolone or a spicy pepper jack.
I truly hope you enjoy making and devouring these Italian Sliders as much as I do. The satisfaction of creating something so flavorful and beloved from scratch is truly rewarding. So gather your ingredients, get your ovens preheated, and prepare for some serious compliments!
Frequently Asked Questions:
Can I make the Italian Sliders ahead of time?
Yes, you can assemble the Italian Sliders ahead of time. Prepare them up to the point of baking, cover them tightly with plastic wrap, and refrigerate for up to 24 hours. You may need to add a few extra minutes to the baking time if baking directly from the refrigerator.
What kind of buns are best for Italian Sliders?
While Hawaiian rolls or other soft slider buns work wonderfully for these Italian Sliders due to their slightly sweet flavor and soft texture, you can also use regular dinner rolls or even cut a larger brioche loaf into individual portions. The key is a bun that’s soft enough to soak up some of the delicious juices.
Easy Italian Beef Sliders – Quick & Delicious Appetizer
Irresistible Italian sliders made with a savory beef meat filling and a zesty dill relish, perfect for appetizers or a quick meal.
Ingredients
-
12 Hawaiian rolls, split horizontally
-
⅓ cup mayonnaise
-
12 slices provolone cheese
-
½ pound hard beef salami, coarsely chopped
-
½ pound beef pepperoni, coarsely chopped
-
½ pound beef ham, coarsely chopped
-
¼ cup butter, melted
-
½ teaspoon garlic powder
-
½ teaspoon dried oregano
-
½ teaspoon dried basil
-
8 ounce bag shredded lettuce
-
½ cup red onion, finely diced
-
½ cup chopped banana peppers
-
¼ cup mayonnaise
-
¼ cup dill relish
Instructions
-
Step 1
In a medium-sized mixing bowl, combine the coarsely chopped hard beef salami, beef pepperoni, and beef ham. Add ⅓ cup mayonnaise and gently combine. Do not overmix. -
Step 2
Sprinkle the garlic powder, dried oregano, and dried basil evenly over the meat mixture. Gently fold the seasonings into the mixture, ensuring an even distribution. -
Step 3
Split the Hawaiian rolls horizontally. Place the bottom halves on a baking sheet lined with parchment paper. Arrange one slice of provolone cheese on top of each bottom roll half. -
Step 4
Spoon the meat mixture evenly over the provolone cheese on each roll. Place the top halves of the Hawaiian rolls over the meat and gently press down. -
Step 5
Melt the ¼ cup of butter. Generously brush the melted butter over the top of each assembled slider. Preheat your oven to 350 degrees Fahrenheit (175 degrees Celsius). -
Step 6
Bake the sliders for 12-15 minutes, or until the rolls are golden brown and the cheese is fully melted and gooey. -
Step 7
While sliders are baking, combine the remaining ¼ cup of mayonnaise with the ¼ cup of dill relish in a small bowl. Stir until well incorporated. -
Step 8
Once sliders are out of the oven, let them cool slightly. Lift the top halves and spread a generous layer of the dill relish mixture onto the inside of the top rolls. Pile shredded lettuce onto the bottom halves. Sprinkle red onion and banana peppers over the lettuce. Place the top halves back onto the sliders. Serve immediately.
Important Information
Nutrition Facts (Per Serving)
It is important to consider this information as approximate and not to use it as definitive health advice.
Allergy Information
Please check ingredients for potential allergens and consult a health professional if in doubt.