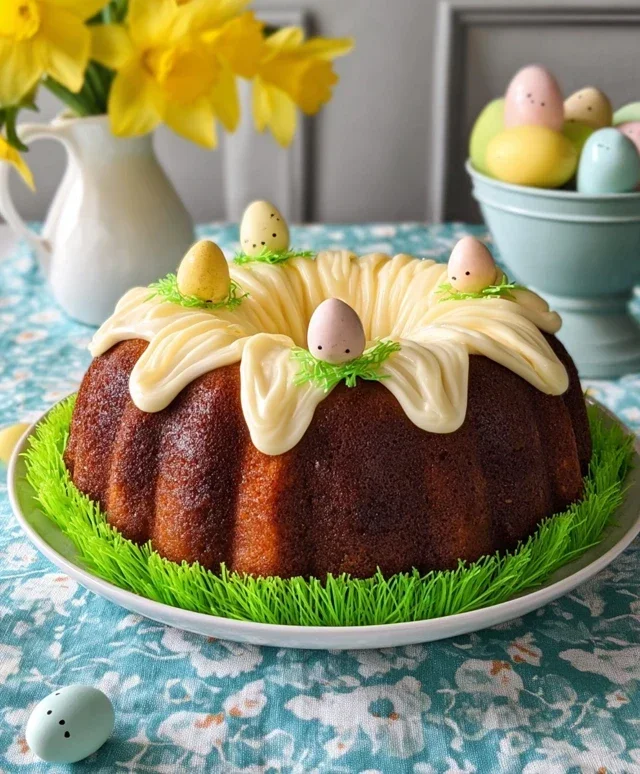
Easy Decorative Sugar Cookie Icing Recipe
Decorative Sugar Cookie Icing is more than just a sweet topping; it’s the edible artistry that transforms simple sugar cookies into dazzling masterpieces. Have you ever admired those perfectly smooth, vibrant designs on holiday treats or intricate patterns adorning birthday celebrations and wondered how they achieve such flawless results? You’re not alone! The secret lies in mastering the art of the right decorative sugar cookie icing. What draws us to these beautifully embellished cookies is their ability to evoke joy, celebrate occasions, and quite frankly, their undeniable visual appeal. They are edible works of art, bringin extractg smiles and gasps of delight with every bite. This isn’t just about taste; it’s about the entire sensory experience – the crisp cookie, the sweet, creamy frosting, and the sheer beauty of the creation. The special magic of this decorative sugar cookie icing is its versatility, allowing for endless creativity from simple elegant lines to complex, multi-layered designs, making every cookie a unique expression of love and festivity.
Ingredients:
- 3 cups powdered sugar
- 4 tablespoons milk
- 1 1/2 tablespoons light corn syrup
- 1/2 teaspoon vanilla extract (or peppermint extract, or orange extract)
- Dash of salt
- Optional food coloring (small amounts for separate bowls)
- Plain cooled sugar cookies (for decorating)
Making the Decorative Sugar Cookie Icing
This recipe is designed to give you a beautifully smooth and glossy Decorative Sugar Cookie Icing that’s perfect for all your holiday baking and special occasion decorating. It dries to a delightful slightly firm finish, allowing you to stack your cookies without worry, yet remains soft enough to bite into easily. The light corn syrup is the secret weapon here, providing that incredible shine and preventing the icing from becoming too brittle. We’ll start by ensuring all our ingredients are measured and ready to go, which makes the process of whipping up this icing a breeze.
Preparing the Icing Base
In a medium-sized mixing bowl, combine the 3 cups of powdered sugar and the dash of salt. Sifting the powdered sugar at this stage is highly recommended, although not strictly necessary if you’re in a hurry. Sifting will ensure there are no lumps and will contribute to a perfectly smooth icing, which is key for decorative work. Once the dry ingredients are together, whisk them lightly to distribute the salt evenly.
Next, add the wet ingredients to the dry. Pour in the 4 tablespoons of milk, the 1 1/2 tablespoons of light corn syrup, and the 1/2 teaspoon of your chosen extract. I’m using classic vanilla extract for this batch, but feel free to experiment with peppermint for a festive touch or orange for a citrusy twist. These flavorings will give your icing a subtle but delicious aroma and taste that complements the sweet sugar cookie.
Achieving the Perfect Consistency
Now, it’s time to mix everything together. Begin extract by stirring with a whisk or a spatula until the ingredients start to combine. You’ll notice it will be quite thick and pasty at this stage. Keep stirring, working to incorporate all the dry powdered sugar into the wet ingredients. Don’t be discouraged by the initial thickness; this is normal. The goal is to create a smooth, lump-free mixture.
Once you have a thick paste, you may need to adjust the consistency to achieve the ideal drizzling or spreading texture for your Decorative Sugar Cookie Icing. If the icing is too thick and unmanageable, add the milk a teaspoon at a time, stirring well after each addition, until you reach your desired consistency. You’re looking for an icing that’s thick enough to hold its shape but fluid enough to pour or spread smoothly without being too runny. A good test is to lift your spatula or whisk; the icing should fall off in a thick ribbon and then slowly melt back into the bowl. If the icing becomes too thin, you can always add a tablespoon more of sifted powdered sugar to thicken it up. This fine-tuning is where you truly master the consistency for detailed decorating.
Coloring Your Decorative Sugar Cookie Icing
If you plan on creating a colorful assortment of decorated cookies, this is the time to divide your icing. Scoop out your desired amounts of the white icing into separate small bowls. For each color you wish to create, add just a tiny drop of food coloring to its respective bowl. It’s always best to start with a very small amount of coloring, as it’s much easier to add more than to take it away. Gel food colorings are excellent for this purpose as they provide vibrant colors without adding too much extra liquid, which could alter the icing’s consistency.
Gently stir each bowl of icing with a clean spoon or a small spatula until the color is fully incorporated and uniform throughout. Continue mixing until you achieve the exact shade you’re aiming for. Remember that the color will appear slightly lighter once it has fully set on the cookie, so aim for a slightly more intense hue than you might think you need.
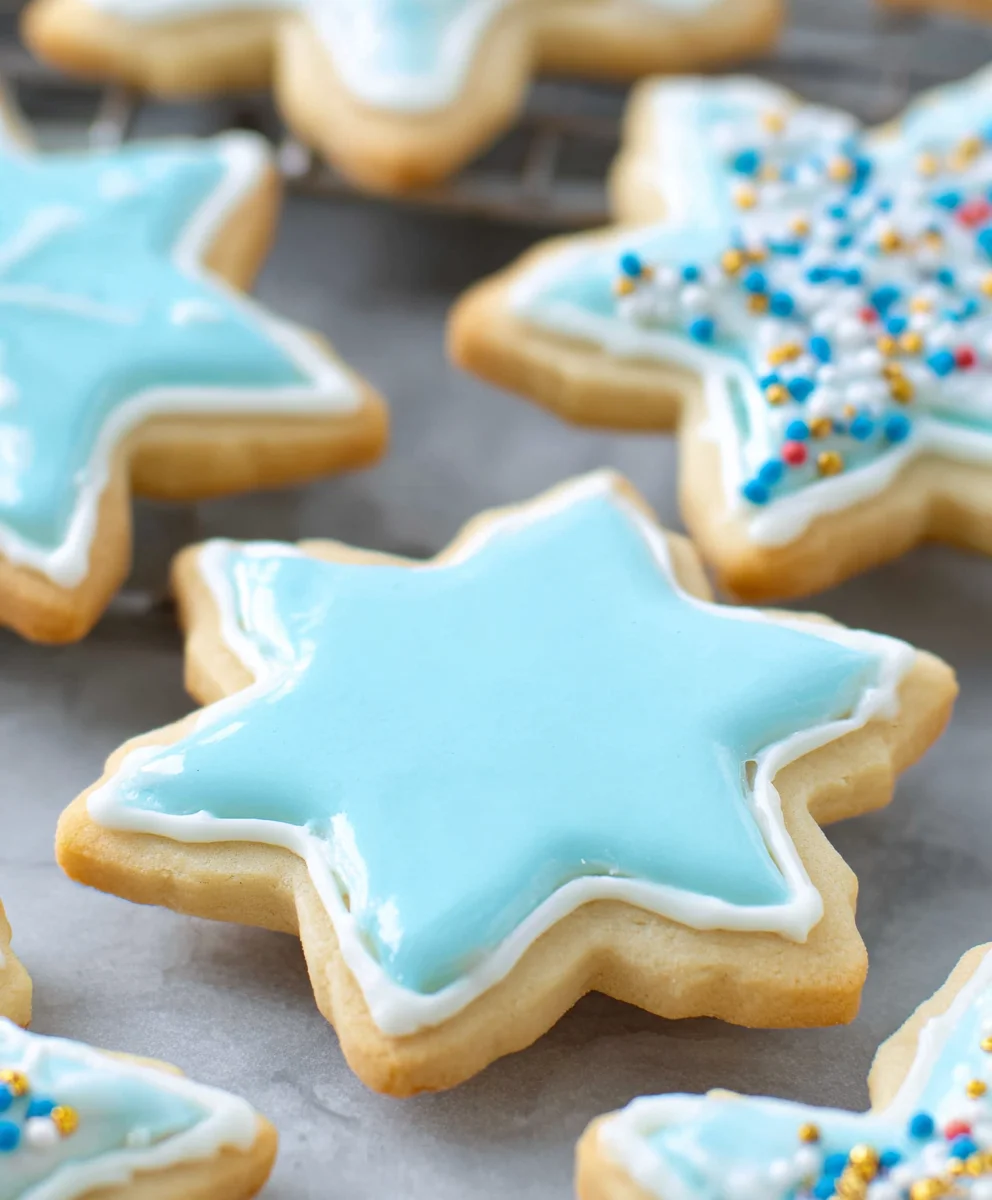
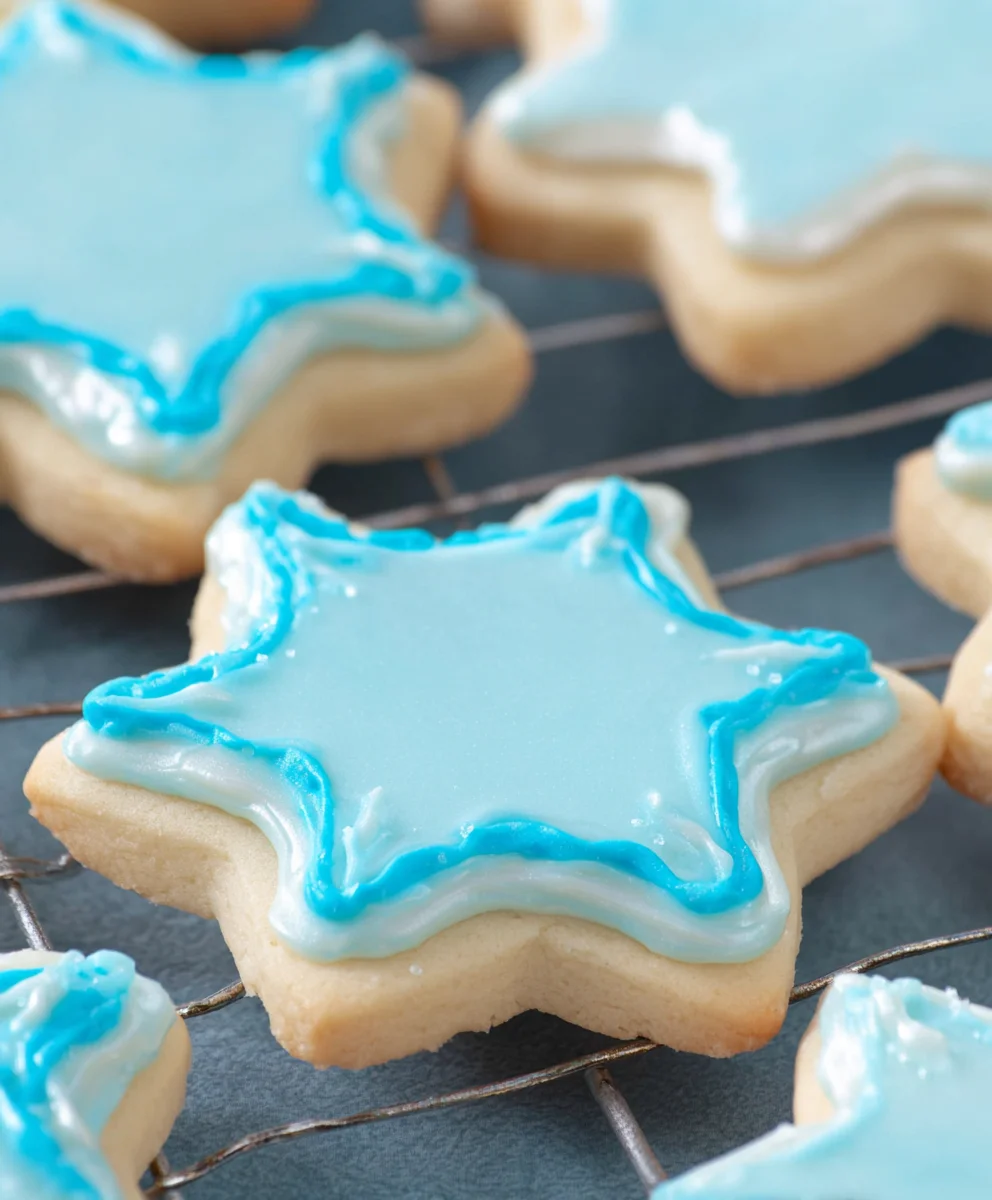
Decorating Your Sugar Cookies
Once your Decorative Sugar Cookie Icing is prepared and colored (if desired), you are reagin extractto begin decorating. You can use a piping bag fitted with a small round tip for intricate lines and details, or a spoon for a more rustic, flooded effect. If you’re flooding cookies, pour a generous amount of icing onto the center of your cooled sugar cookie and gently spread it to the edges with an offset spatula or the back of a spoon. Tap the cookie gently on your work surface to help the icing settle and remove any air bubbles.
For piping, fill your piping bag with the icing and pipe your designs. Allow the decorated cookies to sit at room temperature on a wire rack for at least 30 minutes to an hour, or until the icing has set. The drying time will vary depending on humidity and the thickness of your icing application. For a completely hardened finish that allows for stacking, you might need to let them dry for several hours or even overnight. This ensures your beautiful creations are ready to be shared, admired, and, most importantly, enjoyed!
Conclusion:
And there you have it – the ultimate guide to creating beautiful and delicious Decorative Sugar Cookie Icing! We’ve explored the essential ingredients, the step-by-step process for achieving that perfect smooth consistency, and how to achieve those stunning decorative finishes that will impress your friends and family. This icing isn’t just a topping; it’s the key to transforming your sugar cookies into edible works of art. Remember, practice makes perfect, so don’t be afraid to experiment and have fun with it. Whether you’re decorating for holidays, birthdays, or just because, Decorative Sugar Cookie Icing will elevate your baking to the next level. Try serving your decorated cookies at your next gathering, or package them up as thoughtful, homemade gifts. For variations, consider adding a touch of almond extract for a different flavor profile or using edible glitter for extra sparkle. Happy decorating!
FAQs about Decorative Sugar Cookie Icing:
Q1: How do I store leftover Decorative Sugar Cookie Icing?
You can store leftover Decorative Sugar Cookie Icing in an airtight container at room temperature for up to 2-3 days. If it thickens too much, simply whisk in a tiny bit of water or milk until you reach your desired consistency. For longer storage, you can refrigerate it, but it may require a bit more whisking to smooth out after thawing.
Q2: Can I make Decorative Sugar Cookie Icing ahead of time?
Yes, you can absolutely make Decorative Sugar Cookie Icing ahead of time! Once it’s made and at the desired consistency, cover it tightly with plastic wrap, pressing the wrap directly onto the surface of the icing to prevent a skin from forming. It can typically be made a day or two in advance and stored at room temperature. For coloring, it’s often best to color it just before you plan to use it, as some colors can fade over time.
Q3: My icing is too thick or too thin. How can I adjust it?
If your Decorative Sugar Cookie Icing is too thick, add a very small amount of liquid (like water, milk, or lemon juice) a teaspoon at a time, whisking thoroughly after each addition until you reach the perfect pourable or pipeable consistency. If it’s too thin, gradually add more powdered sugar, a tablespoon at a time, whisking until it thickens. Remember to add liquids and powdered sugar slowly to avoid overcorrection.
Easy Decorative Sugar Cookie Icing
A smooth and glossy icing recipe perfect for decorating sugar cookies, drying to a slightly firm finish for easy stacking.
Ingredients
-
3 cups powdered sugar
-
4 tablespoons milk
-
1 1/2 tablespoons light corn syrup
-
1/2 teaspoon vanilla extract
-
Dash of salt
-
Optional food coloring
-
Plain cooled sugar cookies
Instructions
-
Step 1
In a medium bowl, combine sifted powdered sugar and salt. Whisk lightly. -
Step 2
Add milk, light corn syrup, and vanilla extract to the dry ingredients. Stir until combined into a thick paste. -
Step 3
Adjust consistency by adding milk, one teaspoon at a time, until desired drizzling or spreading texture is reached. If too thin, add more sifted powdered sugar. -
Step 4
Divide icing into separate bowls for coloring. Add tiny amounts of gel food coloring to each bowl and stir until uniform. -
Step 5
Decorate cooled sugar cookies using a piping bag or spoon. Flood cookies by spreading icing and tapping gently to remove air bubbles. -
Step 6
Allow decorated cookies to sit at room temperature on a wire rack for at least 30 minutes to an hour until set. For a hardened finish, dry for several hours or overnight.
Important Information
Nutrition Facts (Per Serving)
It is important to consider this information as approximate and not to use it as definitive health advice.
Allergy Information
Please check ingredients for potential allergens and consult a health professional if in doubt.