Authentic Pav Bhaji Recipe – Delicious Indian Street Food
Pav Bhaji is more than just a dish; it’s a vibrant explosion of flavors and textures that evokes memories of bustling street corners and lively evenings. What is it about this humble, mashed vegetable curry served with buttered bread rolls that captures hearts, both in India and around the world? Perhaps it’s the perfect balance of spices, the comforting creaminess of the bhaji, or the satisfying crunch of the perfectly toasted pav. This iconic Mumbai street food has a way of bringin extractg people together, a communal joy found in every spicy, tangy bite. It’s the aroma that wafts through the air, promising a delicious adventure, that first draws you in. But it’s the unforgettable taste, the satisfying heartiness, and the sheer delight of this iconic dish that makes you a devoted fan. Prepare yourself for a culinary journey that will ignite your senses and introduce you to the magic of authentic Pav Bhaji.
Ingredients:
- 7 cloves Garlic (Big, approximately 30 grams), finely minced
- 2 tbsp Red Kashmiri chili powder (ensure you use Kashmiri chili powder for its vibrant color and mild heat, not regular chili powder)
- 2 cups, around 250 grams Potatoes, peeled and cut into small cubes
- 1 cup, around 120 grams Cauliflower florets, cut into small pieces
- 2 cups Finely chopped Tomatoes
- 1 cup Finely chopped Onion
- 1 cup Finely chopped Capsicum (bell pepper)
- 1/4 cup Dried green peas (or 1/2 cup fresh or frozen green peas)
- Salt to taste
- 1/2 tsp Turmeric powder
- 1 tbsp + 1/2 tsp Pav bhaji masala
- 1/4 cup Finely chopped cilantro (coriander leaves)
- 2 tbsp Butter (salted butter is fine)
- 1 tbsp Oil
- 1 tsp Kasuri methi (dried fenugreek leaves)
Instructions:
Preparing the Vegetables
Boiling and Mashing
Start by preparing the vegetables for our delicious Pav Bhaji. First, take your cubed potatoes and cauliflower florets. In a large pot or a pressure cooker, add the cubed potatoes and cauliflower. If you are using dried green peas, add them now as well. If you are using fresh or frozen green peas, it’s often better to add them later during the simmering stage to retain their vibrant color and texture, so set those aside for now. Add enough water to generously cover the vegetables, about 2-3 cups. Now, add about 1/2 teaspoon of salt and the 1/2 teaspoon of turmeric powder to the water. This will help to season the vegetables from the inside as they cook. If you are using a pressure cooker, cook for about 3-4 whistles on medium heat. If you are boiling in a pot, bring it to a boil, then reduce the heat, cover, and let it simmer until the vegetables are fork-tender. This usually takes around 15-20 minutes. Once cooked, drain any excess water from the vegetables. It’s crucial to drain thoroughly to avoid a watery bhaji. Now, using a potato masher or the back of a sturdy spoon, mash the cooked vegetables until they are mostly smooth but with a few small chunks remaining for texture. Set this mashed vegetable mixture aside.
Building the Flavor Base
Sautéing the Aromatics
This is where the magic truly begin extracts for our Pav Bhaji. Heat the 1 tablespoon of oil and 1 tablespoon of butter in a wide, heavy-bottomed pan or a kadai over medium heat. Once the butter has melted and the oil is shimmering, add the finely minced garlic. Sauté the garlic for about 30-45 seconds until it becomes fragrant, being careful not to burn it. Burnt garlic can impart a bitter taste. Immediately after, add the finely chopped onion and sauté them until they turn translucent and slightly golden. This process can take about 5-7 minutes. Next, add the finely chopped capsicum (bell pepper) and cook for another 3-5 minutes until it softens slightly. Now, it’s time to introduce the tomatoes. Add the finely chopped tomatoes to the pan and cook them down until they soften and the oil starts to separate from the mixture. This indicates that the tomatoes have cooked down beautifully and their raw flavor has mellowed. This step is essential for a rich and flavorful bhaji.
Spicing and Simmering
Infusing with Masala and Heat
Now that our aromatics are well-sautéed, it’s time to add the spices that will give our Pav Bhaji its signature taste and color. Sprinkle in the 2 tablespoons of Red Kashmiri chili powder. Remember, Kashmiri chili powder is prized for its deep red hue and mild heat, so don’t be tempted to substitute it. Stir this in for about 30 seconds, allowing the chili powder to bloom in the hot oil and release its color and flavor. Be mindful of the heat and avoid inhaling the fumes directly. Next, add the 1 tablespoon + 1/2 teaspoon of Pav bhaji masala. This is the heart of the flavor profile, so ensure you are using a good quality pav bhaji masala. Stir the masala into the onion-tomato mixture and cook for another minute until it becomes fragrant. This toasting of the spices enhances their aroma and taste. If you are using fresh or frozen green peas at this stage, add them now. Pour in about 1 cup of water to deglaze the pan and help everything combine smoothly. Stir well to scrape up any bits stuck to the bottom of the pan.
Combining and Finishing
Mashing and Flavor Adjustment
Now, it’s time to incorporate the mashed vegetable mixture into our flavorful masala base. Gently add the mashed potatoes, cauliflower, and peas (if you added them earlier) into the pan. Stir everything together thoroughly, ensuring that the vegetable mixture is well coated with the onion-tomato-spice masala. Reduce the heat to low. Using your masher or the back of a spoon, continue to mash the mixture directly in the pan. The goal here is to achieve a consistency that is smooth yet still has some texture. Cook the bhaji on low heat, stirring frequently to prevent it from sticking to the bottom of the pan. This simmering process allows all the flavors to meld together beautifully. Add the remaining 1 tablespoon of butter and the 1 teaspoon of kasuri methi (dried fenugreek leaves). Crush the kasuri methi between your palms before adding it to the bhaji; this releases its aromatic oils. Stir in the finely chopped cilantro, reserving some for garnish. Adjust the salt to your taste. If the bhaji seems too thick, you can add a splash of hot water to reach your desired consistency. Cook for another 5-7 minutes, allowing the flavors to deepen.
Serving the Pav Bhaji
The Final Touches
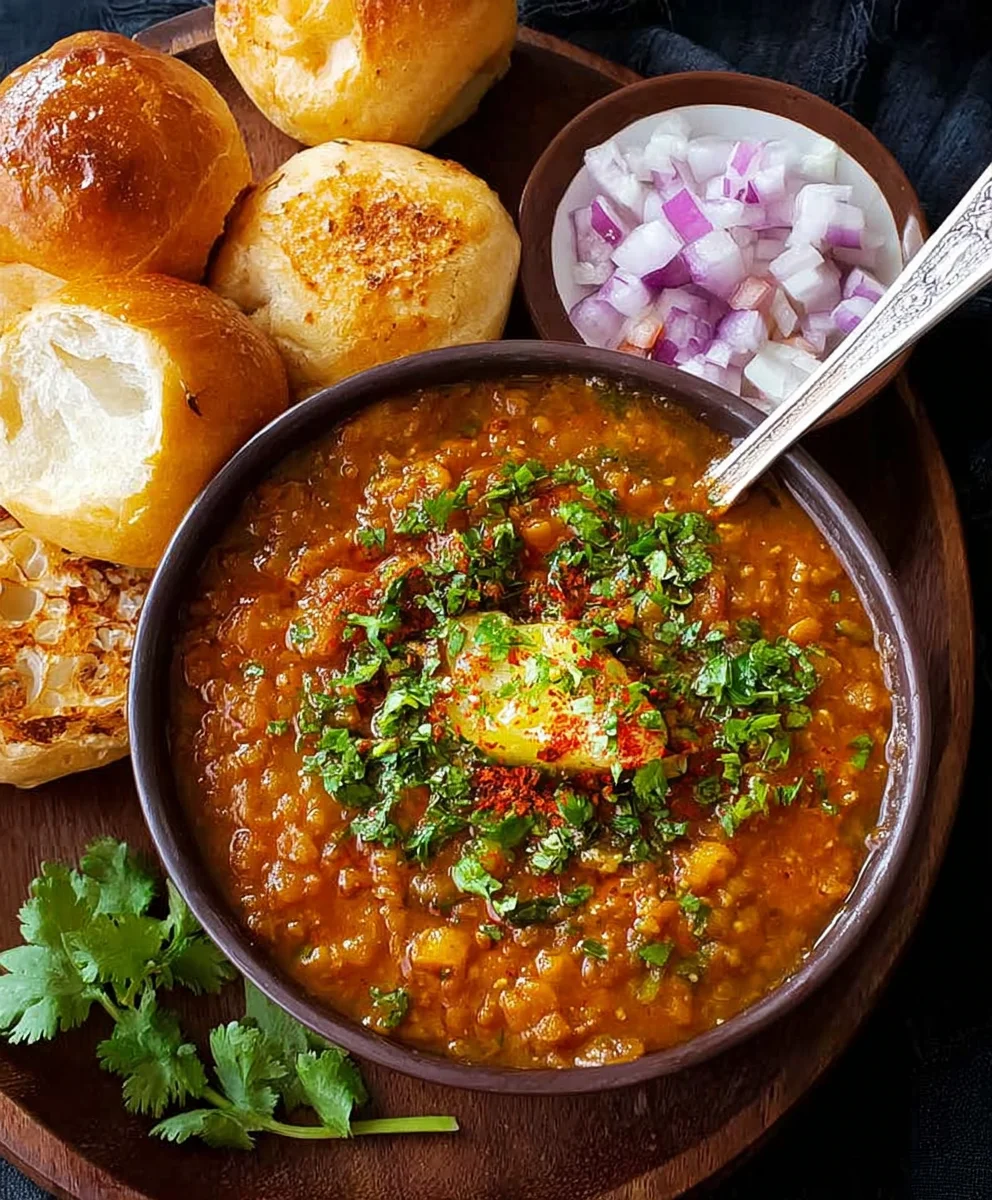
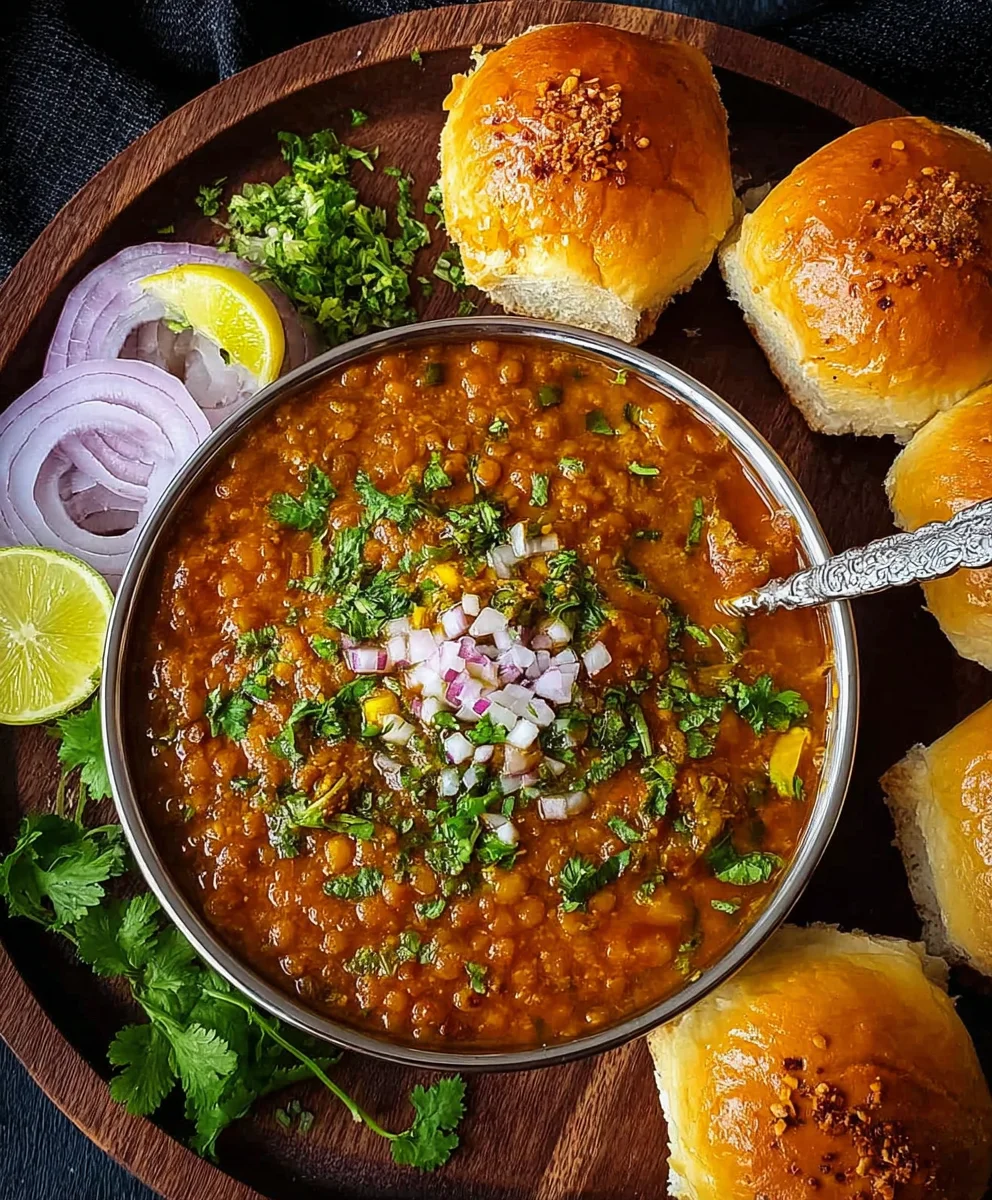
To serve this delightful Pav Bhaji, we need to prepare the “pav” or bread rolls. Lightly toast the pav (bread rolls) by slathering them with butter on both sides. You can do this on a tawa (griddle) or in a pan until they are golden brown and slightly crisp. Serve the hot bhaji in bowls, garnished with a dollop of extra butter and the reserved chopped cilantro. You can also add a squeeze of fresh lemon juice for a tangy kick. Accompany the bhaji with the butter-toasted pav, some sliced onions, and a wedge of lemon on the side for everyone to customize their plate. The combination of the spicy, flavorful bhaji with the soft, buttery pav is simply irresistible. Enjoy this classic Indian street food delicacy!
Conclusion:
There you have it – a delightful and flavorful recipe for homemade Pav Bhaji! We’ve walked through the steps of creating this beloved Indian street food classic, from perfectly mashing the vegetables to achieving that signature spicy and tangy bhaji. The aroma that fills your kitchen as it cooks is truly irresistible. This Pav Bhaji is not just a dish; it’s an experience, perfect for a comforting weeknight meal or a fun gathering with friends and family. Don’t be afraid to experiment and make it your own!
For serving, the classic accompaniments are essential: warm, buttered pav (buns), a squeeze of fresh lemon juice, and a sprinkle of finely chopped red onions and fresh cilantro. A side of cucumber and carrot slices adds a refreshing crunch.
Feel free to adjust the spice level to your preference by adding more or less green chilies and red chili powder. You can also add other vegetables like carrots or peas to the bhaji for extra nutrition and flavor. We encourage you to give this Pav Bhaji recipe a try; the satisfaction of creating this vibrant dish from scratch is immense!
Frequently Asked Questions about Pav Bhaji:
Q1: Can I make Pav Bhaji ahead of time?
Yes, you can definitely make the bhaji ahead of time. It actually often tastes even better the next day as the flavors meld together. Store it in an airtight container in the refrigerator for up to 2-3 days. Reheat gently on the stovetop or in the microwave. You’ll want to warm the pav just before serving.
Q2: What can I use if I can’t find pav (Indian bread rolls)?
If pav is unavailable, you can substitute them with other soft dinner rolls or burger buns. Toasting them generously with butter on a griddle or in a pan until golden brown and slightly crispy will help replicate the authentic Pav Bhaji experience.
Authentic Pav Bhaji Recipe – Delicious Indian Street Food
A step-by-step guide to making authentic and delicious Indian street food – Pav Bhaji, featuring a flavorful vegetable mash served with butter-toasted bread rolls.
Ingredients
-
7 cloves Garlic (Big, approximately 30 grams), finely minced
-
2 tbsp Red Kashmiri chili powder
-
2 cups, around 250 grams Potatoes, peeled and cut into small cubes
-
1 cup, around 120 grams Cauliflower florets, cut into small pieces
-
1/4 cup Dried green peas
-
Salt to taste
-
1/2 tsp Turmeric powder
-
1 tbsp + 1/2 tsp Pav bhaji masala
-
1/4 cup Finely chopped cilantro
-
2 tbsp Butter
-
1 tbsp Oil
-
1 tsp Kasuri methi (dried fenugreek leaves)
Instructions
-
Step 1
Boil and mash the vegetables: In a pressure cooker or pot, combine cubed potatoes, cauliflower florets, and dried green peas (if using). Add enough water to cover, salt, and turmeric powder. Pressure cook for 3-4 whistles or boil for 15-20 minutes until fork-tender. Drain excess water thoroughly and mash the vegetables until mostly smooth with some chunks remaining. -
Step 2
Build the flavor base: Heat oil and butter in a pan over medium heat. Sauté minced garlic until fragrant. Add finely chopped onion and sauté until translucent. Then, add finely chopped capsicum and cook until softened. Finally, add finely chopped tomatoes and cook until they soften and oil separates. -
Step 3
Spice and infuse: Add Kashmiri chili powder and sauté for 30 seconds. Stir in pav bhaji masala and cook for another minute until fragrant. Add fresh or frozen green peas (if using). Pour in about 1 cup of water to deglaze the pan and combine ingredients. -
Step 4
Combine and simmer: Add the mashed vegetable mixture to the masala base. Stir well to combine. Mash the mixture further in the pan. Cook on low heat, stirring frequently. Add remaining butter and crushed kasuri methi. Stir in chopped cilantro. Adjust salt and add hot water if needed for desired consistency. Cook for another 5-7 minutes. -
Step 5
Serve the Pav Bhaji: Lightly toast bread rolls (pav) by buttering and browning them on a griddle. Serve the hot bhaji garnished with extra butter and cilantro. Optionally, add lemon juice. Accompany with butter-toasted pav, sliced onions, and a lemon wedge.
Important Information
Nutrition Facts (Per Serving)
It is important to consider this information as approximate and not to use it as definitive health advice.
Allergy Information
Please check ingredients for potential allergens and consult a health professional if in doubt.