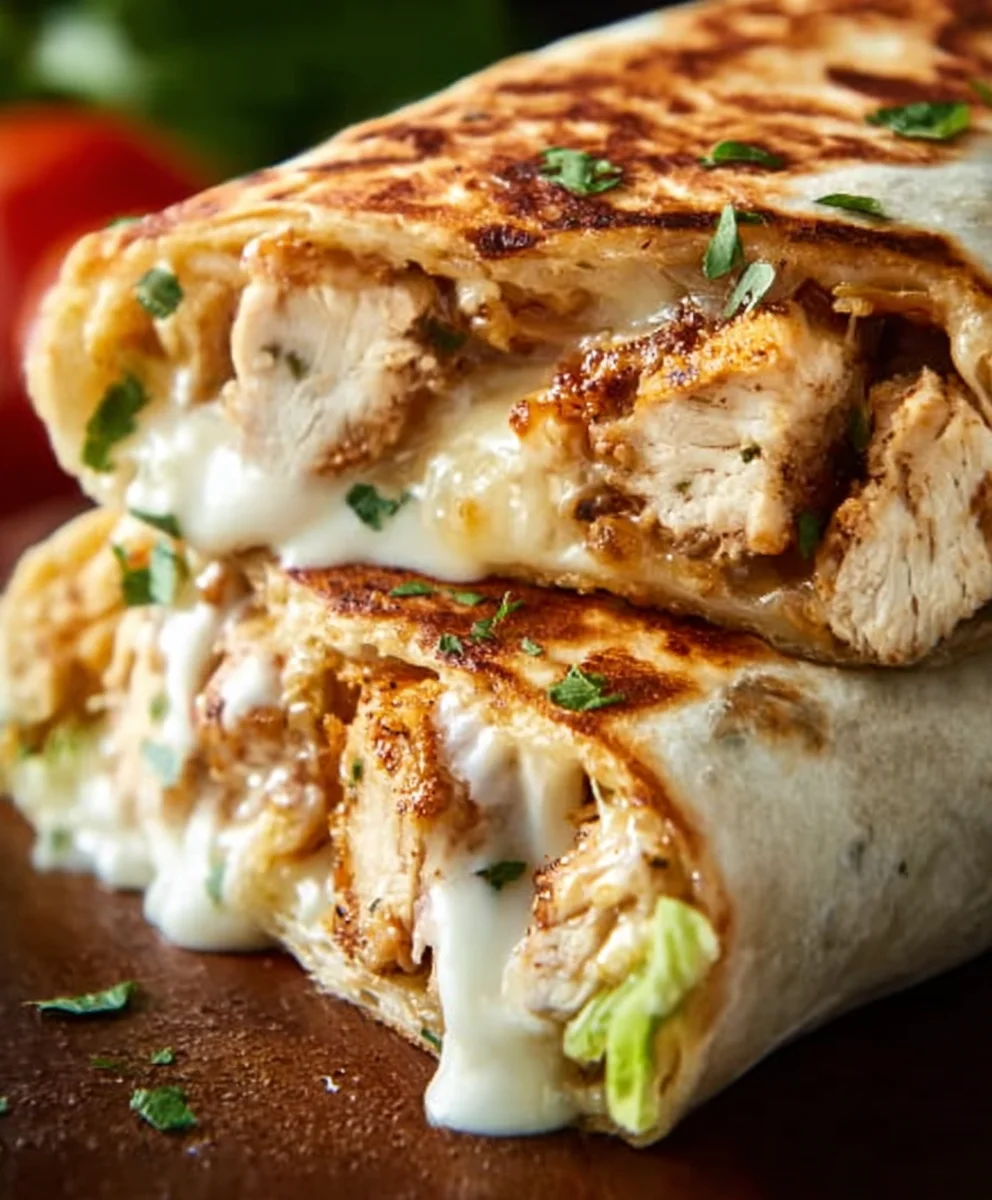
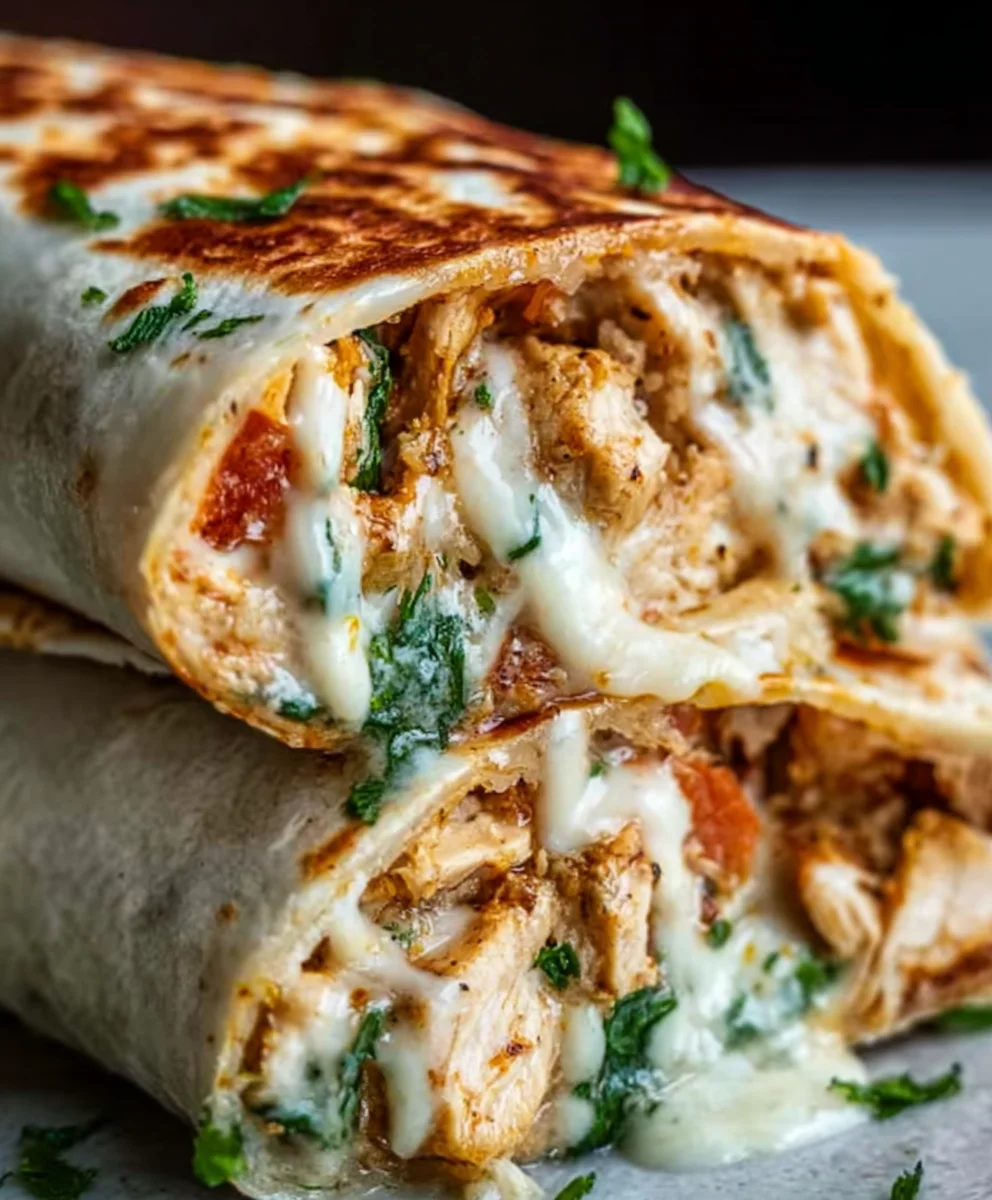
Cheesy Garlic Chicken Wraps – Easy Dinner Recipe
Cheesy Garlic Chicken Wraps are the ultimate weeknight hero, a dish that sparks joy and satisfies cravings with every single bite. What is it about these simple yet sensational wraps that makes them so universally adored? Perhaps it’s the perfect marriage of tender, garlicky chicken enveloped in a creamy, melty cheese sauce, all tucked snugly into a warm tortilla. Or maybe it’s the sheer ease of preparation, transforming humble ingredients into a restaurant-worthy meal in under 30 minutes. These Cheesy Garlic Chicken Wraps are more than just a quick dinner; they’re a comfort food experience, a guaranteed crowd-pleaser for busy families and a delightful indulgence for anyone seeking pure, unadulterated deliciousness. Get ready to discover your new favorite go-to meal!
Ingredients:
- 2 cups cooked chicken, shredded
- 1/2 cup garlic aioli
- 1 cup cheddar cheese, shredded
- 4 large tortillas
- Salt and pepper to taste
Preparing the Chicken Filling
Step 1: Combine Chicken and Aioli
The foundation of our Cheesy Garlic Chicken Wraps is this incredibly simple yet flavourful chicken mixture. In a medium-sized mixing bowl, place your 2 cups of pre-cooked and shredded chicken. To this, add the 1/2 cup of rich and creamy garlic aioli. Now, this is where the magic starts. Gently but thoroughly mix the chicken and aioli together, ensuring every strand of chicken is coated in that delightful garlicky goodness. You want a consistency where the chicken is moist and held together by the aioli, but not swimming in it. This aioli is the key to the creamy texture and robust flavor profile of these wraps. If your chicken is particularly dry, you might find you need a tiny splash more aioli, but aim for a cohesive mixture that’s easy to spread.
Step 2: Season Generously
Once your chicken and aioli are well combined, it’s time to bring out the full flavour with a simple seasoning. Sprinkle in salt and pepper to taste. Remember, the garlic aioli already has a good amount of flavour, so start with a modest amount of salt and pepper and you can always add more later if you feel it needs it. Use your mixing spoon or even a clean hand to gently toss the chicken mixture, distributing the salt and pepper evenly. This step is crucial for creating a balanced taste that complements the richness of the aioli and the creaminess of the cheese we’ll be adding next. Don’t be shy with the pepper; a little zest can really make the garlic pop.
Assembling the Wraps
Step 3: Add the Cheese
Now for the cheesy part! To the seasoned chicken and aioli mixture, add your 1 cup of shredded cheddar cheese. Cheddar is fantastic here because it melts beautifully and offers a sharp, satisfying flavour that pairs perfectly with garlic and chicken. Gently fold the cheese into the chicken mixture. You don’t want to overmix at this stage; just a few gentle stirs to distribute the cheese throughout. The goal is to have pockets of melty cheese within the chicken filling, rather than a completely homogenous paste. As you fold, you’ll notice the mixture starting to become even more appealing and slightly clumpy, which is exactly what we want for a delicious wrap.
Step 4: Warm the Tortillas
Before we can fill and wrap, it’s essential to warm up your 4 large tortillas. This makes them pliable and less likely to tear when you’re rolling them, and it also helps the cheese melt beautifully within the wrap. There are a few ways to do this. You can briefly warm them in a dry skillet over medium heat for about 30 seconds per side until they are soft and flexible. Alternatively, you can wrap them in a damp paper towel and microwave them for 15-20 seconds. Some people even prefer to lightly toast them under a broiler for a minute or two, watching them very carefully to avoid burning. Choose the method that best suits your kitchen setup and desired tortilla texture. A warm, soft tortilla is key to a perfect wrap experience.
Step 5: Fill and Roll Your Wraps
With your tortillas warmed and your cheesy chicken mixture ready, it’s time for the final assembly. Lay one warmed tortilla flat on a clean surface. Spoon a generous portion of the cheesy chicken filling onto the center of the tortilla, leaving some space around the edges. Aim for about a quarter of the filling per tortilla. Now, fold in the sides of the tortilla first, tucking them in slightly over the filling. Then, starting from the bottom edge closest to you, tightly roll the tortilla upwards, enclosing the filling completely. The folded sides will help prevent the filling from escaping as you roll. Repeat this process for all four tortillas. If you find your tortillas are a bit stubborn to roll, don’t force them; just gently coax them into shape. The slight warmth from the tortillas and the aioli will help everything meld together beautifully. You can enjoy these Cheesy Garlic Chicken Wraps immediately, or for an extra decadent touch, you can briefly sear them in a lightly oiled skillet or press them in a panini maker until golden brown and the cheese is fully melted and gooey.
Conclusion:
And there you have it! Your very own batch of delicious Cheesy Garlic Chicken Wraps is ready to be devoured. This recipe is a fantastic weeknight meal that’s both satisfying and surprisingly simple to prepare. The tender chicken, infused with garlic and coated in a creamy, cheesy sauce, makes for an incredibly flavorful filling that’s perfectly complemented by the soft tortilla. I hope you’ve enjoyed bringin extractg these Cheesy Garlic Chicken Wraps to life in your kitchen!
For serving, these wraps are best enjoyed immediately, but can also be prepped ahead and warmed through. They are perfect on their own, or you can serve them with a side of crisp green salad, sweet potato fries, or even some seasoned roasted vegetables. Feel free to get creative with your own twists! Consider adding a pinch of cayenne pepper for a little heat, or topping with fresh cilantro or chopped chives for an extra burst of freshness. Don’t be afraid to experiment with different cheeses like Monterey Jack or a spicy Pepper Jack for a bolder flavor profile. I truly encourage you to make these Cheesy Garlic Chicken Wraps a regular in your meal rotation!
Frequently Asked Questions:
Can I make the cheesy garlic chicken filling ahead of time?
Absolutely! You can prepare the cheesy garlic chicken filling up to two days in advance. Store it in an airtight container in the refrigerator. When you’re ready to assemble the wraps, simply warm the filling gently on the stovetop or in the microwave before adding it to your tortillas.
What are some good vegetarian or vegan alternatives for Cheesy Garlic Chicken Wraps?
For a vegetarian option, you can substitute the chicken with pan-fried halloumi cheese, firm tofu, or a hearty mix of sautéed mushrooms and bell peppers. For a vegan version, use a plant-based chicken substitute or the mushroom and pepper mix. Ensure you use vegan cheese and a dairy-free creamy sauce base, such as cashew cream or a blended silken tofu mixture, seasoned with nutritional yeast for a cheesy flavor.
Cheesy Garlic Chicken Wraps – Easy Dinner Recipe
Simple and delicious cheesy garlic chicken wraps, perfect for a quick and satisfying dinner. These wraps feature tender shredded chicken mixed with creamy garlic aioli and melty cheddar cheese, all rolled in warm tortillas.
Ingredients
-
2 cups cooked chicken, shredded
-
1/2 cup garlic aioli
-
1 cup cheddar cheese, shredded
-
4 large tortillas
-
Salt to taste
-
Pepper to taste
Instructions
-
Step 1
In a medium-sized mixing bowl, combine the 2 cups of pre-cooked and shredded chicken with the 1/2 cup of garlic aioli. Mix gently but thoroughly until every strand of chicken is coated. -
Step 2
Season the chicken and aioli mixture with salt and pepper to taste. Toss gently to distribute the seasonings evenly. -
Step 3
Add the 1 cup of shredded cheddar cheese to the chicken mixture. Gently fold the cheese in until just distributed, creating pockets of cheese. -
Step 4
Warm the 4 large tortillas. This can be done by briefly warming them in a dry skillet over medium heat for about 30 seconds per side, or by microwaving them wrapped in a damp paper towel for 15-20 seconds until soft and pliable. -
Step 5
Lay a warmed tortilla flat. Spoon about a quarter of the cheesy chicken filling onto the center, leaving space around the edges. Fold in the sides of the tortilla, then tightly roll it up from the bottom edge. -
Step 6
Repeat the filling and rolling process for the remaining tortillas. Enjoy immediately, or for an extra crispy finish, sear in a lightly oiled skillet until golden brown.
Important Information
Nutrition Facts (Per Serving)
It is important to consider this information as approximate and not to use it as definitive health advice.
Allergy Information
Please check ingredients for potential allergens and consult a health professional if in doubt.