Easy Christmas Fudge Recipe-Holiday Dessert Delight
Christmas Fudge isn’t just a treat; it’s a warm hug in edible form, a nostalgic journey back to cozy kitchens filled with the scent of holiday cheer. If you’re searching for that quintessential festive indulgence, this Christmas Fudge is precisely what you’ve been dreaming of. There’s something undeniably magical about its rich, creamy texture and the way it melts in your mouth, leaving behind a whisper of pure delight. It’s the kind of confection that brings everyone together, from the youngest little elves to the most seasoned Santa Claus, creating shared smiles and sweet memories. What truly sets this Christmas Fudge apart is its perfect balance of sweetness and subtle festive spices, making it an unforgettable part of your holiday celebrations. It’s incredibly easy to make, yet it tastes like it came straight from a gourmet chocolatier’s shop, making it the star of any cookie platter or a thoughtful handmade gift.
Ingredients:
- 3 cups white chocolate chips
- 1 (14-ounce) can sweetened condensed milk
- 1/2 teaspoon vanilla extract
- Red food coloring
- Green food coloring
- 1/4 cup holiday sprinkles (optional for decoration)
Preparing Your Christmas Fudge Base
The foundation of our delicious Christmas Fudge is a simple yet effective combination that yields a wonderfully smooth and rich texture. To begin extract, gather a medium-sized, heavy-bottomed saucepan. It’s important to use a heavy-bottomed pan as this helps to distribute heat evenly and prevents the white chocolate from scorching, which can happen quite easily. Add the entire 14-ounce can of sweetened condensed milk to the saucepan. This is the magical ingredient that gives fudge its signature creaminess and sweetness.
Next, pour in the 3 cups of white chocolate chips directly on top of the sweetened condensed milk. Don’t stir them in just yet; we’ll let the heat do the work. Place the saucepan over low to medium-low heat. This is where patience is key. We want to melt the chocolate gently. Stirring constantly with a heatproof spatula or wooden spoon is crucial to ensure the chocolate melts evenly and doesn’t burn. Continue stirring, scraping the bottom and sides of the pan, until the white chocolate chips are completely melted and the mixture is smooth and glossy. This process can take anywhere from 5 to 10 minutes, depending on your stovetop. It’s vital to keep the heat low; if the mixture starts to bubble vigorously, reduce the heat further or even briefly remove the pan from the heat to prevent overheating. Once fully melted and smooth, remove the saucepan from the heat.
Adding Flavor and Color
Now it’s time to elevate our Christmas Fudge from a simple sweet treat to a festive masterpiece. To the melted white chocolate and condensed milk mixture, add the 1/2 teaspoon of vanilla extract. Vanilla extract enhances the sweetness and adds a subtle depth of flavor that complements the white chocolate beautifully. Stir it in thoroughly until it’s fully incorporated.
The fungin extractrt begins now: dividing and coloring our fudge. Have two separate heatproof bowls ready. Carefully divide the warm fudge mixture as evenly as possible between these two bowls. One bowl will become our festive red fudge, and the other will be our cheerful green fudge. To the first bowl, add a few drops of red food coloring. Start with a small amount, perhaps 2-3 drops, and stir thoroughly. You’ll notice the color intensifying as you mix. Add more drops of red food coloring incrementally, stirring after each addition, until you achieve a vibrant Christmas red hue that you’re happy with. Remember that food coloring can be quite potent, so it’s better to start with less and add more as needed.
Repeat this process for the second bowl, adding green food colgin extractng. Again, begin with a few drops and stir well, adding more color until you achieve a rich, festive green. Aim for a color intensity that is visually appealing and clearly distinct from the red. This dual coloring creates the beautiful swirled or striped effect characteristic of classic Christmas Fudge.
Assembling Your Festive Fudge
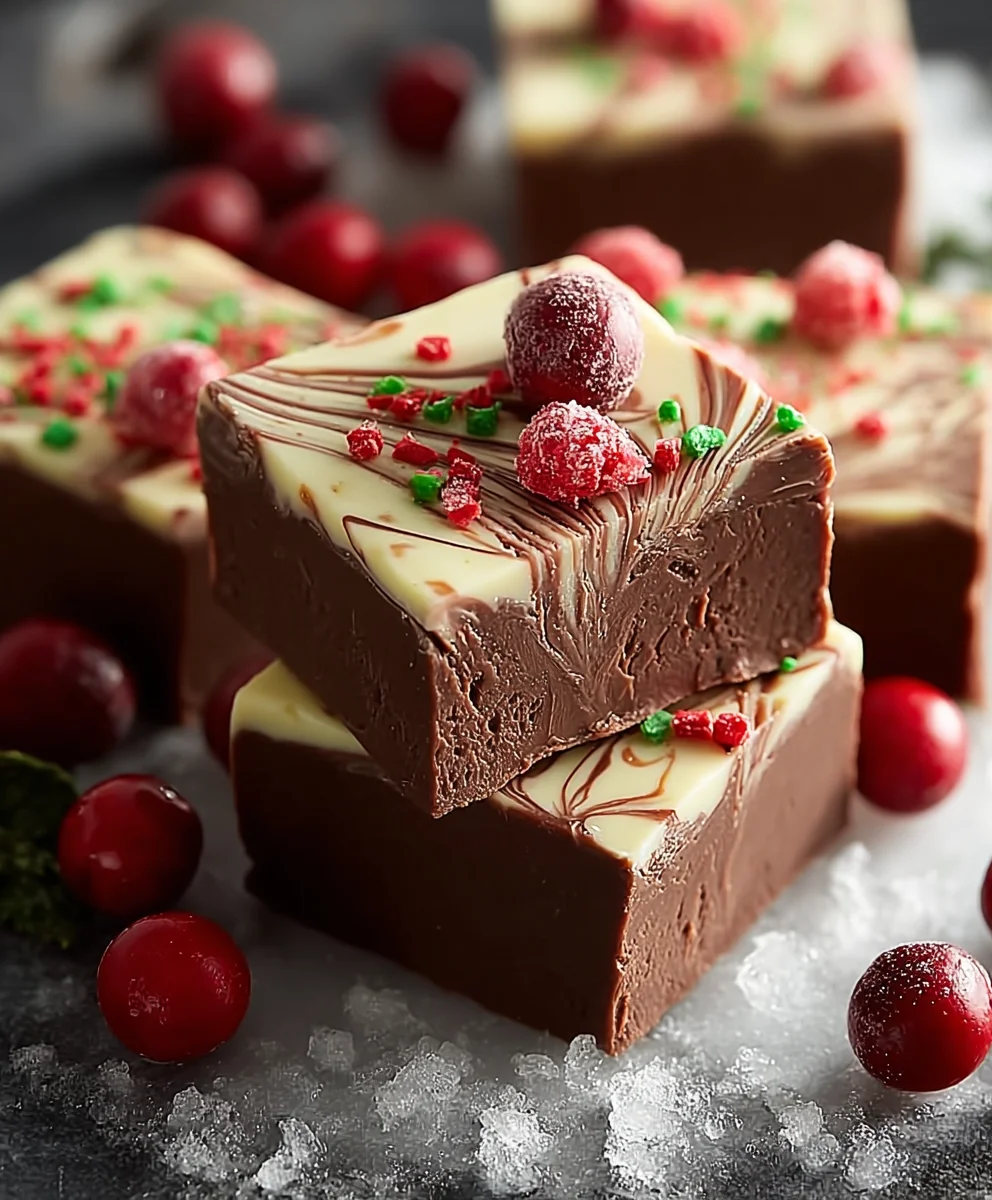
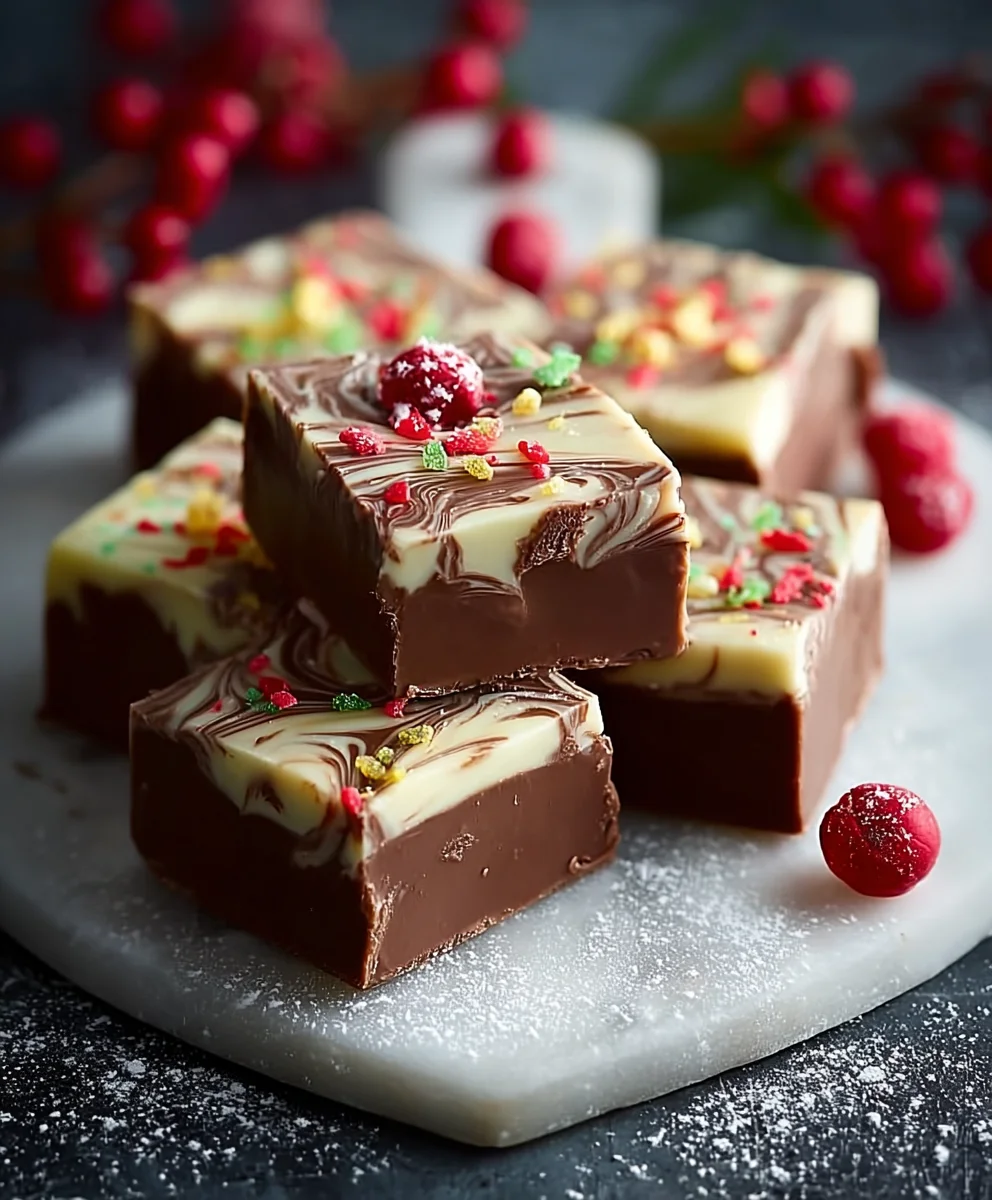
With our two colors of fudge base ready, it’s time to bring them together and prepare them for setting. Line a 9×9 inch baking pan with parchment paper, leaving some overhang on the sides. This parchment paper sling will make it incredibly easy to lift the finished fudge out of the pan for cutting.
Now, we’ll create the festive look. Spoon dollops of the red fudge mixture and the green fudge mixture alternately into the prepared baking pan. Don’t worry about making it perfectly neat; the charm of Christmas Fudge often lies in its rustic, handcrafted appearance. Once all the fudge mixture is in the pan, use a spatula to gently spread and swirl the colors together. You can creategin extracttterns by gently dragging the spatula through the two colors, or simply press it down to create an marbled effect. Be careful not to over-mix, as this can muddy the colors. Aim for distinct swirls and patches of red and green.
If you’re using them, this is also the perfect time to add your holiday sprinkles. Sprinkle the 1/4 cup of holiday sprinkles evenly over the top of the fudge mixture. Gently press the sprinkles into the fudge so they adhere. This adds a delightful crunch and an extra festive sparkle to your Christmas Fudge.
Setting and Cutting Your Fudge
Once your fudge is assembled and decorated, it needs time to set and firm up. Cover the baking pan loosely with plastic wrap or foil. Place the pan in the refrigerator for at least 2 to 3 hours, or until the fudge is firm to the touch. For the best texture and easiest cutting, you can even leave it to set overnight. The cold temperature allows the fudge to solidify properly, ensuring clean cuts.
After the fudge has set completely, use the parchment paper overhang to carefully lift the entire block of fudge out of the pan and onto a cutting board. Now for the final, satisfying step: cutting. Use a sharp knife to cut the fudge into desired portion sizes. Small squares are traditional for fudge, making them perfect for sharing during the holiday season. For the cleanest cuts, you may want to warm the knife under hot water and dry it thoroughly between cuts, especially if the fudge is very firm. Wipe any excess chocolate from the knife as needed.
Storing Your Homemade Christmas Fudge
To keep your delicious Christmas Fudge fresh and delightful, proper storage is key. Once cut, the fudge can be stored in an airtight container at room temperature for up to a week. If your kitchen tends to be warm, or if you prefer your fudge to be extra firm, you can store it in the refrigerator. When storing in the refrigerator, it’s a good idea to separate layers of fudge with parchment paper to prevent them from sticking together. For longer-term storage, you can freeze the fudge. Wrap individual pieces or larger blocks tightly in plastic wrap and then place them in a freezer-safe container or bag. Frozen fudge will remain delicious for up to 2-3 months. When you’re ready to enjoy frozen fudge, thaw it slowly at room temperature for the best texture.
Conclusion:
There you have it – your guide to creating the most delightful Christmas Fudge! We’ve walked through each simple step, from melting the chocolate to achieving that perfect, smooth consistency. This rich and decadent treat is sure to become a holiday tradition in your home, bringin extractg smiles and festive cheer to all who taste it. Remember, the beauty of Christmas Fudge lies not only in its deliciousness but also in its versatility. Don’t be afraid to experiment and make it your own!
When serving your magnificent Christmas Fudge, consider presenting it on a festive platter alongside other holiday cookies and candies. It also makes a wonderfully thoughtful edible gift; simply box it up with a ribbon and a handmade tag. For variations, try adding a pinch of peppermint extract for a minty kick, swirling in some caramel for an extra layer of sweetness, or topping it with crushed candy canes for added texture and visual appeal. We encourage you to embrace the holiday spirit and have fun in the kitchen. May your Christmas Fudge be merry and bright!
Frequently Asked Questions about Christmas Fudge:
Q: How should I store my Christmas Fudge to keep it fresh?
A: To maintain the freshness of your Christmas Fudge, store it in an airtight container at room temperature. If the weather is particularly warm, you can refrigerate it, but allow it to come back to room temperature before serving for the best texture. It can typically be stored for up to two weeks.
Q: Can I make Christmas Fudge ahead of time for the holidays?
A: Absolutely! Christmas Fudge is an excellent make-ahead treat. In fact, many find that the flavors meld even better after a day or two. Prepare it a week or two in advance and store it according to the storage instructions above.
Q: My Christmas Fudge didn’t set properly. What went wrong?
A: Several factors can contribute to fudge not setting. Ensure you are using a reliable candy thermometer and have reached the correct temperature for soft-ball stage (around 237-240°F or 114-116°C). Over-stirring after removing from heat or adding ingredients too quickly can also affect setting. Make sure your ingredients are fresh and measured accurately.
Easy Christmas Fudge Recipe-Holiday Dessert Delight
A simple and delightful holiday fudge recipe with festive red and green colors, perfect for Christmas.
Ingredients
-
3 cups white chocolate chips
-
1 (14-ounce) can sweetened condensed milk
-
1/2 teaspoon vanilla extract
-
Red food coloring
-
Green food coloring
-
1/4 cup holiday sprinkles (optional for decoration)
Instructions
-
Step 1
In a heavy-bottomed saucepan over low to medium-low heat, gently melt the white chocolate chips with the sweetened condensed milk, stirring constantly until smooth and glossy (about 5-10 minutes). Remove from heat. -
Step 2
Stir in the vanilla extract until fully incorporated. Divide the mixture evenly between two heatproof bowls. -
Step 3
Add red food coloring to one bowl, a few drops at a time, stirring until a vibrant red is achieved. Repeat with green food coloring in the second bowl until a rich green is achieved. -
Step 4
Line a 9×9 inch baking pan with parchment paper. Spoon dollops of red and green fudge mixtures alternately into the pan. Gently swirl the colors together with a spatula. Sprinkle holiday sprinkles over the top, if using, and gently press them in. -
Step 5
Cover the pan loosely and refrigerate for at least 2-3 hours, or until firm. Lift the fudge out using the parchment paper and cut into desired portions.
Important Information
Nutrition Facts (Per Serving)
It is important to consider this information as approximate and not to use it as definitive health advice.
Allergy Information
Please check ingredients for potential allergens and consult a health professional if in doubt.