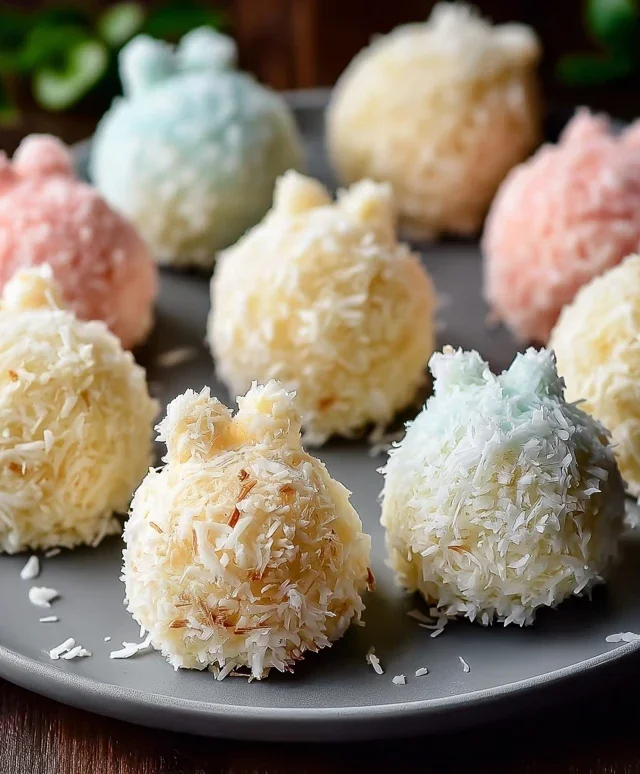
Easter Bunny Coconut Tails-Sweet & Easy Treat
Easter Bunny Coconut Tails are the adorable, no-bake treats that will steal the show at your springtime celebrations! I absolutely adore these little delights because they’re so incredibly easy to whip up, making them perfect for a last-minute addition to your Easter dessert table or a fun baking project with the kids. What truly makes these Easter Bunny Coconut Tails so special is their charming presentation – they look just like fluffy bunny tails, complete with a sprinkle of sweet coconut that mimics soft fur. Plus, the sweet, tropical coconut flavor is an absolute winner with everyone, young and old. Forget complicated baking; these delightful morsels deliver big on festive flair and deliciousness with minimal effort. Get ready to hop into some serious fun and flavor with this simple recipe!
Easter Bunny Coconut Tails
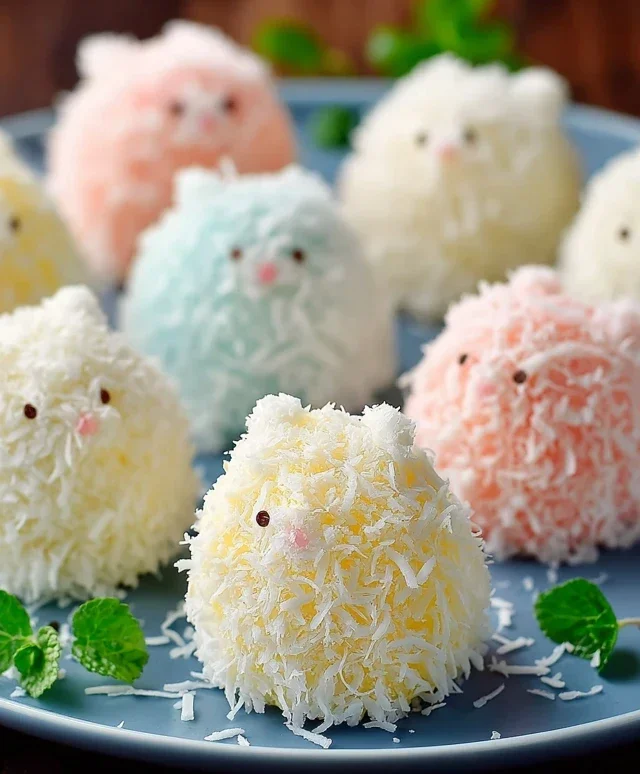
Easter is a time for joy, family, and of course, delicious treats! These Easter Bunny Coconut Tails are a delightful and surprisingly easy addition to your holiday spread. They look adorable, taste wonderfully sweet and tropical, and are a guaranteed hit with both kids and adults. Imagin extracte little fluffy tails, dusted with coconut, peeking out from your dessert table – pure Easter magic! This recipe is perfect for those looking for a fun, no-bake Easter dessert that requires minimal effort but delivers maximum charm. We’re going to take simple ingredients and transform them into a festive delight that captures the essence of spring and the joy of the Easter bunny. Get ready to create some sweet memories in your kitchen!
Ingredients:
Creating Your Adorable Tails
Now, let’s get down to the fun part: making these little bunny tails! This recipe is designed to be straightforward, making it a great activity to do with children. The process involves melting, mixing, and shaping, with a final touch of decorative flair.
1. Prepare Your Coconut Base: In a medium-sized mixing bowl, combine the 2 cups of shredded coconut. This will be the fluffy body of our bunny tails. For an extra fluffy texture, you can gently fluff the coconut with a fork before measuring it out. Set this bowl aside for now, as we’ll be adding the binding agents shortly.
2. Melt the Marshmallow Mixture: In a microwave-safe bowl, add the 1½ cups of mini marshmallows and the ¼ cup of butter. Microwave these in 30-second intervals, stirring well after each interval, until the marshmallows are completely melted and the butter is incorporated. You’re looking for a smooth, gooey, and uniform mixture. Be careful not to overheat, as this can make the marshmallows tough. Once melted, carefully stir in the 1 teaspoon of vanilla extract until it’s fully combined. The vanilla adds a lovely aroma and depth of flavor to our sweet tails.
3. Combine and Form the Tails: Pour the melted marshmallow mixture over the prepared shredded coconut. Now, using a sturdy spatula or your hands (greased with a little bit of butter or cooking spray to prevent sticking), thoroughly mix everything together. You want to ensure that every strand of coconut is coated in the marshmallow mixture. Once everything is well combined and you have a sticky, moldable mass, it’s time to shape your bunny tails. Take small portions of the mixture (about a tablespoon to a tablespoon and a half) and roll them into little balls or slightly elongated oval shapes. Think of them as miniature, fluffy cotton balls or tiny clouds. As you shape them, gently press them together to ensure they hold their form. The warmth from the marshmallow mixture will make them easy to shape initially, but they will firm up as they cool.
4. Melt the White Chocolate for Coating: While your coconut tails are begin extractning to set, it’s time to prepare the white chocolate coating. In a separate microwave-safe bowl, place the 1 cup of white chocolate chips. Microwave these in 30-second intervals, stirring thoroughly after each interval, until the chocolate is completely melted and smooth. White chocolate can be a bit finicky, so it’s important to stir frequently to prevent it from seizing or burning. Alternatively, you can melt the white chocolate using a double boiler method over simmering water for a more gentle melt. Once melted and smooth, let it cool slightly for a minute or two so it’s not piping hot.
5. Decorate Your Bunny Tails: Now for the most delightful part – decorating! Dip each coconut tail into the slightly cooled melted white chocolate, ensuring it’s coated about two-thirds of the way up. You can use a fork or a toothpick to gently lower and lift the tails from the chocolate, allowing any excess to drip back into the bowl. Place the partially coated tails onto a parchment-lined baking sheet. Now, take your pink candy melts. You can melt these according to package directions (similar to the white chocolate) and then use a toothpick or a small piping bag to draw a small heart or a little dot on the tip of each white chocolate-dipped tail to resemble a bunny’s nose. For an even more festive touch, you can dip just the very tip of the tail in the melted pink candy melts to create a more pronounced nose. Allow the tails to set completely at room temperature or in the refrigerator for about 15-20 minutes until the chocolate is firm.
These Easter Bunny Coconut Tails are a whimsical treat that’s perfect for a spring gathering or as a fun Easter basket surprise. Enjoy creating and devouring these sweet, fluffy delights!
Conclusion:
And there you have it – your very own delightful Easter Bunny Coconut Tails! This recipe is an absolute winner because it’s incredibly easy to make, requiring no special baking skills, and the results are simply adorable. The perfect balance of sweet coconut and creamy white chocolate creates a taste sensation that’s truly irresistible, making these a guaranteed hit with both kids and adults. They’re not just a treat; they’re a charming centerpiece for your Easter celebrations, adding a whimsical touch to any table.
I love serving these Easter Bunny Coconut Tails alongside fresh fruit for a lighter dessert, or alongside a variety of other Easter-themed cookies and candies for a festive platter. Feel free to get creative with your decorations! You can experiment with different colored candy melts for the tails, or even use edible glitter for an extra sparkle. Don’t be afraid to play around with sprinkles too – the possibilities are endless.
I truly encourage you to give this recipe a try this Easter. It’s a fun and rewarding activity that will bring smiles and deliciousness to your holiday. Enjoy the process, and most importantly, enjoy the fantastic Easter Bunny Coconut Tails you create!
Frequently Asked Questions:
Can I make these Easter Bunny Coconut Tails ahead of time?
Absolutely! These coconut treats can be made 2-3 days in advance. Store them in an airtight container at room temperature, ensuring they don’t get crushed. This makes them perfect for busy holiday preparations!
What if I don’t have white chocolate chips?
No problem at all! You can substitute white chocolate chips with vanilla-flavored candy melts, which often melt more smoothly and set up firmer. Alternatively, you could use a good quality white baking bar that is specifically designed for melting.
Easter Bunny Coconut Tails
Deliciously sweet and festive coconut tails perfect for Easter celebrations. Easy to make and fun to decorate!
Ingredients
-
2 cups shredded coconut
-
1½ cups mini marshmallows
-
¼ cup butter
-
1 teaspoon vanilla extract
-
1 cup white chocolate chips
-
Pink candy melts for decoration
Instructions
-
Step 1
In a microwave-safe bowl, combine the mini marshmallows and butter. Microwave on high for 1-2 minutes, stirring every 30 seconds, until melted and smooth. -
Step 2
Stir in the vanilla extract until well combined. -
Step 3
Add the shredded coconut to the marshmallow mixture and stir until evenly coated. -
Step 4
Shape the mixture into small, tail-like shapes. You can lightly grease your hands with butter or use a small cookie scoop for easier shaping. -
Step 5
Place the coconut tails on a parchment-lined baking sheet and let them set at room temperature for about 10-15 minutes. -
Step 6
Melt the white chocolate chips according to package directions. Dip one end of each coconut tail into the melted white chocolate. -
Step 7
Melt the pink candy melts according to package directions. Drizzle or use a toothpick to add small pink decorative details to the white chocolate-dipped end to resemble bunny tails. -
Step 8
Allow the chocolate and candy melts to harden completely before serving.
Important Information
Nutrition Facts (Per Serving)
It is important to consider this information as approximate and not to use it as definitive health advice.
Allergy Information
Please check ingredients for potential allergens and consult a health professional if in doubt.