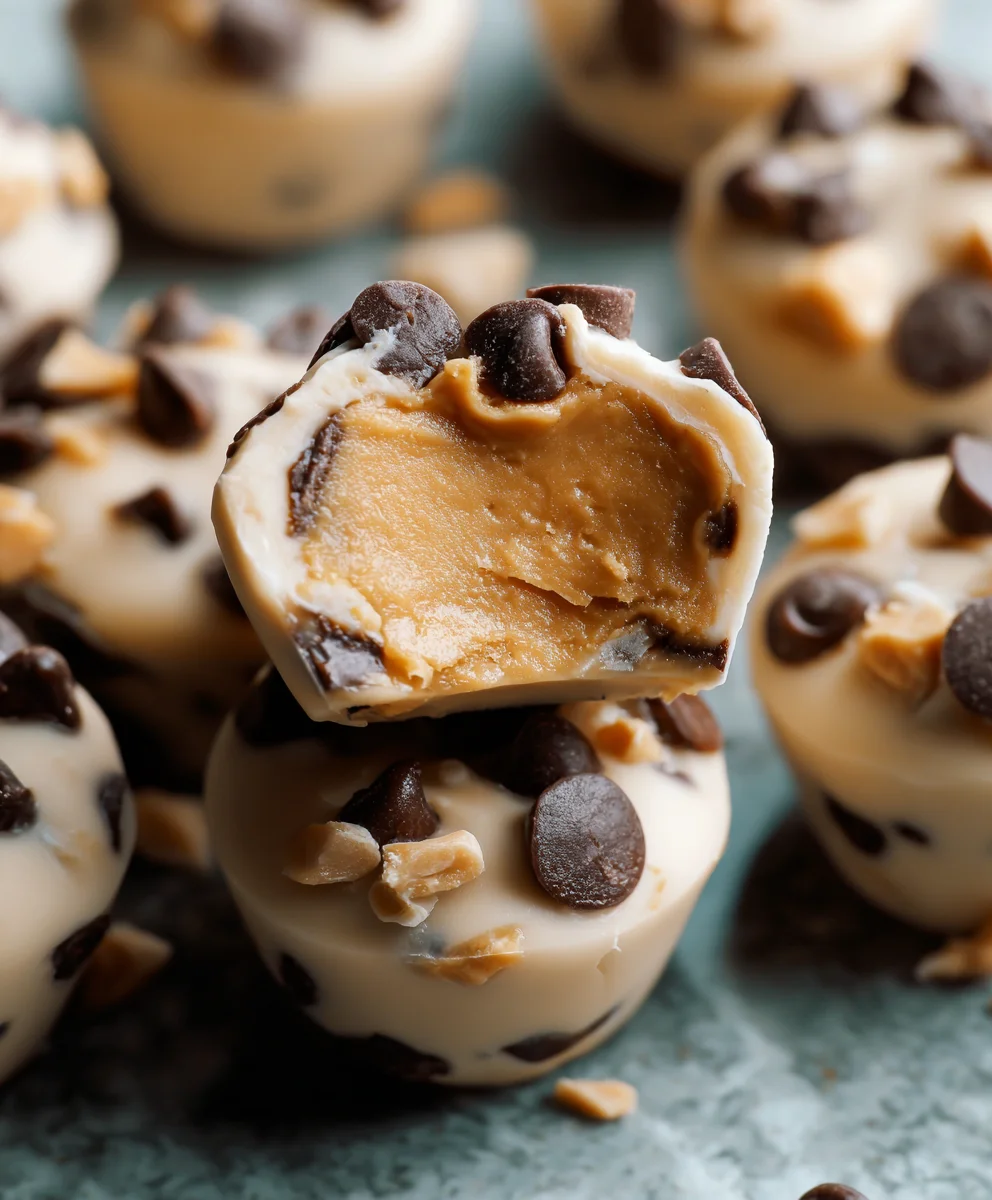
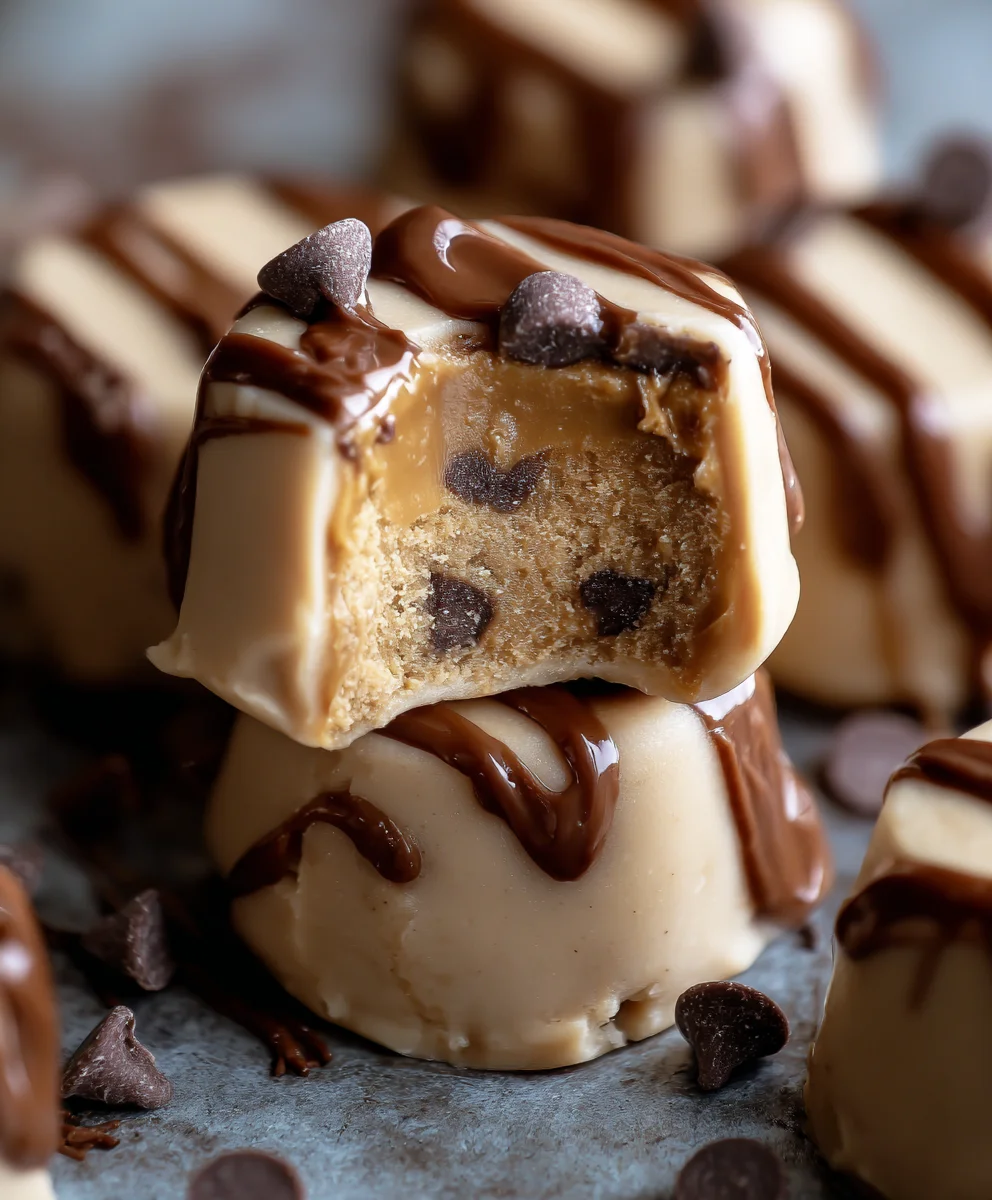
Frozen Greek Yogurt Peanut Butter Bites – Easy Snack
Frozen Greek Yogurt Peanut Butter Bites: Your Freezer’s New Best Friend! Are you on the hunt for a ridiculously easy, delightfully decadent, and guilt-free treat that will revolutionize your snack game? Then look no further. These Frozen Greek Yogurt Peanut Butter Bites are the answer to your cravings, a perfect harmony of creamy tang and nutty richness that transforms simple ingredients into something truly magical. People absolutely adore them because they strike that perfect balance between being satisfyingly sweet and wonderfully wholesome. They are incredibly versatile, making them ideal for a post-workout refuel, a midday energy boost, or even a light dessert. What truly sets these bites apart is their incredible simplicity combined with their incredible flavor payoff. Imagin extracte a cool, creamy bite that melts in your mouth, delivering a burst of peanut butter goodness without any of the heavy calories. It’s no wonder these Frozen Greek Yogurt Peanut Butter Bites are quickly becoming a staple in freezers everywhere!
Ingredients:
- 1 ½ cups creamy peanut butter
- ½ cup honey or maple syrup (adjust to your sweetness preference)
- 1 teaspoon vanilla extract
- ¼ cup milk (dairy or non-dairy of your choice)
- ½ cup mini chocolate chips or roughly chopped chocolate
- 2 tablespoons chia seeds
- A pinch of ground cinnamon
- Optional: A little extra peanut butter for drizzling
Making the Magic Happen: The Steps
Phase 1: The Peanut Butter Base
Let’s get started with the heart of our frozen treats: the peanut butter base. In a medium-sized bowl, combine your 1 ½ cups of creamy peanut butter. It’s important that your peanut butter is at room temperature or slightly softened. If it’s too cold and hard, it will be difficult to mix smoothly. If your peanut butter has separated, give it a good stir before measuring to ensure you have a consistent texture. To this creamy goodness, add ½ cup of honey or maple syrup. The honey will provide a lovely natural sweetness and help bind the ingredients, while maple syrup offers a slightly different, equally delicious flavor profile. Feel free to adjust this amount based on how sweet you like your treats. Some people prefer a more intense peanut butter flavor with less sweetness, while others enjoy a sweeter bite. Next, we’ll add the aromatic magic: 1 teaspoon of vanilla extract. This humble ingredient adds a wonderful depth of flavor and that familiar cozy aroma that makes baked goods and frozen treats so inviting. Give this mixture a thorough stir until all the ingredients are well incorporated and the peanut butter is smooth and pliable. This is the foundation of our delicious bites, so take your time to get it just right.
Phase 2: Achieving the Perfect Consistency
Now, we need to get our peanut butter mixture to a consistency that’s easy to work with and will hold its shape when frozen. We’ll do this by adding ¼ cup of milk. You can use any milk you prefer – regular dairy milk, almond milk, soy milk, or oat milk all work wonderfully. The milk will help to loosen up the peanut butter and create a smoother, more manageable dough. Start by adding about half of the milk and mix it in thoroughly. You might find that you need more or less milk depending on the brand and type of peanut butter you’re using. Peanut butter can vary in its oil content and thickness. Gradually add the remaining milk, mixing well after each addition, until you reach a consistency that is soft but not sticky, similar to a thick cookie dough. You should be able to easily roll it into balls without it crum extractbling apart or sticking excessively to your hands. It’s important not to make it too wet, as this can prevent the bites from firming up properly in the freezer. A little patience here will pay off in perfectly formed frozen treats.
Phase 3: Adding the Exciting Inclusions
This is where we inject some texture and extra flavor into our frozen yogurt bites! We’re going to add the star ingredients that elevate these from simple peanut butter balls to something truly special. First, gently fold in ½ cup of mini chocolate chips or roughly chopped chocolate. If you’re using larger chocolate pieces, chopping them into smaller chunks will ensure they distribute more evenly throughout the bites and are less likely to create large, unwieldy pockets of chocolate. Then, add 2 tablespoons of chia seeds. These tiny powerhouses are not only packed with fiber and omega-3 fatty acids, making these bites a healthier indulgence, but they also add a subtle texture and help bind the mixture. Finally, for that warm, comforting note, add a pinch of ground cinnamon. Cinnamon pairs beautifully with peanut butter and chocolate, adding a layer of complexity that is incredibly satisfying. Be careful not to add too much cinnamon; a little goes a long way to enhance the other flavors without overpowering them. Mix everything together gently but thoroughly, ensuring the chocolate chips, chia seeds, and cinnamon are evenly dispersed throughout the peanut butter mixture. You want to see those flecks of chocolate and seeds throughout the dough.
Phase 4: Forming and Freezing the Bites
Now for the fun part – shaping our delicious creations! You’ll want to prepare a baking sheet or a plate by lining it with parchment paper or wax paper. This is crucial to prevent the bites from sticking to the surface as they freeze. Once your lining is ready, you can begin extract forming the bites. The easiest way to do this is to scoop out small portions of the peanut butter mixture, about a tablespoon at a time, and roll them into bite-sized balls between your palms. If the mixture feels a bit sticky, you can lightly dampen your hands with a little water or a tiny bit of oil, but avoid adding extra flour or peanut butter at this stage, as it can alter the texture. Place each rolled ball onto the prepared baking sheet, ensuring they are not touching each other. This gives them space to freeze individually and makes them easier to store later. Once you have formed all your peanut butter bites, carefully transfer the baking sheet into the freezer. Let them freeze for at least 1-2 hours, or until they are firm to the touch. This initial freeze is important for setting their shape before you can handle them more freely.
Phase 5: The Final Chill and Enjoyment
After your peanut butter bites have had their initial freeze and are firm, you can now transfer them to an airtight container for long-term storage. This step is key to maintaining their quality and preventing freezer burn. You can layer them in the container with sheets of parchment paper between layers to prevent them from sticking together once they are fully frozen. Keep these frozen Greek yogurt peanut butter bites in your freezer and enjoy them whenever a craving strikes. They are the perfect quick and healthy snack, a delightful dessert, or even a post-workout treat. For an extra touch of elegance and flavor, you can even drizzle a little melted peanut butter or a touch of melted chocolate over them once they are fully frozen and firm. Simply place them back in the freezer for a few minutes to let the drizzle set. These bites are designed to be enjoyed straight from the freezer, offering a satisfyingly cool and chewy texture that is incredibly refreshing. They are truly your freezer’s new best friend, ready to be devoured at a moment’s notice!
Conclusion:
There you have it – the incredibly simple yet utterly delicious recipe for Frozen Greek Yogurt Peanut Butter Bites: Your Freezer’s New Best Friend! We’ve covered how easy it is to whip up these healthy, satisfying treats that are perfect for curbing sweet cravings, refueling after a workout, or simply enjoying as a delightful snack. These bites are a testament to how simple ingredients can create something truly special, and they’ll quickly become a staple in your freezer, ready whenever you need a moment of delicious, guilt-free indulgence.
For serving, these bites are fantastic straight from the freezer. They’re also wonderful slightly softened, offering a creamier texture. Consider them as a topping for your morning smoothie bowl or as a sweet companion to a cup of herbal tea. The beauty of Frozen Greek Yogurt Peanut Butter Bites: Your Freezer’s New Best Friend lies in their versatility. Feel free to experiment with different nut butters, add a sprinkle of chia seeds for extra crunch, or even swirl in a bit of honey or maple syrup before freezing for a touch more sweetness. Don’t be afraid to get creative and make these bites your own! I truly hope you enjoy making and sharing these fantastic treats as much as I do.
FAQs:
Can I make these Frozen Greek Yogurt Peanut Butter Bites ahead of time?
Absolutely! That’s the beauty of this recipe. They are designed to be made ahead and stored in the freezer for up to 2-3 weeks, making them a perfect make-ahead snack.
What if I don’t have Greek yogurt? Can I use regular yogurt?
While Greek yogurt is recommended for its thicker texture and higher protein content, you can use regular plain yogurt. However, the bites might be a little softer. You may need to freeze them for a bit longer or use less liquid to achieve a similar consistency.
Are these Frozen Greek Yogurt Peanut Butter Bites suitable for children?
Yes, they are a wonderful and healthy snack option for children. Just ensure the peanut butter is well-mixed and there are no other allergens to consider for your child.
Frozen Greek Yogurt Peanut Butter Bites – Easy Snack
These no-bake frozen Greek yogurt peanut butter bites are a delicious, healthy, and easy-to-make snack. Packed with peanut butter, chocolate, and chia seeds, they’re perfect for a quick treat.
Ingredients
-
1 ½ cups creamy peanut butter
-
½ cup honey or maple syrup
-
1 teaspoon vanilla extract
-
¼ cup milk
-
½ cup mini chocolate chips or roughly chopped chocolate
-
2 tablespoons chia seeds
-
A pinch of ground cinnamon
Instructions
-
Step 1
In a medium bowl, combine peanut butter, honey or maple syrup, and vanilla extract. Stir until smooth and well incorporated. -
Step 2
Gradually add milk, mixing until a soft, cookie-dough-like consistency is achieved. It should be pliable but not sticky. -
Step 3
Gently fold in mini chocolate chips, chia seeds, and a pinch of cinnamon until evenly distributed. -
Step 4
Line a baking sheet with parchment paper. Scoop tablespoon-sized portions of the mixture and roll into balls. Place on the prepared baking sheet, ensuring they don’t touch. -
Step 5
Freeze for at least 1-2 hours, or until firm. Once frozen, transfer to an airtight container for storage.
Important Information
Nutrition Facts (Per Serving)
It is important to consider this information as approximate and not to use it as definitive health advice.
Allergy Information
Please check ingredients for potential allergens and consult a health professional if in doubt.