Easy Homemade Aioli Recipe – Garlic Mayo Sauce
Aioli recipe. Ah, aioli. Just the word itself conjures images of sun-drenched Mediterranean meals, crisp vegetables, and perfectly grilled seafood. This creamy, garlicky emulsion is so much more than just a condiment; it’s a flavor enhancer, a luxurious dip, and a secret weapon in any home cook’s arsenal. People adore aioli for its incredible versatility and its power to transform the simplest of dishes into something truly special. What makes this particular aioli recipe stand out? It’s the perfect balance of pungent garlic, bright lemon, and rich olive oil, all brought together in a velvety smooth texture that will have you reaching for just one more dip. We’ll walk you through creating this quintessential aioli from scratch, demystifying the process and proving that you don’t need to be a professional chef to achieve restaurant-quality results. Get ready to elevate your culinary game with this foolproof aioli recipe – your taste buds will thank you.
Ingredients:
- 1 cup mayonnaise
- 3 tablespoons fresh lemon juice
- ½ teaspoon black pepper
- 3 tablespoons fresh garlic, minced
- 1 teaspoon fresh parsley, chopped
- 3 tablespoons ketchup
Preparing Your Zesty Aioli
This aioli recipe is incredibly simple to whip up, making it perfect for a quick flavor boost to almost any dish. The key to a fantastic aioli lies in the quality of your ingredients and allowing the flavors to meld together. We’re starting with a base of creamy mayonnaise, which provides a rich and smooth foundation. The tang of fresh lemon juice cuts through the richness, adding a bright, zesty note that is absolutely essential.
The star of any good aioli, besides the mayonnaise, is undoubtedly the garlic. We’re using a generous amount of finely minced fresh garlic to ensure its pungent, savory flavor permeates the sauce. Be sure to mince your garlic as finely as possible; this helps to distribute its flavor evenly throughout the aioli and avoids any overpowering chunks. If you’re sensitive to raw garlic’s bite, you can lightly roast the garlic cloves before mincing them, which will mellow their intensity and impart a sweeter, deeper flavor. However, for a classic punchy aioli, raw minced garlic is traditional and highly recommended.
Next, we have the black pepper. A good grind of fresh black pepper adds a subtle warmth and a hint of spice that complements the other ingredients beautifully. Don’t skimp on the pepper; it’s more than just seasoning here; it contributes to the overall complexity of the aioli. Fresh parsley, finely chopped, brings a burst of freshness and a lovely green fleck that makes the aioli visually appealing. It adds a herbaceous note that lifts the entire flavor profile, preventing it from becoming too heavy.
Finally, the ketchup might seem like an unusual addition to a traditional aioli, but in this recipe, it plays a crucial role in adding a touch of sweetness and a lovely reddish hue, transforming our aioli into something a little more dynamic and versatile, almost like a spicy mayo or a cocktail sauce hybrid. It balances the acidity of the lemon and the pungency of the garlic, creating a well-rounded condiment that is both familiar and exciting.
Mixing the Flavors
Now that you have all your ingredients ready, it’s time to bring them together. In a medium-sized mixing bowl, add the entire cup of mayonnaise. This forms the creamy base of your aioli. Make sure your mayonnaise is at room temperature; this helps to ensure a smoother incorporation of the other ingredients. If your mayonnaise is cold, it can sometimes lead to a slightly separated sauce.
Next, pour in the 3 tablespoons of fresh lemon juice. Whisk this gently into the mayonnaise until it’s well combined. You’ll notice the mayonnaise will become slightly looser in consistency, which is exactly what we want. The lemon juice is crucial for balancing the richness of the mayonnaise and providing that signature aioli tang.
Now, add the 3 tablespoons of minced garlic. Stir this in thoroughly. You want to ensure the garlic is evenly distributed. For a stronger garlic flavor, you can let the minced garlic sit in the lemon juice for about 5 minutes before adding it to the mayonnaise. This process, called maceration, helps to soften the garlic and release more of its aromatic oils.
Sprinkle in the ½ teaspoon of black pepper and then add the 1 teaspoon of chopped fresh parsley. Stir these in until they are distributed throughout the mixture. The parsley will add little flecks of green, making your aioli look vibrant and fresh.
Finally, incorporate the 3 tablespoons of ketchup. This is where our aioli gets its unique twist. Whisk everything together until the ketchup is fully blended into the mayonnaise mixture. Continue stirring until you have a uniform pinkish-orange hue and a smooth, creamy consistency.
Allowing Flavors to Mellow
This is perhaps the most important step for achieving the best possible flavor in your aioli, and it requires a little patience. Once all the ingredients are thoroughly combined, cover the bowl tightly with plastic wrap or transfer the aioli to an airtight container. Place the aioli in the refrigerator to chill and allow the flavors to meld.
The minimum recommended chilling time is at least 30 minutes, but for an even more profound and complex flavor, I highly suggest chilling it for at least 1 to 2 hours, or even overnight. During this time, the sharp edges of the raw garlic will soften, and its flavor will become more integrated and mellowed into the creamy base. The lemon juice will also have more time to infuse its zestiness throughout the sauce. This resting period is what transforms a simple mixture of ingredients into a truly exceptional aioli. Don’t skip this step; it makes a significant difference in the final taste and texture.
Serving Your Delicious Aioli
Once your aioli has had ample time to chill and the flavors have had a chance to harmonize, it’s ready to be served. Give it a quick stir before serving to ensure everything is still well combined. This versatile aioli is a fantastic accompaniment to a wide range of dishes.
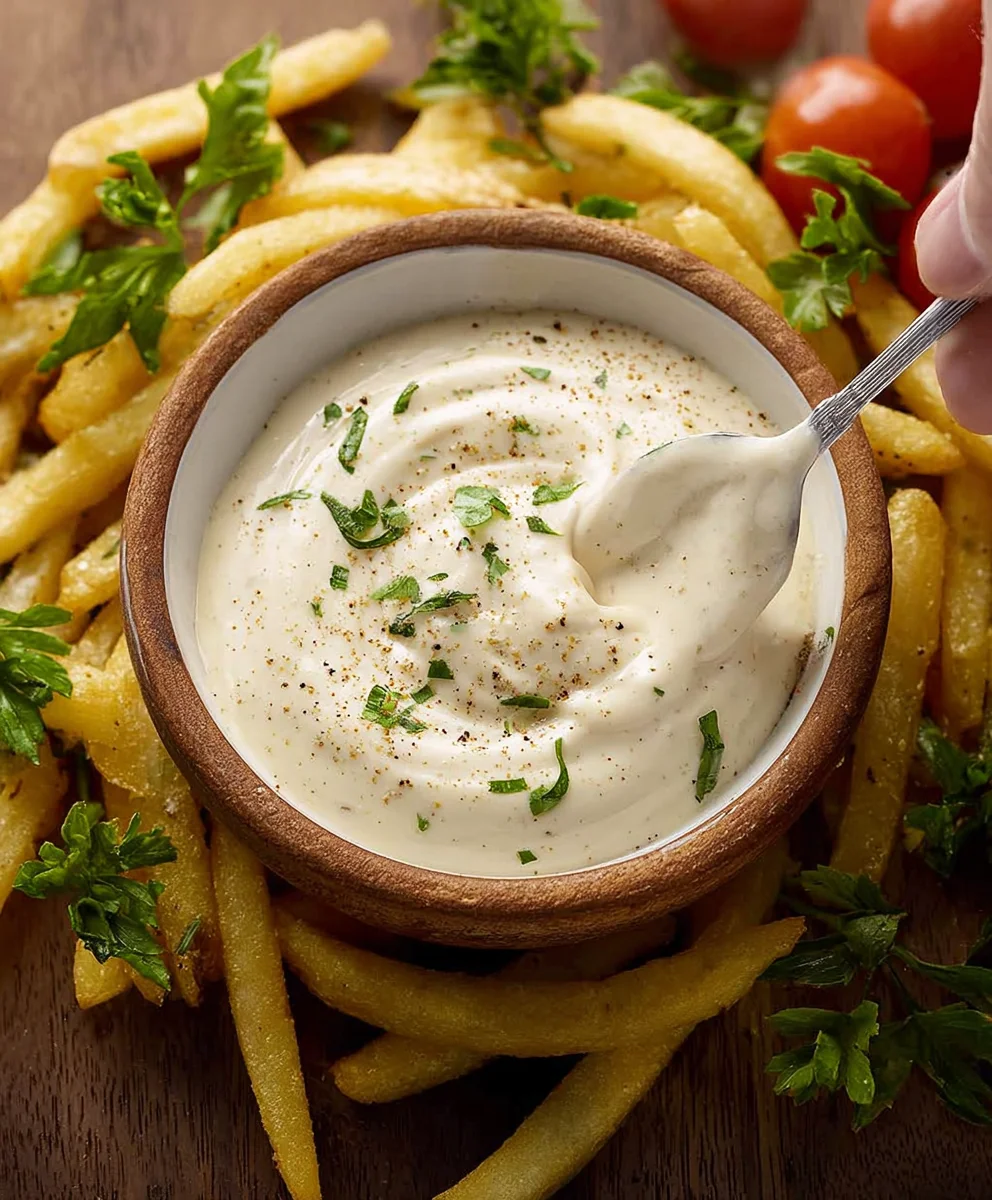
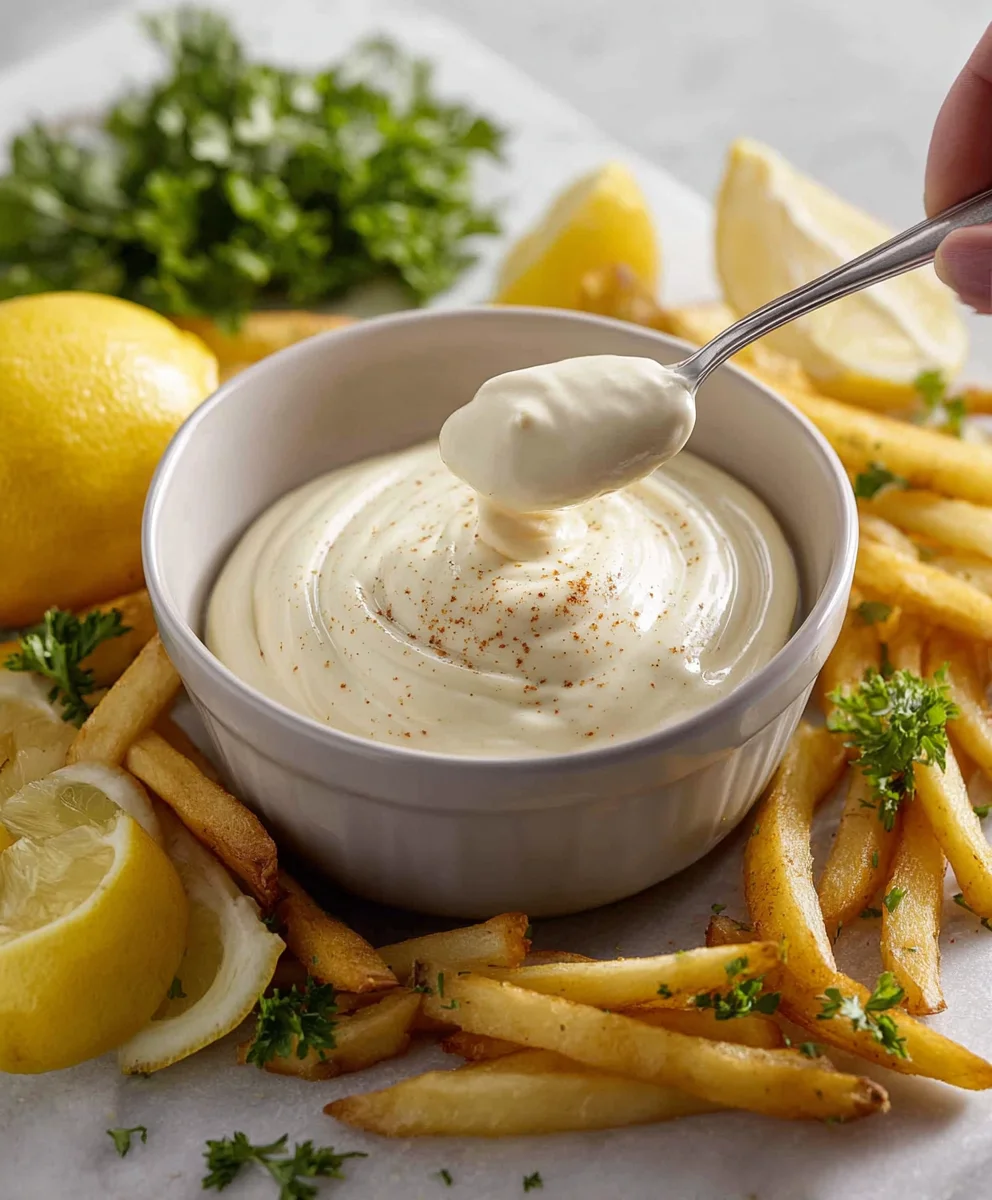
It’s absolutely divine served as a dip for french fries, sweet potato fries, or even onion rings. Smear a generous dollop onto your favorite sandwiches or burgers to elevate them from ordinary to extraordinary. It also works wonderfully as a sauce for grilled chicken, fish, or shrimp. For a sophisticated touch, try serving it alongside roasted vegetables or as a dressing for a hearty salad. The balance of creamy, zesty, garlicky, and slightly sweet notes makes it a universally loved condiment that will have your guests asking for the recipe. Enjoy the burst of flavor it brings to your meals!
Conclusion:
You’ve now mastered the art of making a delicious and versatile Aioli Recipe! This classic garlic mayonnaise is incredibly simple to prepare, yet it adds a sophisticated touch to so many dishes. The key is using fresh garlic and good quality olive oil to achieve that perfect emulsified creamy texture and pungent, delicious flavor. Don’t be intimidated by the simple process; the results are truly rewarding and will have you reaching for this aioli again and again.
This delightful Aioli Recipe is a perfect accompaniment to roasted vegetables, grilled meats, seafood, sandwiches, and even as a dip for fries. For serving suggestions, try it alongside your favorite burger, smear it on fish tacos, or use it as a dipping sauce for crispy artichoke hearts. If you’re feeling adventurous, consider adding a pinch of smoked paprika for a smoky twist, a squeeze of lemon juice for extra brightness, or even some finely chopped fresh herbs like parsley or chives for added freshness.
We encourage you to experiment and make this Aioli Recipe your own. The beauty of homemade aioli lies in its adaptability. So go ahead, whip up a batch, and elevate your next meal!
Frequently Asked Questions about Aioli Recipe:
Q1: My aioli split or looks oily. What did I do wrong?
A1: The most common reason for aioli splitting is adding the oil too quickly or at the wrong temperature. Ensure your oil is at room temperature and add it very slowly, in a thin, steady stream, while whisking constantly. If it splits, you can try to save it by starting with a fresh egg yolk in a clean bowl and slowly whisking the broken mixture into it, as if you were starting the aioli all over again.
Q2: Can I make this aioli recipe ahead of time?
A2: Yes, absolutely! Once made, the Aioli Recipe can be stored in an airtight container in the refrigerator for up to 3-5 days. The garlic flavor will actually deepen and meld beautifully over time, making it even more delicious for subsequent uses. Just give it a good stir before serving.
Easy Homemade Aioli Recipe – Garlic Mayo Sauce
A simple and zesty homemade aioli sauce made with mayonnaise, fresh garlic, lemon juice, and a hint of ketchup for a unique twist. Perfect as a dip, spread, or sauce.
Ingredients
-
1 cup mayonnaise
-
3 tablespoons fresh lemon juice
-
½ teaspoon black pepper
-
3 tablespoons fresh garlic, minced
-
1 teaspoon fresh parsley, chopped
-
3 tablespoons ketchup
Instructions
-
Step 1
In a medium-sized mixing bowl, add the mayonnaise. Ensure it’s at room temperature for smoother incorporation. -
Step 2
Add the fresh lemon juice and whisk gently into the mayonnaise until well combined. The mixture will become slightly looser. -
Step 3
Stir in the minced garlic, ensuring it’s evenly distributed. For a stronger flavor, let the garlic sit in the lemon juice for 5 minutes before adding. -
Step 4
Add the black pepper and chopped fresh parsley. Stir until distributed throughout the mixture. -
Step 5
Incorporate the ketchup and whisk everything together until fully blended, creating a uniform pinkish-orange hue and a smooth consistency. -
Step 6
Cover the bowl tightly and refrigerate for at least 30 minutes, or ideally 1-2 hours or overnight, to allow flavors to meld and mellow. -
Step 7
Give the aioli a quick stir before serving. Enjoy as a dip for fries, spread on sandwiches, or sauce for grilled meats and vegetables.
Important Information
Nutrition Facts (Per Serving)
It is important to consider this information as approximate and not to use it as definitive health advice.
Allergy Information
Please check ingredients for potential allergens and consult a health professional if in doubt.