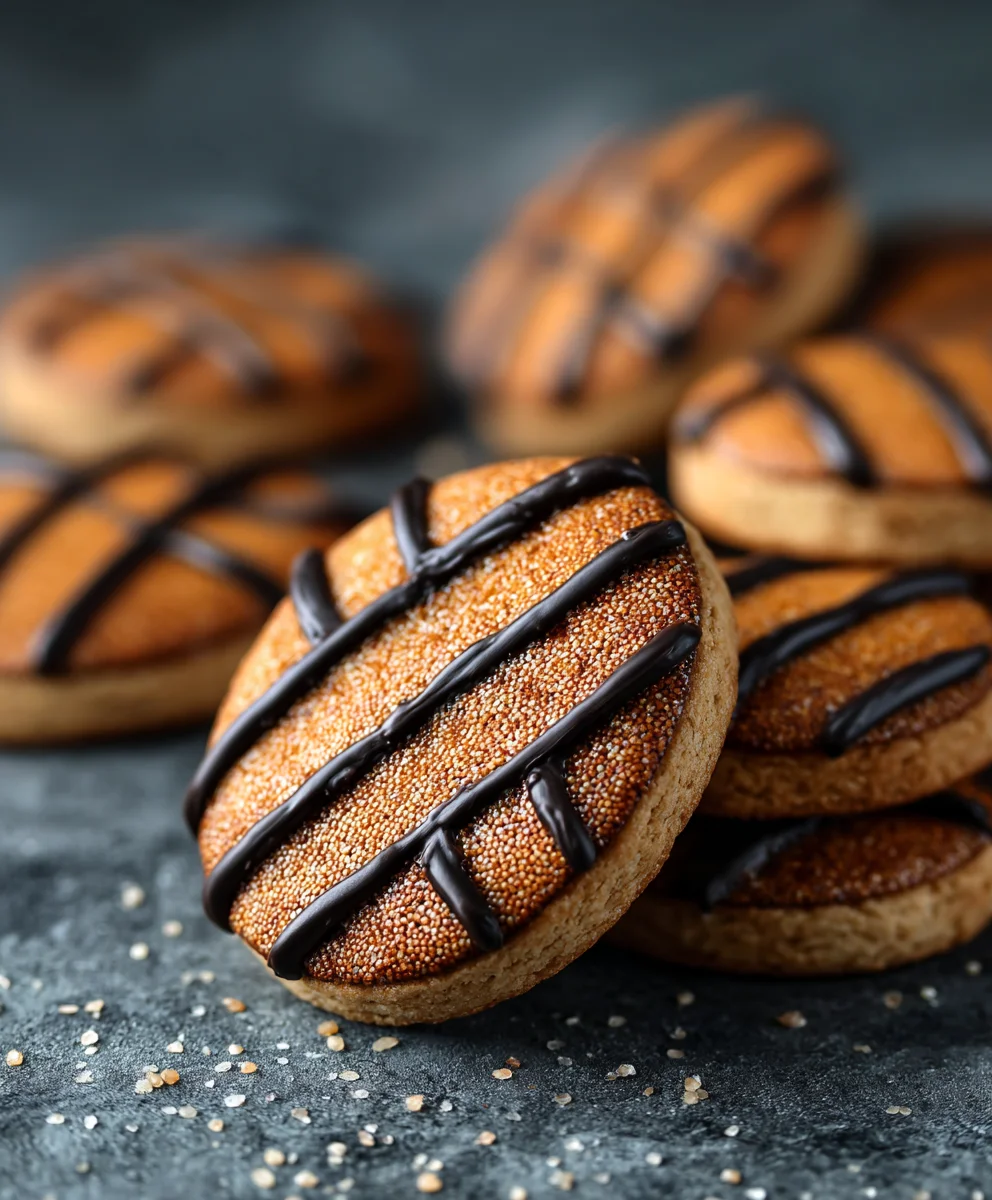
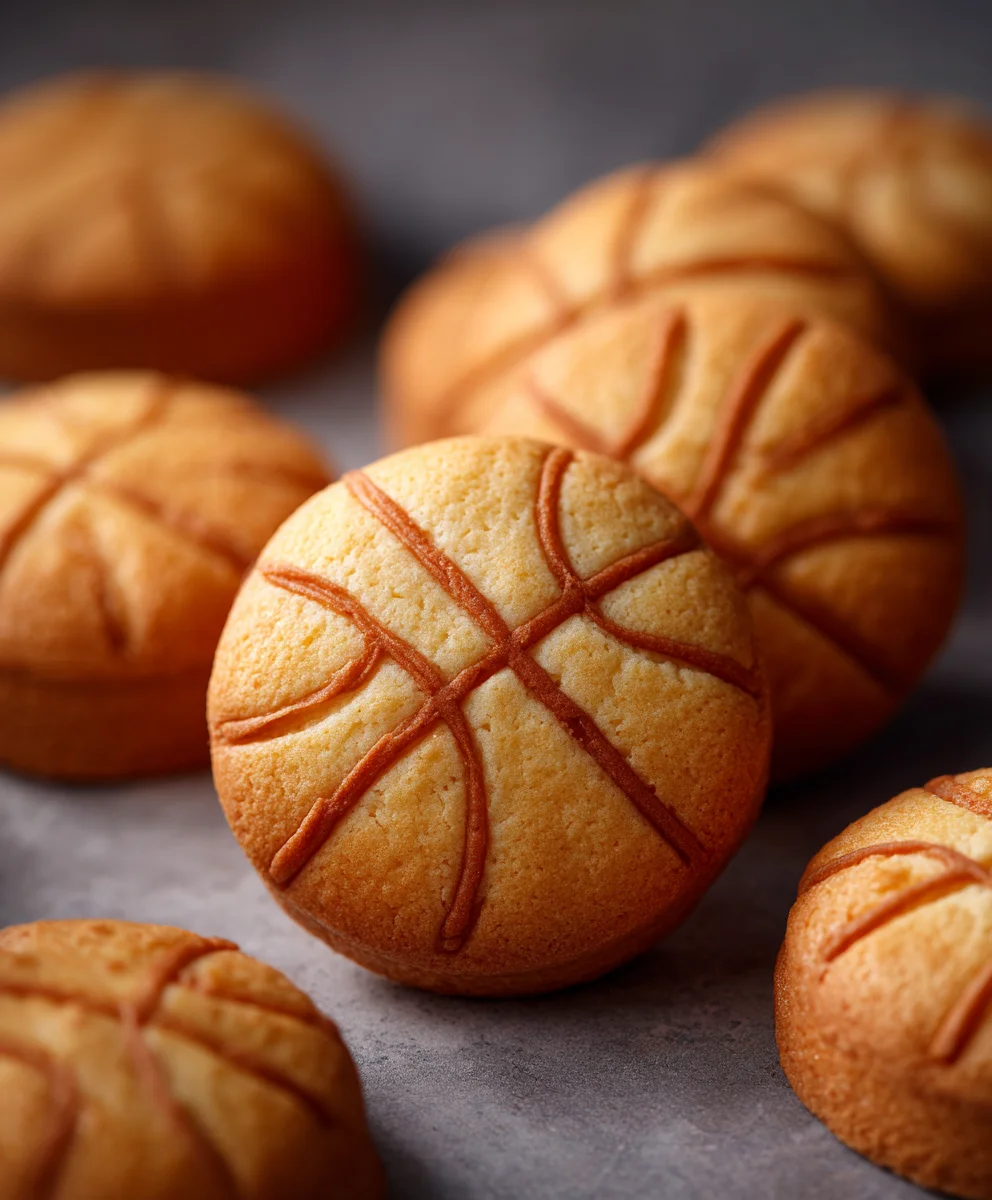
Piping Basketball Cookies – Fun Dessert Recipe
Piping basketball cookies are more than just a sweet treat; they’re a slam dunk for any sports enthusiast or party planner. Imagin extracte biting into a perfectly baked sugar cookie, its crisp texture giving way to a tender crum extractb, all adorned with the iconic orange hue and black lines of a basketball. It’s no wonder these cookies are a perennial favorite for birthday parties, sports events, or just a fun afternoon activity with the kids. The joy of creating these edible masterpieces is almost as satisfying as eating them. What truly makes these piping basketball cookies so special is their versatility. They’re a blank canvas for your creativity, allowing you to achieve that perfect, realistic basketball look with just a few simple piping techniques. Get ready to score big with this delightful recipe that promises fun, flavor, and a whole lot of admiration!
Ingredients:
- 2 cups all-purpose flour
- 1 teaspoon baking powder
- 1/2 teaspoon salt
- 1 cup (2 sticks) unsalted butter, softened
- 1 1/2 cups granulated sugar
- 2 large eggs
- 1 teaspoon vanilla extract
- Orange food coloring
- Black food coloring
- Powdered sugar for dusting (optional)
- Royal icing (store-bought or homemade, divided into batches for orange and black)
Preparing the Cookie Dough
The foundation of our piping basketball cookies is a delicious and sturdy sugar cookie dough. It needs to hold its shape during baking and be firm enough to support the detailed piping work. First, in a medium bowl, whisk together the 2 cups of all-purpose flour, 1 teaspoon of baking powder, and 1/2 teaspoon of salt. This dry mixture will form the structure of our cookies. Ensure these ingredients are well combined to distribute the leavening agent evenly.
In a large bowl, cream together 1 cup of softened unsalted butter and 1 1/2 cups of granulated sugar until light and fluffy. This step is crucial for a tender cookie. It might take a few minutes with an electric mixer, or a bit longer if doing it by hand. The mixture should be pnon-alcoholic ale yellow and airy. Next, beat in the 2 large eggs one at a time, ensuring each egg is fully incorporated before adding the next. Stir in 1 teaspoon of vanilla extract for that classic sweet flavor.
Gradually add the dry ingredients to the wet ingredients, mixing on low speed until just combined. Be careful not to overmix at this stage, as it can lead to tough cookies. The dough will be soft. Now, divide the dough into two equal portions. To one portion, add a few drops of orange food coloring and mix until you achieve a vibrant basketball orange color. To the other portion, add a few drops of black food coloring and mix until you reach a deep black. Wrap each colored dough portion tightly in plastic wrap and refrigerate for at least 1 hour, or until firm enough to handle. This chilling process is essential for easy rolling and cutting, and it prevents the cookies from spreading too much during baking.
Shaping and Baking the Cookies
Once the dough is well-chilled, preheat your oven to 350°F (175°C). Line baking sheets with parchment paper. On a lightly floured surface, roll out the orange dough to about 1/4-inch thickness. Use a round cookie cutter, approximately 3 inches in diameter, to cut out circles. These will be the base of our basketballs. Place the cut-out circles onto the prepared baking sheets, leaving about 1 inch of space between them.
Now, let’s add the basketball details. Take small pieces of the black dough and flatten them slightly. Using a smaller round cookie cutter or a knife, cut out thin strips to create the basketball lines and a small circle for the center. Carefully arrange these black dough pieces onto the orange circles to resemble a basketball. You can use a toothpick to gently press them into place or help shape the lines. Don’t worry about perfection; a slightly rustic look adds charm.
Repeat this process with any remaining orange and black dough, or if you prefer, you can bake plain orange circles and pipe all the details with icing later. However, using the black dough for the lines gives a wonderful texture and depth. Bake for 9-12 minutes, or until the edges are lightly golden. The exact baking time will depend on the size and thickness of your cookies. Allow the cookies to cool on the baking sheets for a few minutes before transferring them to a wire rack to cool completely. This is crucial; warm cookies are fragile and will break easily.
Decorating with Royal Icing
This is where our piping basketball cookies truly come to life! Ensure your cookies are completely cool before you begin extract decorating. Prepare your royal icing according to package directions or your recipe. Divide the icing into two batches: one for the orange base (if you chose to bake plain orange circles) and one for the black lines. If you used black dough for the lines, you’ll only need orange icing for the base if you didn’t color your dough, or you might just want a touch-up of orange. For those using pre-made black dough lines, you’ll want to have black royal icing ready to outline and fill in any gaps or add extra detail.
For the most realistic effect, if you baked plain orange cookies, start by flooding the surface with orange royal icing. Use a piping bag with a small round tip (or a squeeze bottle) to outline the edge of the cookie. Then, fill in the center with more orange icing. Gently tap the cookie on the counter to help the icing settle and create a smooth surface. Let this layer of icing dry completely. This could take several hours, depending on humidity. Patience is key here to prevgin extract smudging.
Once the orange base is dry, it’s time for the black details. Using black royal icing in a piping bag fitted with a fine-tip nozzle, carefully pipe the characteristic curved lines of a basketball. Start with the main curved lines that divide the surface, then add the smaller arcs. You can also pipe a small black circle in the center for added dimension. If you used black dough for the lines, you might just want to use the black icing to reinforce the edges of the dough lines or add subtle shading. For a smoother finish on the black dough lines, you can pipe a thin layer of black icing directly over them. Alternatively, if you want to create a completely piped basketball, use orange icing for the base and then pipe all the black lines directly onto the dried orange icing.
Adding Final Touches and Variations
Once all the piping is complete and the black icing has had a chance to set, you can add any final touches. If you want a slight sheen or to protect the icing, you can lightly dust the cookies with powdered sugar once they are fully dry, though this is optional and might detract from the basketball look. For a bit of texture, consider using a scribe tool to etch faint lines into the wet icing before it dries to mimic the texture of a real basketball.
If you’re feeling adventurous and want to make them even more special, consider making some cookies that look like basketballs mid-air. You can achieve this by slightly bending the cookie dough circles before baking to give them a dynamic curve. For a fun twist, you can also make mini basketballs using smaller cookie cutters and piping them with the same technique. These would be perfect for cupcakes or as edible decorations for other desserts. Remember to always allow sufficient drying time between each layer of icing to prevent colors from bleeding and ensure a crisp, clean finish. The key to great piping is practice and a steady hand, so don’t be discouraged if your first few aren’t perfect. Enjoy the process and the delicious results!
Conclusion:
And there you have it – your guide to creating the most impressive Piping basketball cookies! We’ve covered the essential steps, from achieving that perfect cookie base to mastering the intricate piping techniques that bring these sporty treats to life. These cookies are more than just delicious; they’re a statement piece for any basketball fan, a perfect addition to game day parties, or a delightful surprise for young athletes. Don’t be afraid to experiment! These Piping basketball cookies are incredibly versatile.
Serve them proudly at your next gathering, alongside a glass of cold milk or your favorite game-day beverage. They also make fantastic party favors or gifts. For variations, consider using different shades of orange for the basketballs, or perhaps adding a touch of black piping to create a realistic lace effect. You could even try piping little team logos onto them for a personalized touch! The joy of baking is in the creativity, so have fun with it and let your inner artist shine through.
Frequently Asked Questions about Piping Basketball Cookies:
Q1: My royal icing is too thick or too thin for piping. How can I fix it?
If your royal icing is too thick, gradually add small amounts of water (a teaspoon at a time) while stirring until it reaches a floodable but still manageable consistency. If it’s too thin, add a little more powdered sugar until it thickens up. For piping lines, you want a slightly thicker consistency that holds its shape.
Q2: Can I make these cookies ahead of time?
Absolutely! Once decorated and completely dry, Piping basketball cookies can be stored in an airtight container at room temperature for up to a week. Ensure they are fully cooled and dry before stacking them to prevent sticking or smudgin extractg.
Piping Basketball Cookies
A fun and delicious sugar cookie recipe shaped and decorated to look like basketballs, perfect for sports enthusiasts or any sweet treat occasion.
Ingredients
-
2 cups all-purpose flour
-
1 teaspoon baking powder
-
1/2 teaspoon salt
-
1 cup (2 sticks) unsalted butter, softened
-
1 1/2 cups granulated sugar
-
2 large eggs
-
1 teaspoon vanilla extract
-
Orange food coloring
-
Black food coloring
-
Powdered sugar for dusting (optional)
-
Royal icing (store-bought or homemade, divided into batches for orange and black)
Instructions
-
Step 1
Prepare the cookie dough: Whisk together flour, baking powder, and salt. In a separate bowl, cream butter and sugar until fluffy. Beat in eggs one at a time, then vanilla extract. Gradually add dry ingredients to wet ingredients until just combined. Divide dough into two portions; color one orange and the other black. Wrap each and refrigerate for at least 1 hour. -
Step 2
Shape and bake: Preheat oven to 350°F (175°C). Line baking sheets with parchment paper. Roll out orange dough to 1/4-inch thickness and cut out circles with a 3-inch cutter. Flatten small pieces of black dough and cut thin strips for lines and a small circle for the center. Arrange black dough pieces on orange circles to resemble a basketball. Bake for 9-12 minutes until edges are lightly golden. -
Step 3
Cool the cookies: Allow cookies to cool on baking sheets for a few minutes, then transfer to a wire rack to cool completely before decorating. This step is essential to prevent breakage. -
Step 4
Decorate with royal icing: Prepare royal icing and divide into orange and black batches. If you baked plain orange cookies, flood them with orange royal icing, outline the edge, fill the center, and let dry completely. If you used black dough for lines, you may only need orange icing for touch-ups or base flooding. -
Step 5
Add black details: Once the orange base is dry, use black royal icing in a piping bag with a fine tip to pipe the characteristic curved lines of a basketball. Reinforce black dough lines or pipe all black lines directly onto dried orange icing. If using black dough, you can pipe black icing over it for a smoother finish or to add subtle shading. -
Step 6
Final touches and variations: Optionally, dust with powdered sugar once dry. Use a scribe tool to etch faint lines for texture. Consider making bent cookies for a mid-air effect or mini basketballs. Allow sufficient drying time between icing layers.
Important Information
Nutrition Facts (Per Serving)
It is important to consider this information as approximate and not to use it as definitive health advice.
Allergy Information
Please check ingredients for potential allergens and consult a health professional if in doubt.